Cómo coser una prenda interior que cubra la cintura
Saltar a instruccionesDescripción general
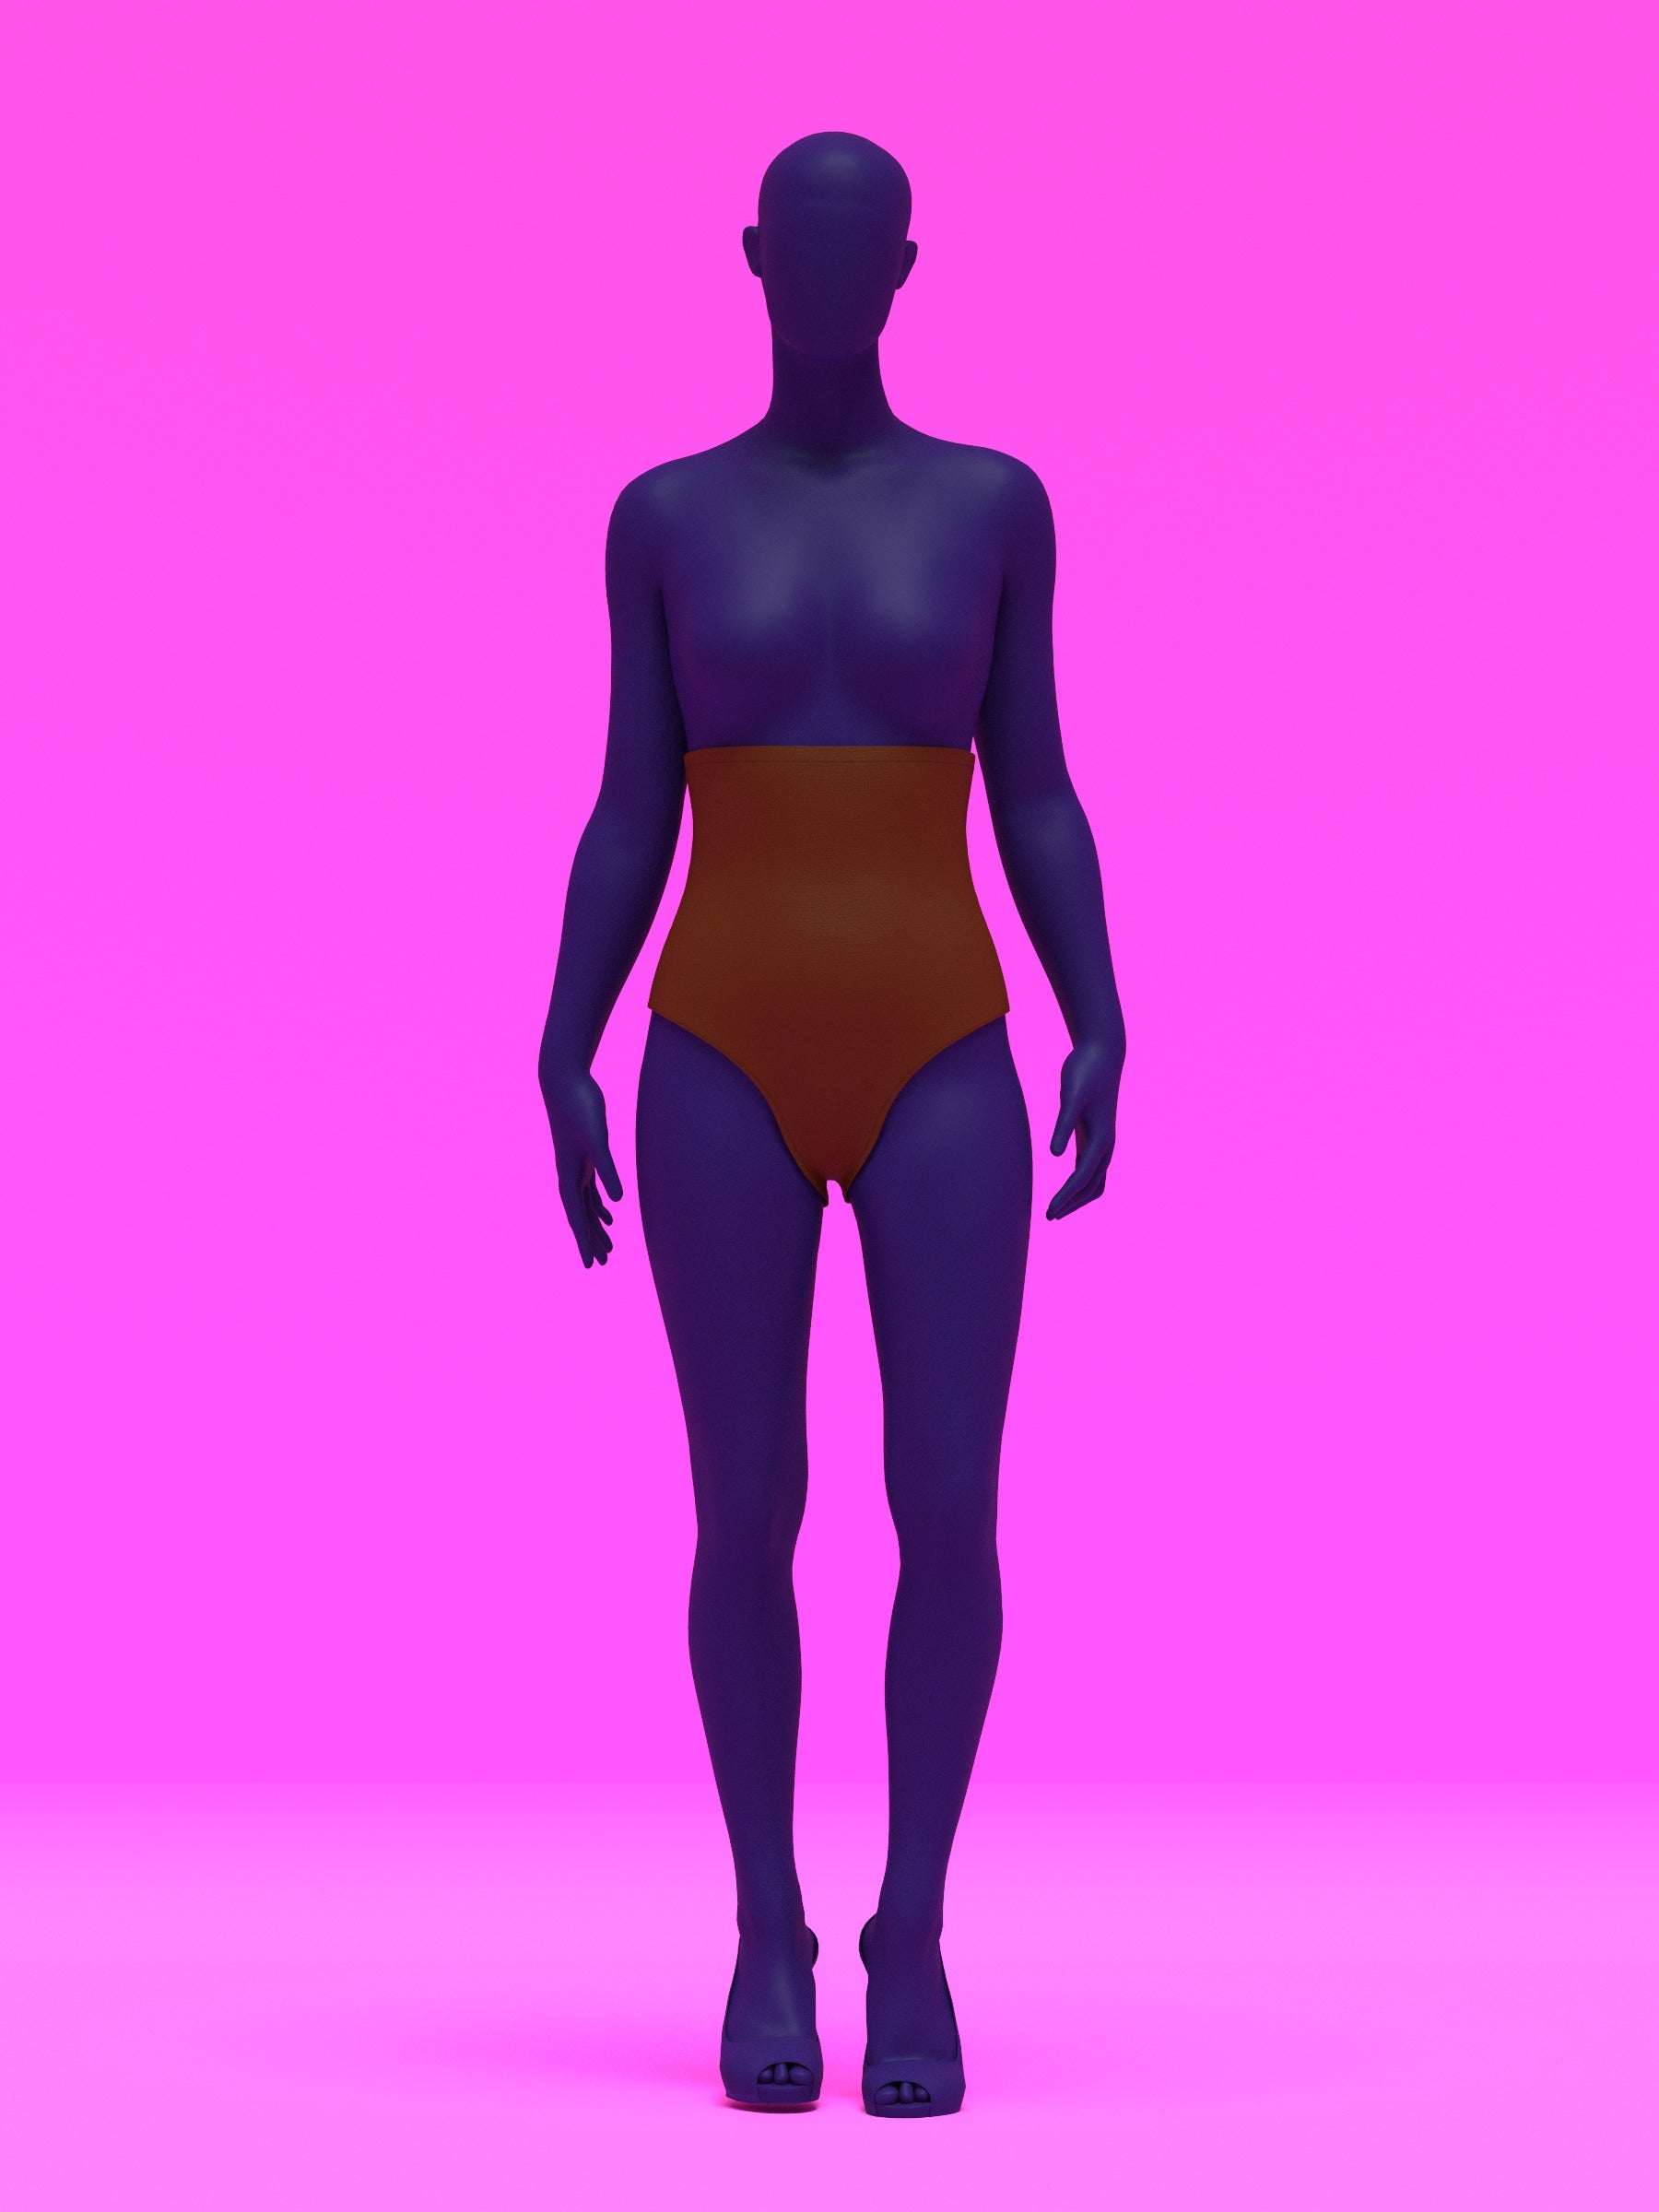
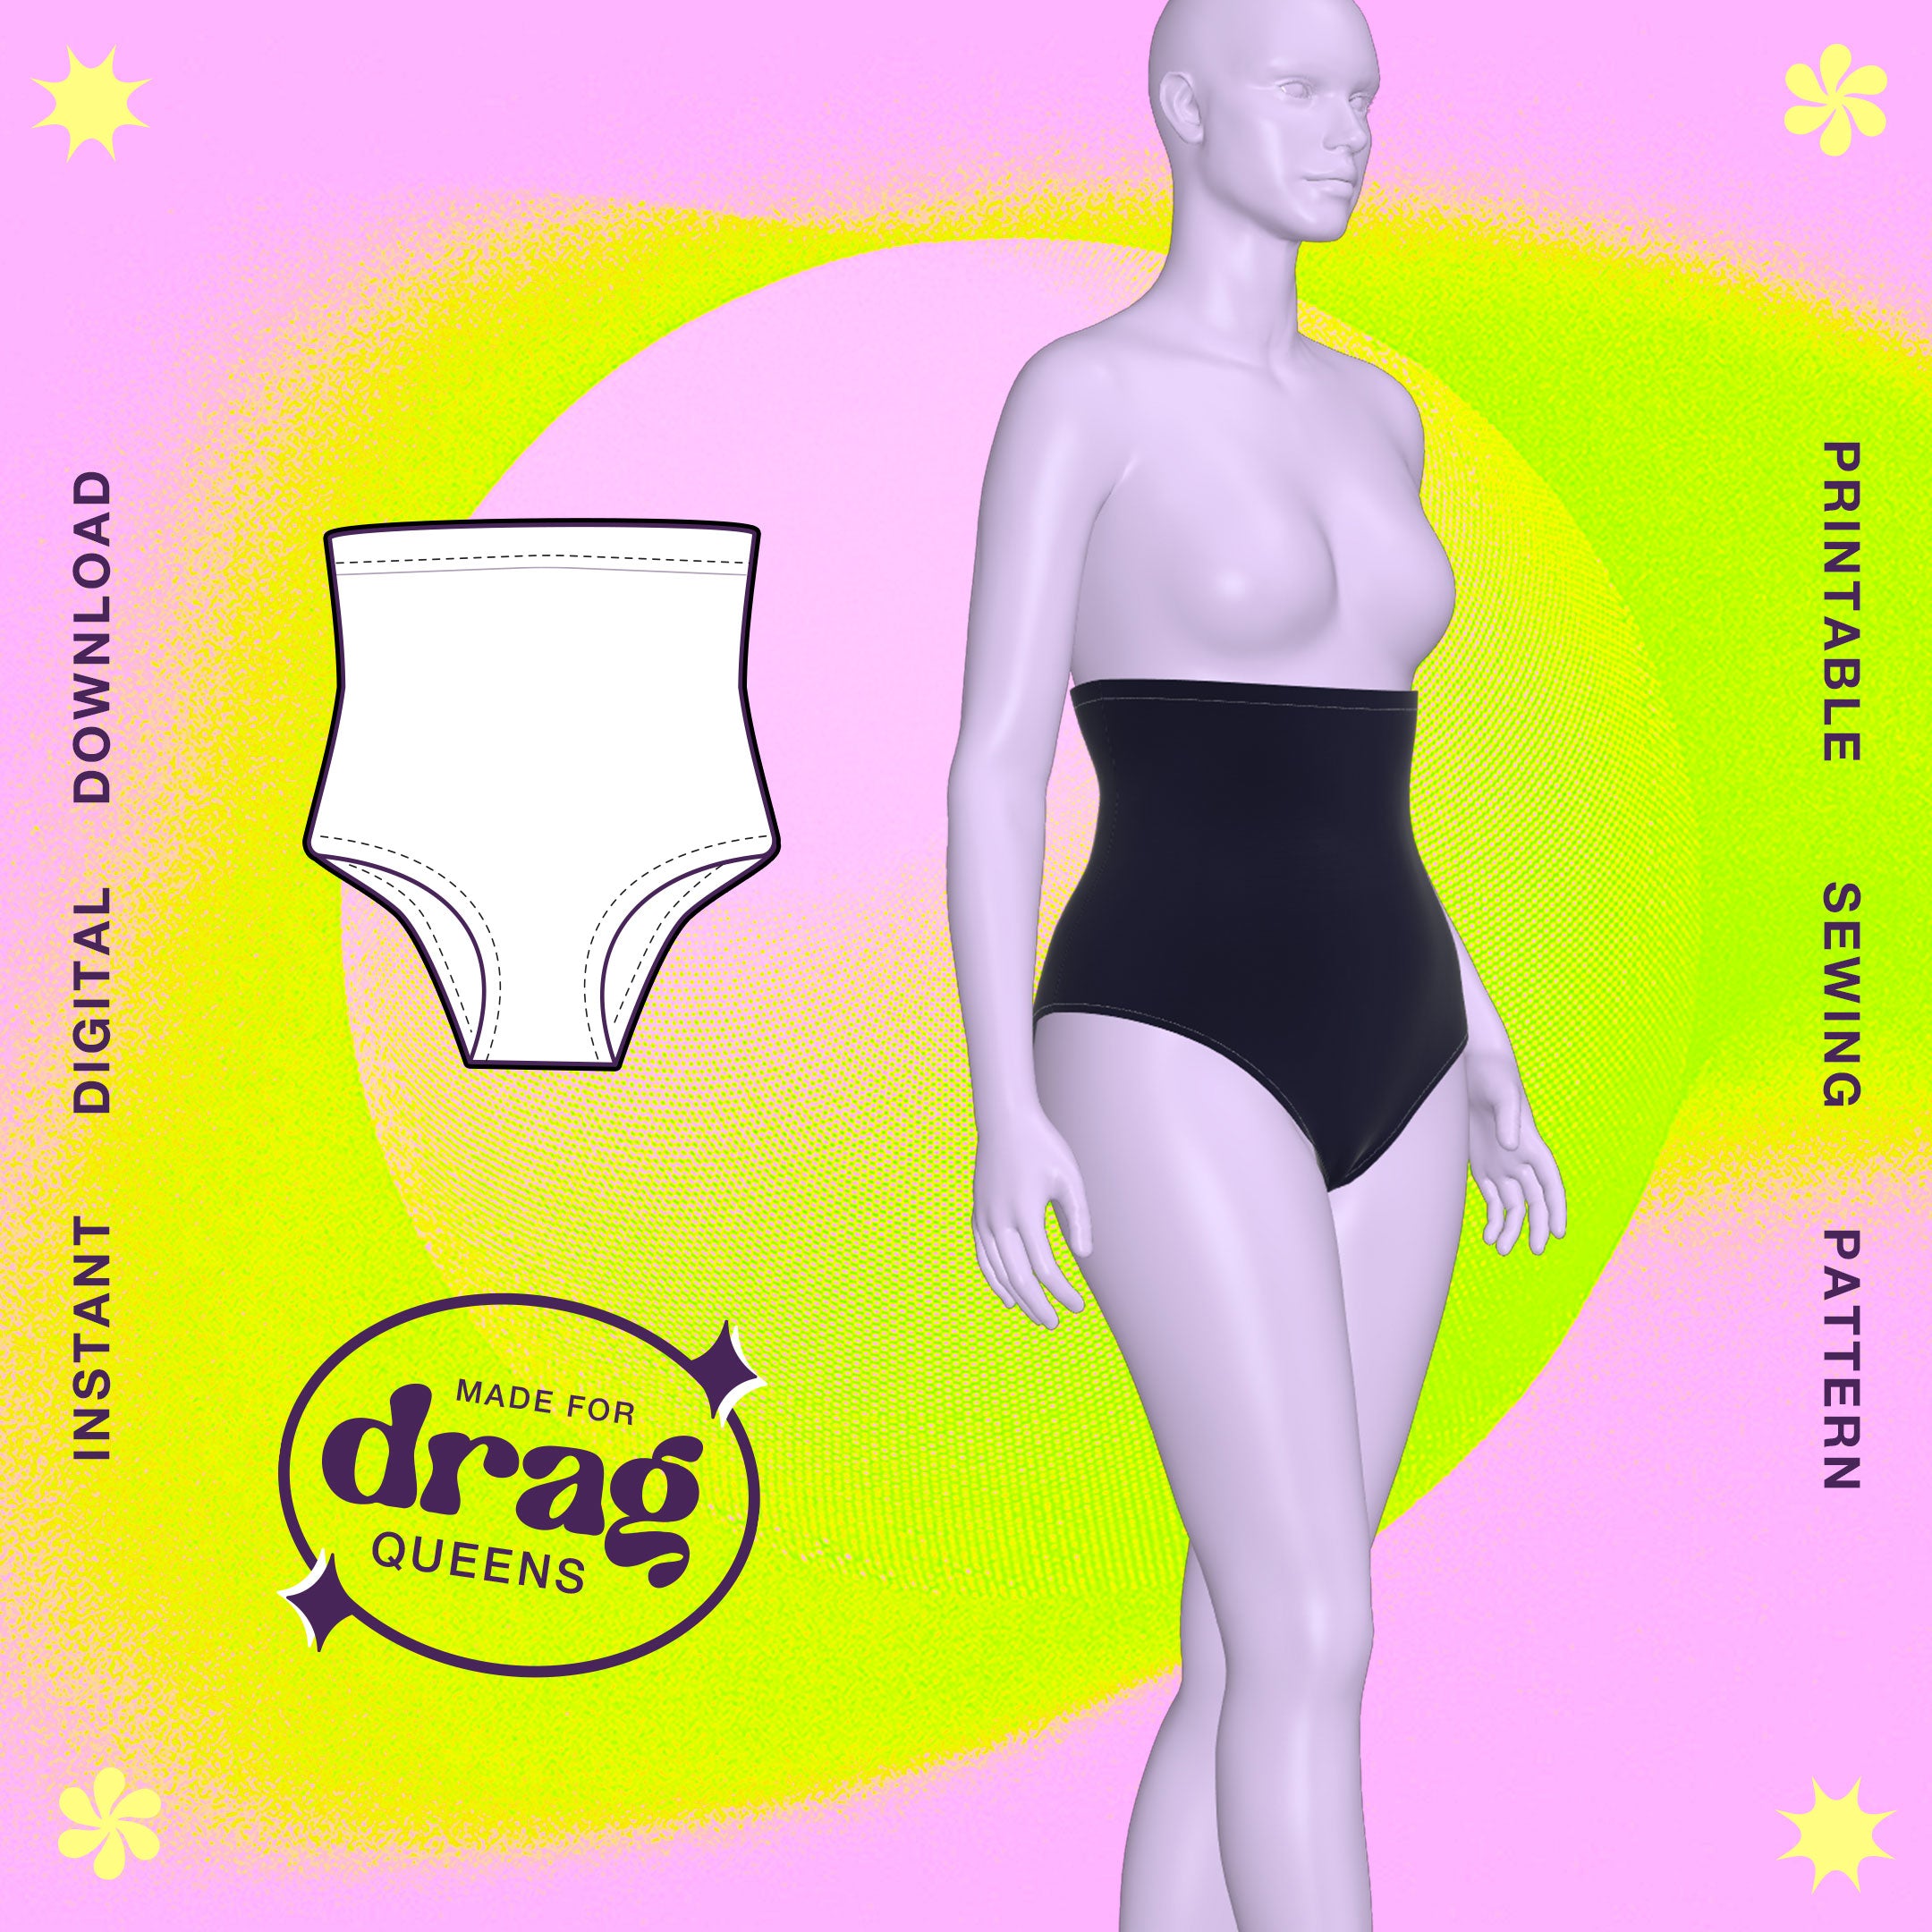
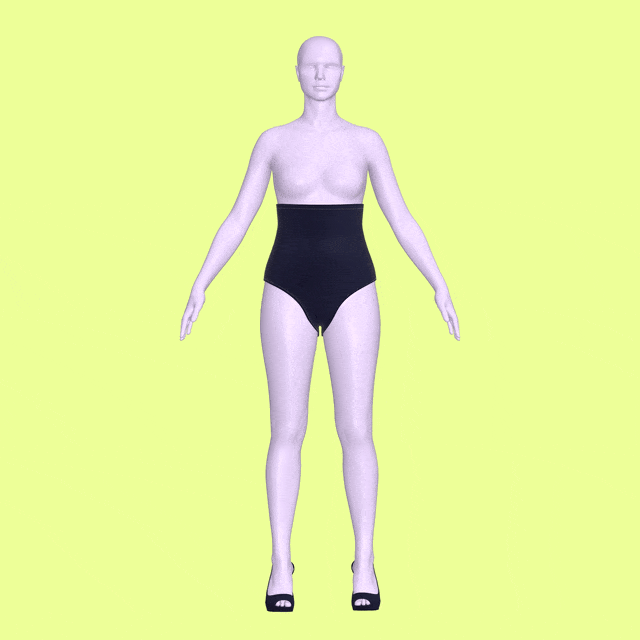
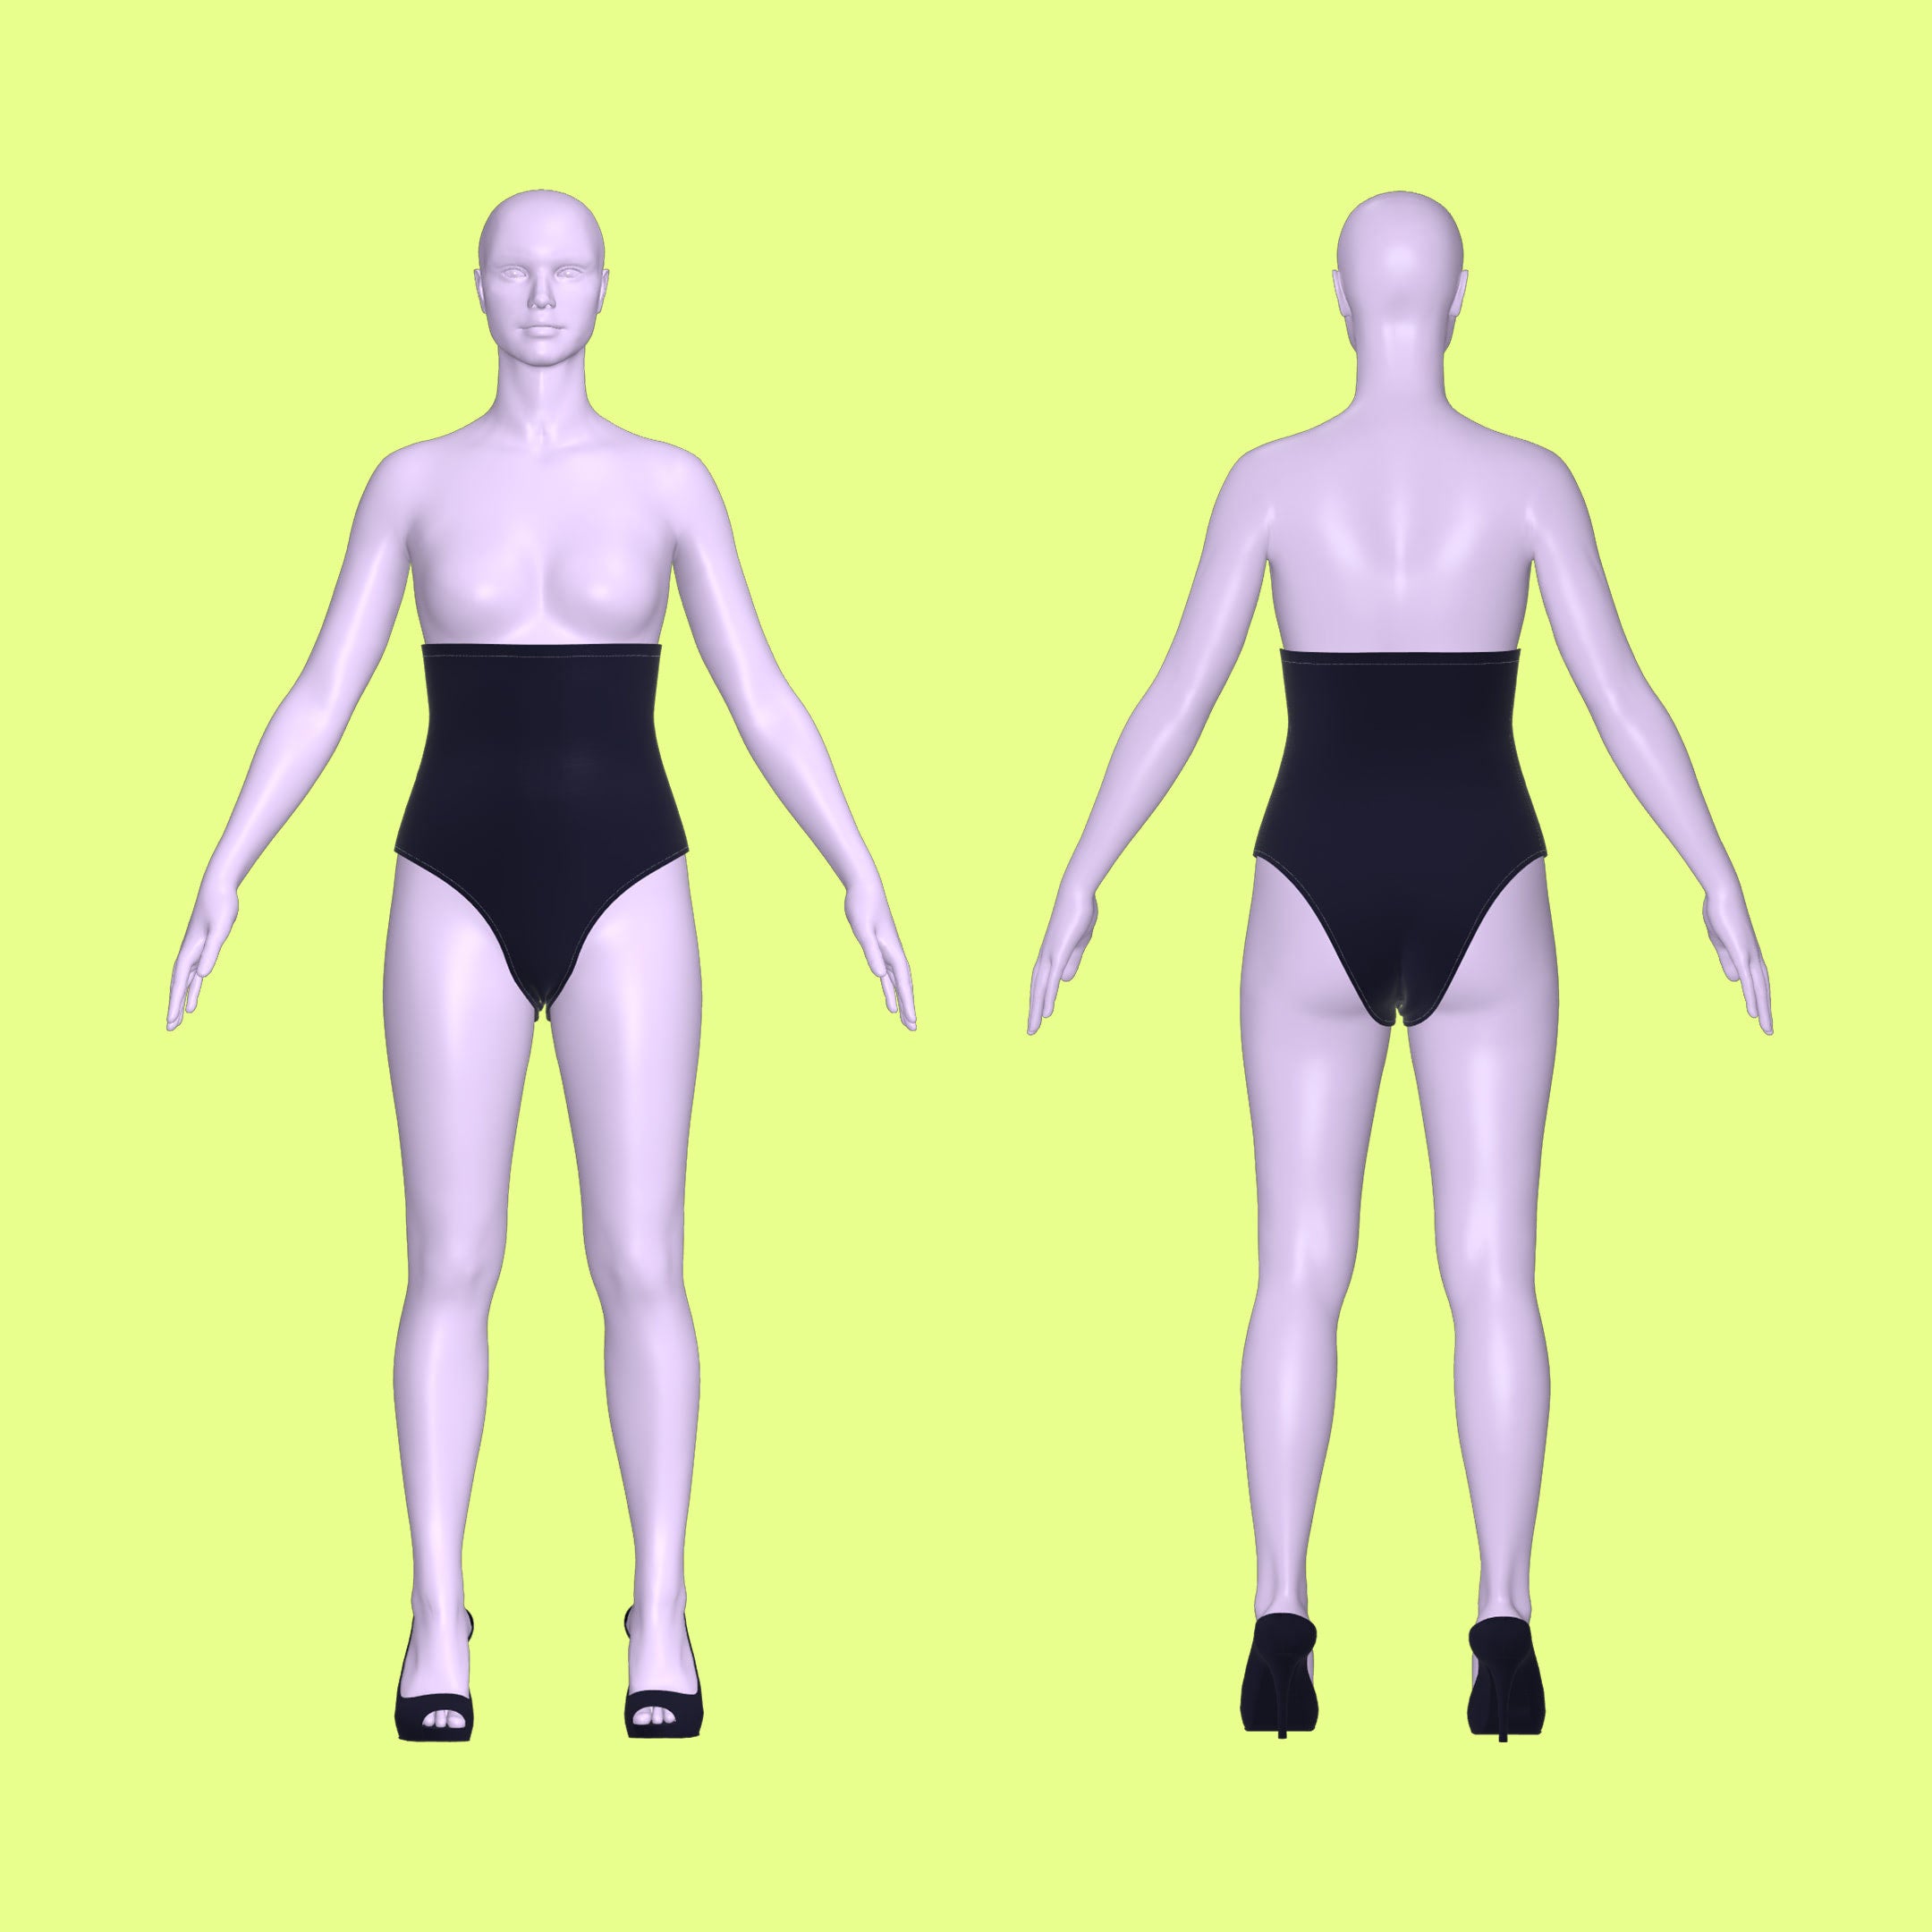
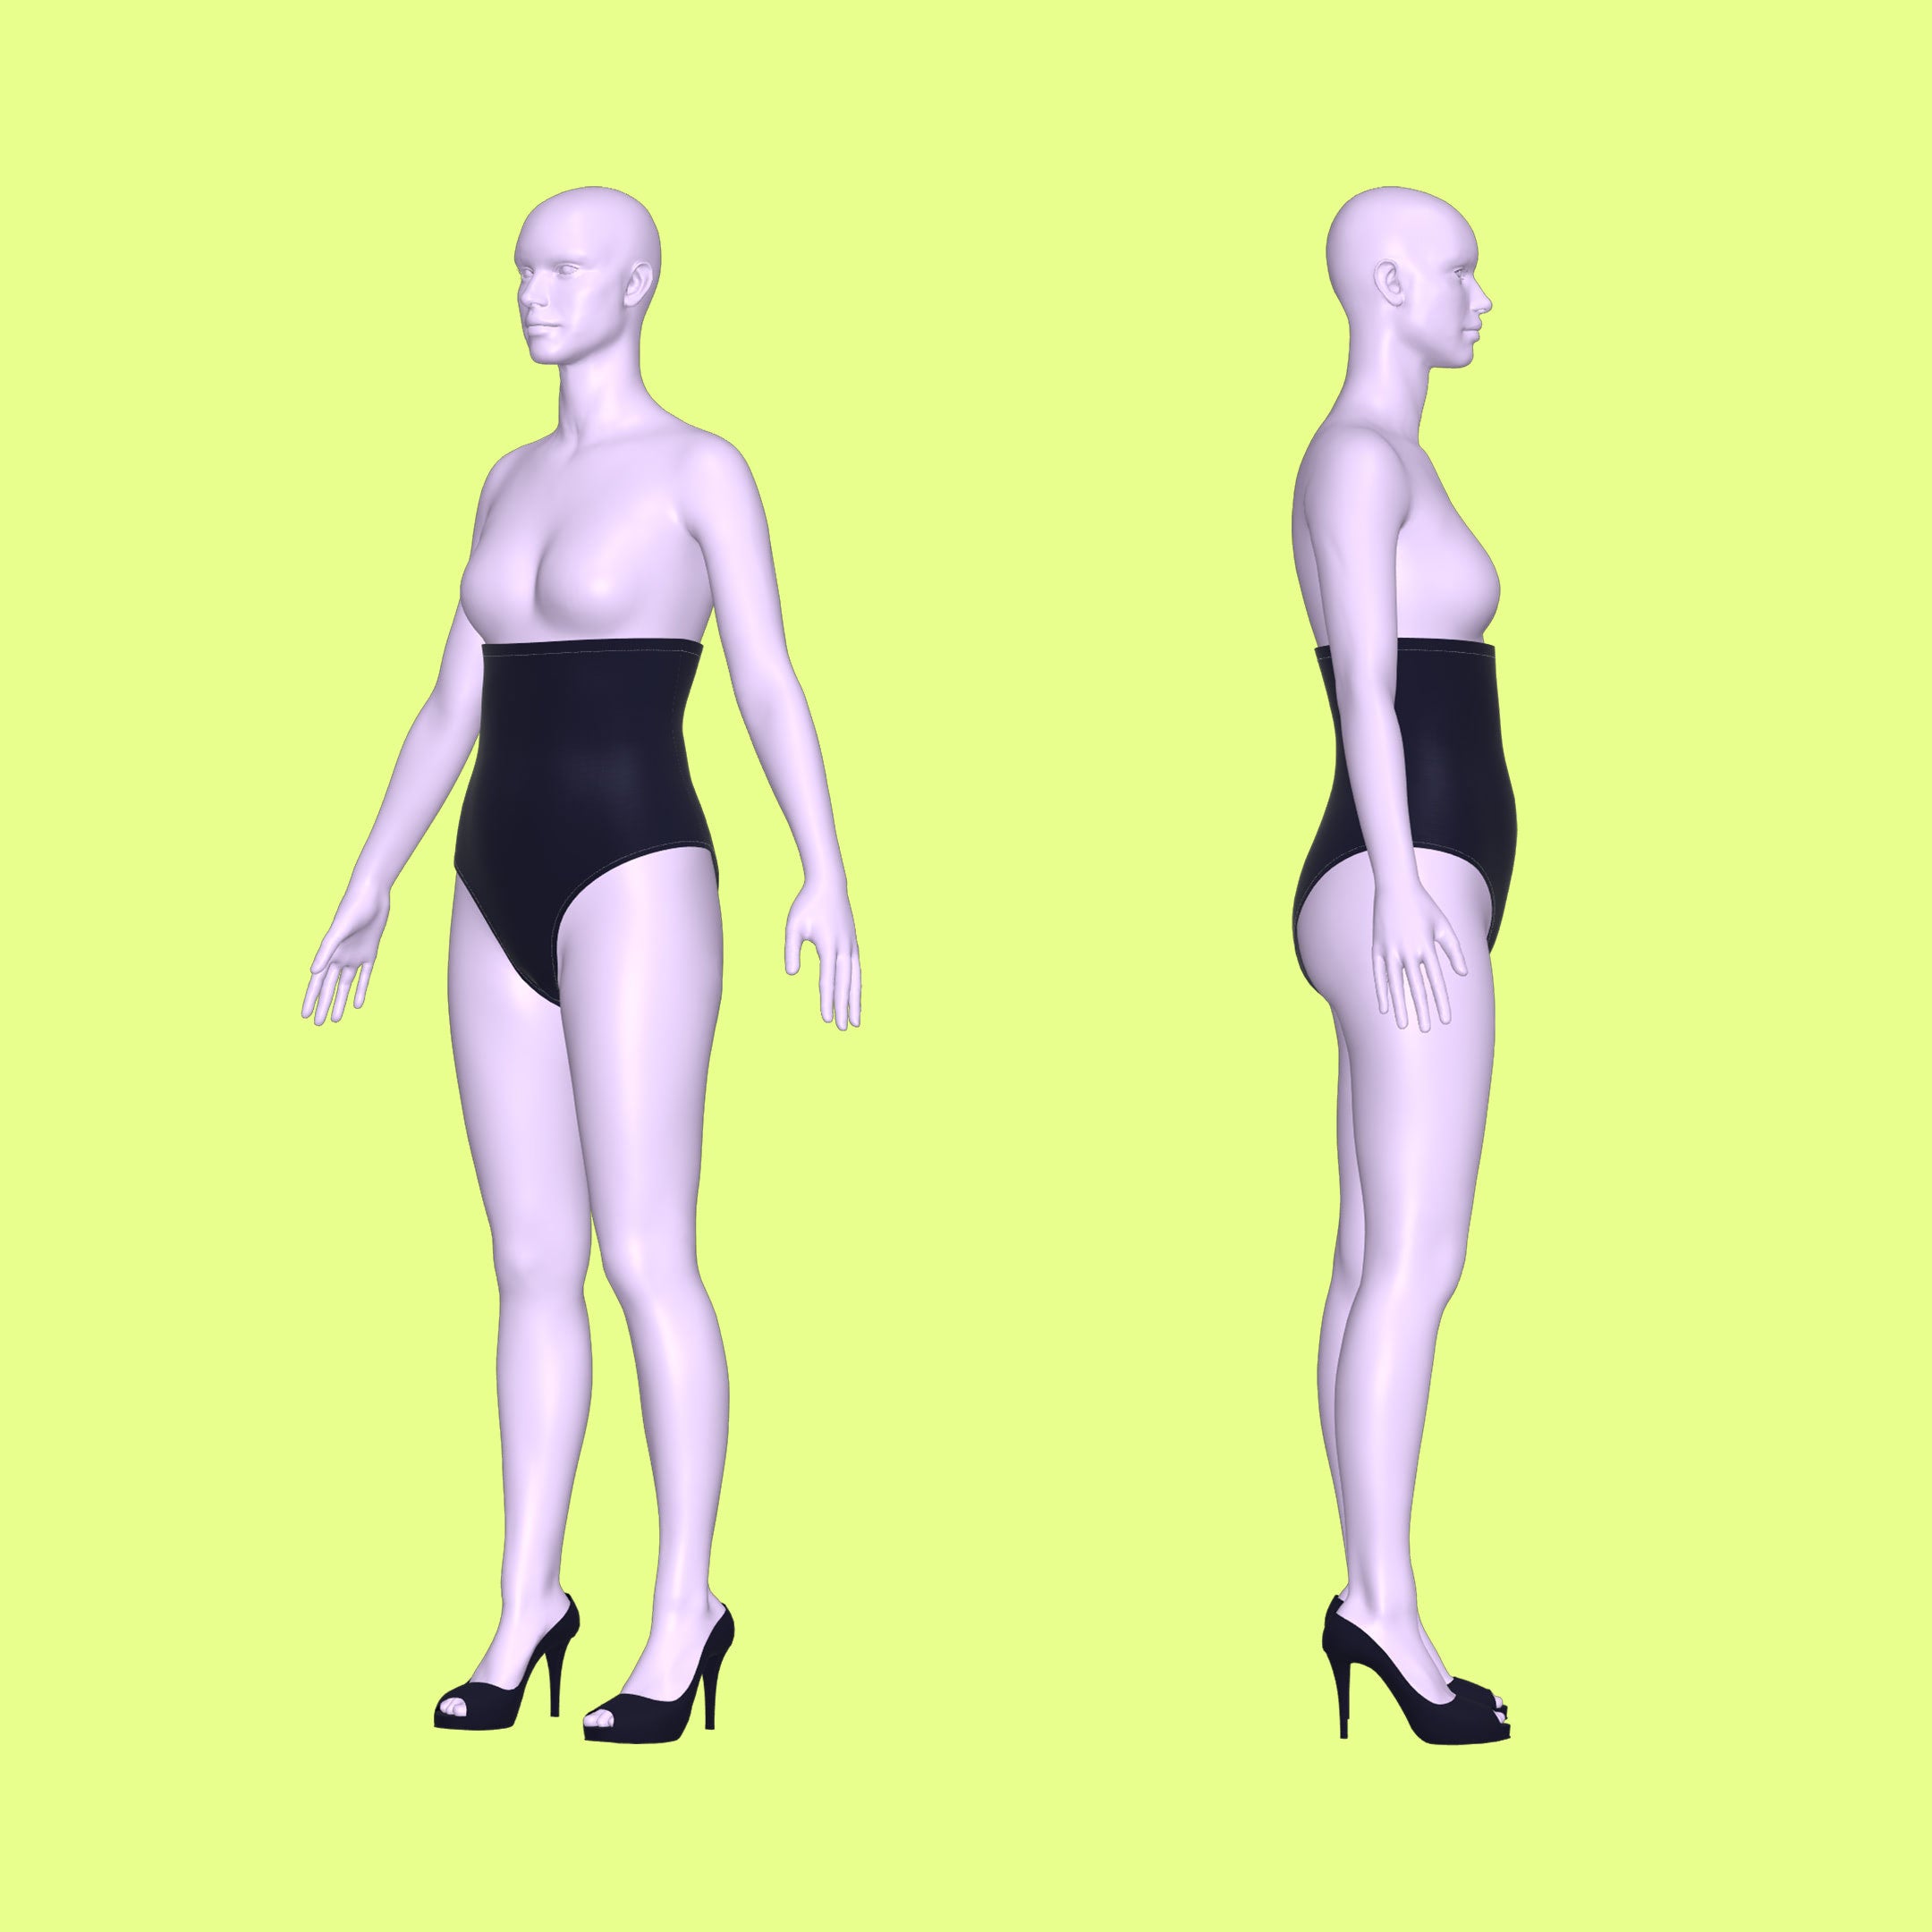
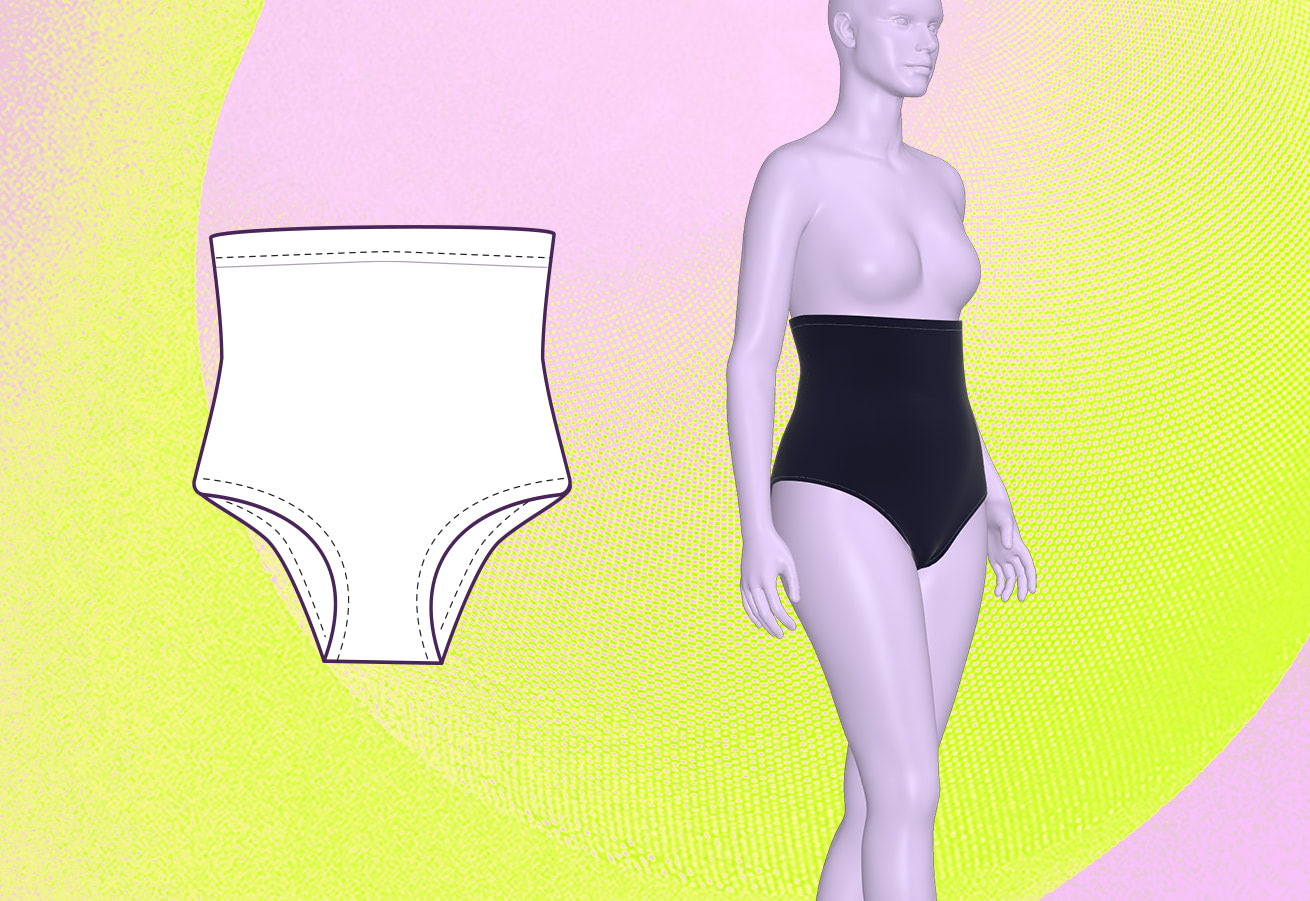
Presentamos un patrón de ropa interior versátil diseñado específicamente para drag queens: la "ropa interior que cubre la cintura". Diseñada para cubrir la cintura de manera impecable, es la solución perfecta para ocultar la piel, los corsés o varias capas de medias. Diseñada para ajustarse cómodamente justo debajo del busto, es como una braguita de bikini reversible con cobertura extendida. Esta prenda interior ofrece un doble propósito; no solo es ideal para atuendos con cortes en la cintura, sino que también se puede usar sola con confianza, combinada con un sujetador elegante y tus tacones favoritos. Diseñado para la comodidad y el glamour del drag, este patrón es imprescindible en el arsenal de costura de todas las drag queens.
Dificultad del patrón: Intermedio
Yardas de tela
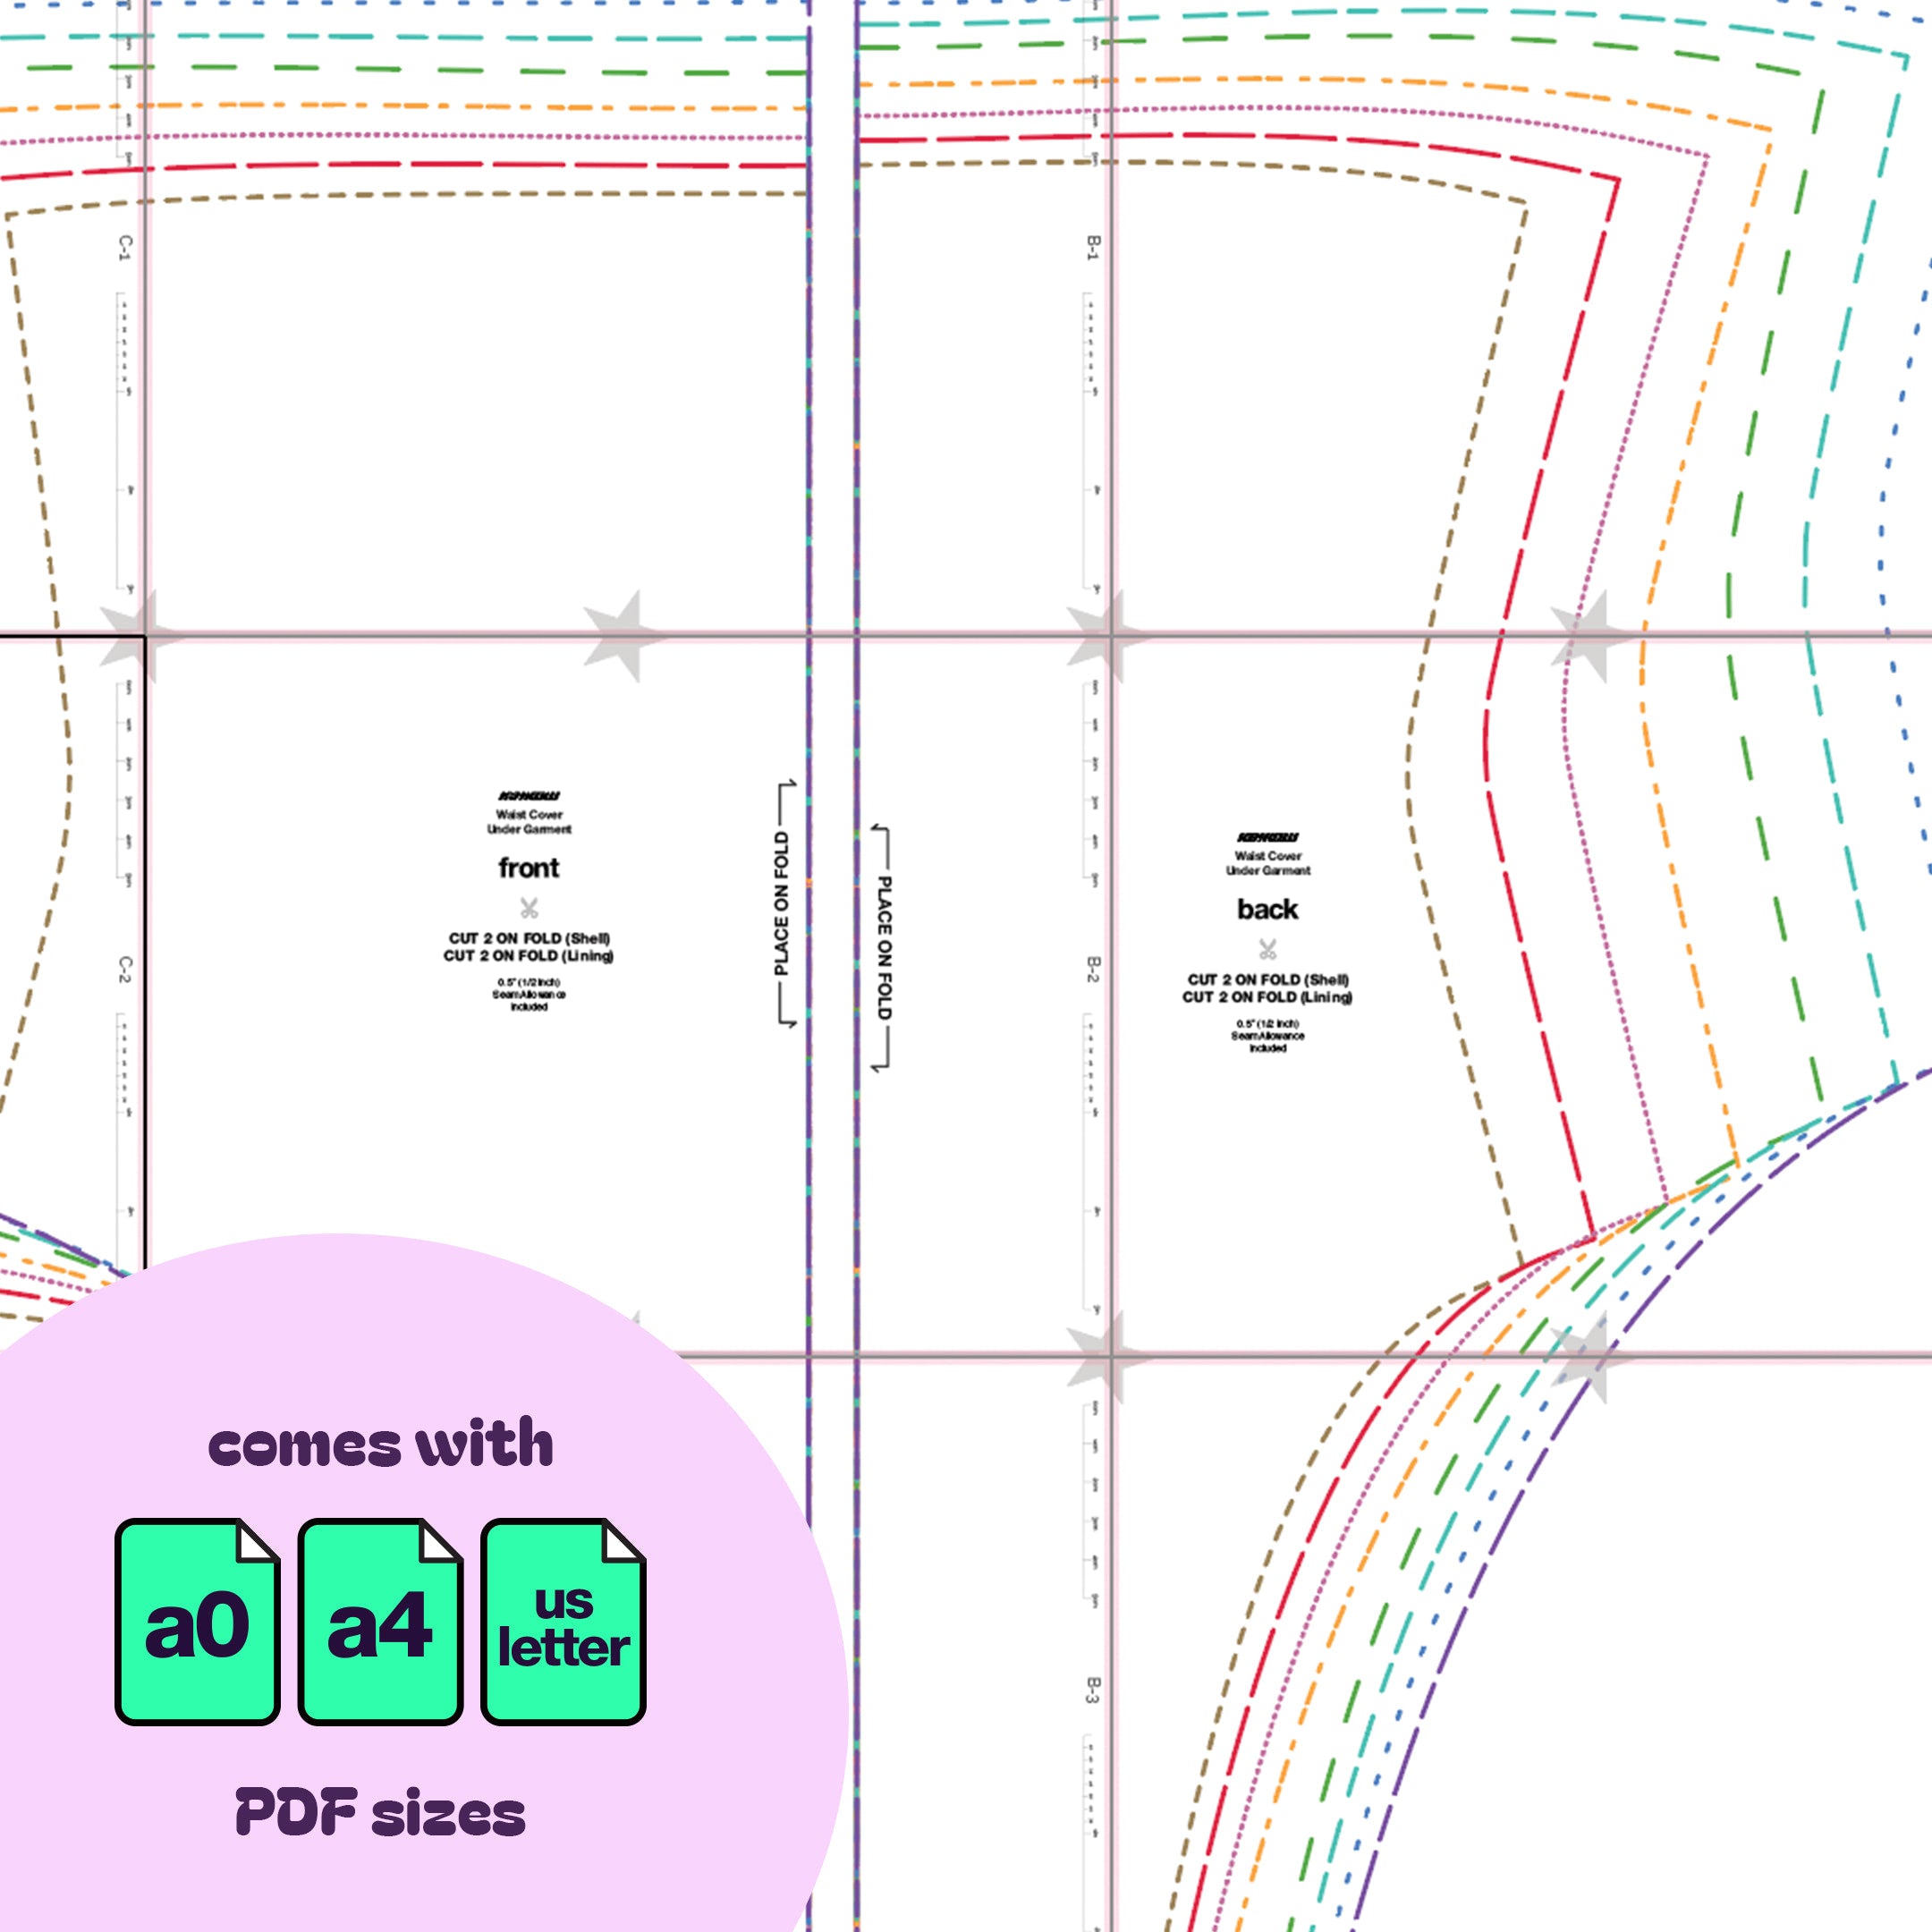
Este patrón requiere una tela exterior y una tela de forro. El metraje será igual para ambas. A continuación, encontrará el metraje necesario para cada talla.
| Tamaño | Yardas de tela (ancho de 44”) | |
|---|---|---|
| Caparazón | Recubrimiento | |
| XS | 0,5 yardas | 0,5 yardas |
| S | 0,75 yardas | 0,75 yardas |
| METRO | 0,75 yardas | 0,75 yardas |
| yo | 0,75 yardas | 0,75 yardas |
| SG | 1 yard | 1 yard |
| 2X | 1 yard | 1 yard |
| 3 veces | 1 yard | 1 yard |
| 4 veces | 1 yard | 1 yard |
Para obtener información sobre la conversión de pulgadas a metros, consulte nuestra guía de conversión.
Telas y artículos de mercería
Adecuado para tejidos elásticos:
- Licra/spandex
- Miliskin
- Tejido de punto elástico
- Vinilo elástico
- Satén elástico
- Elástico de 1,5 a 2 pulgadas para cinturilla
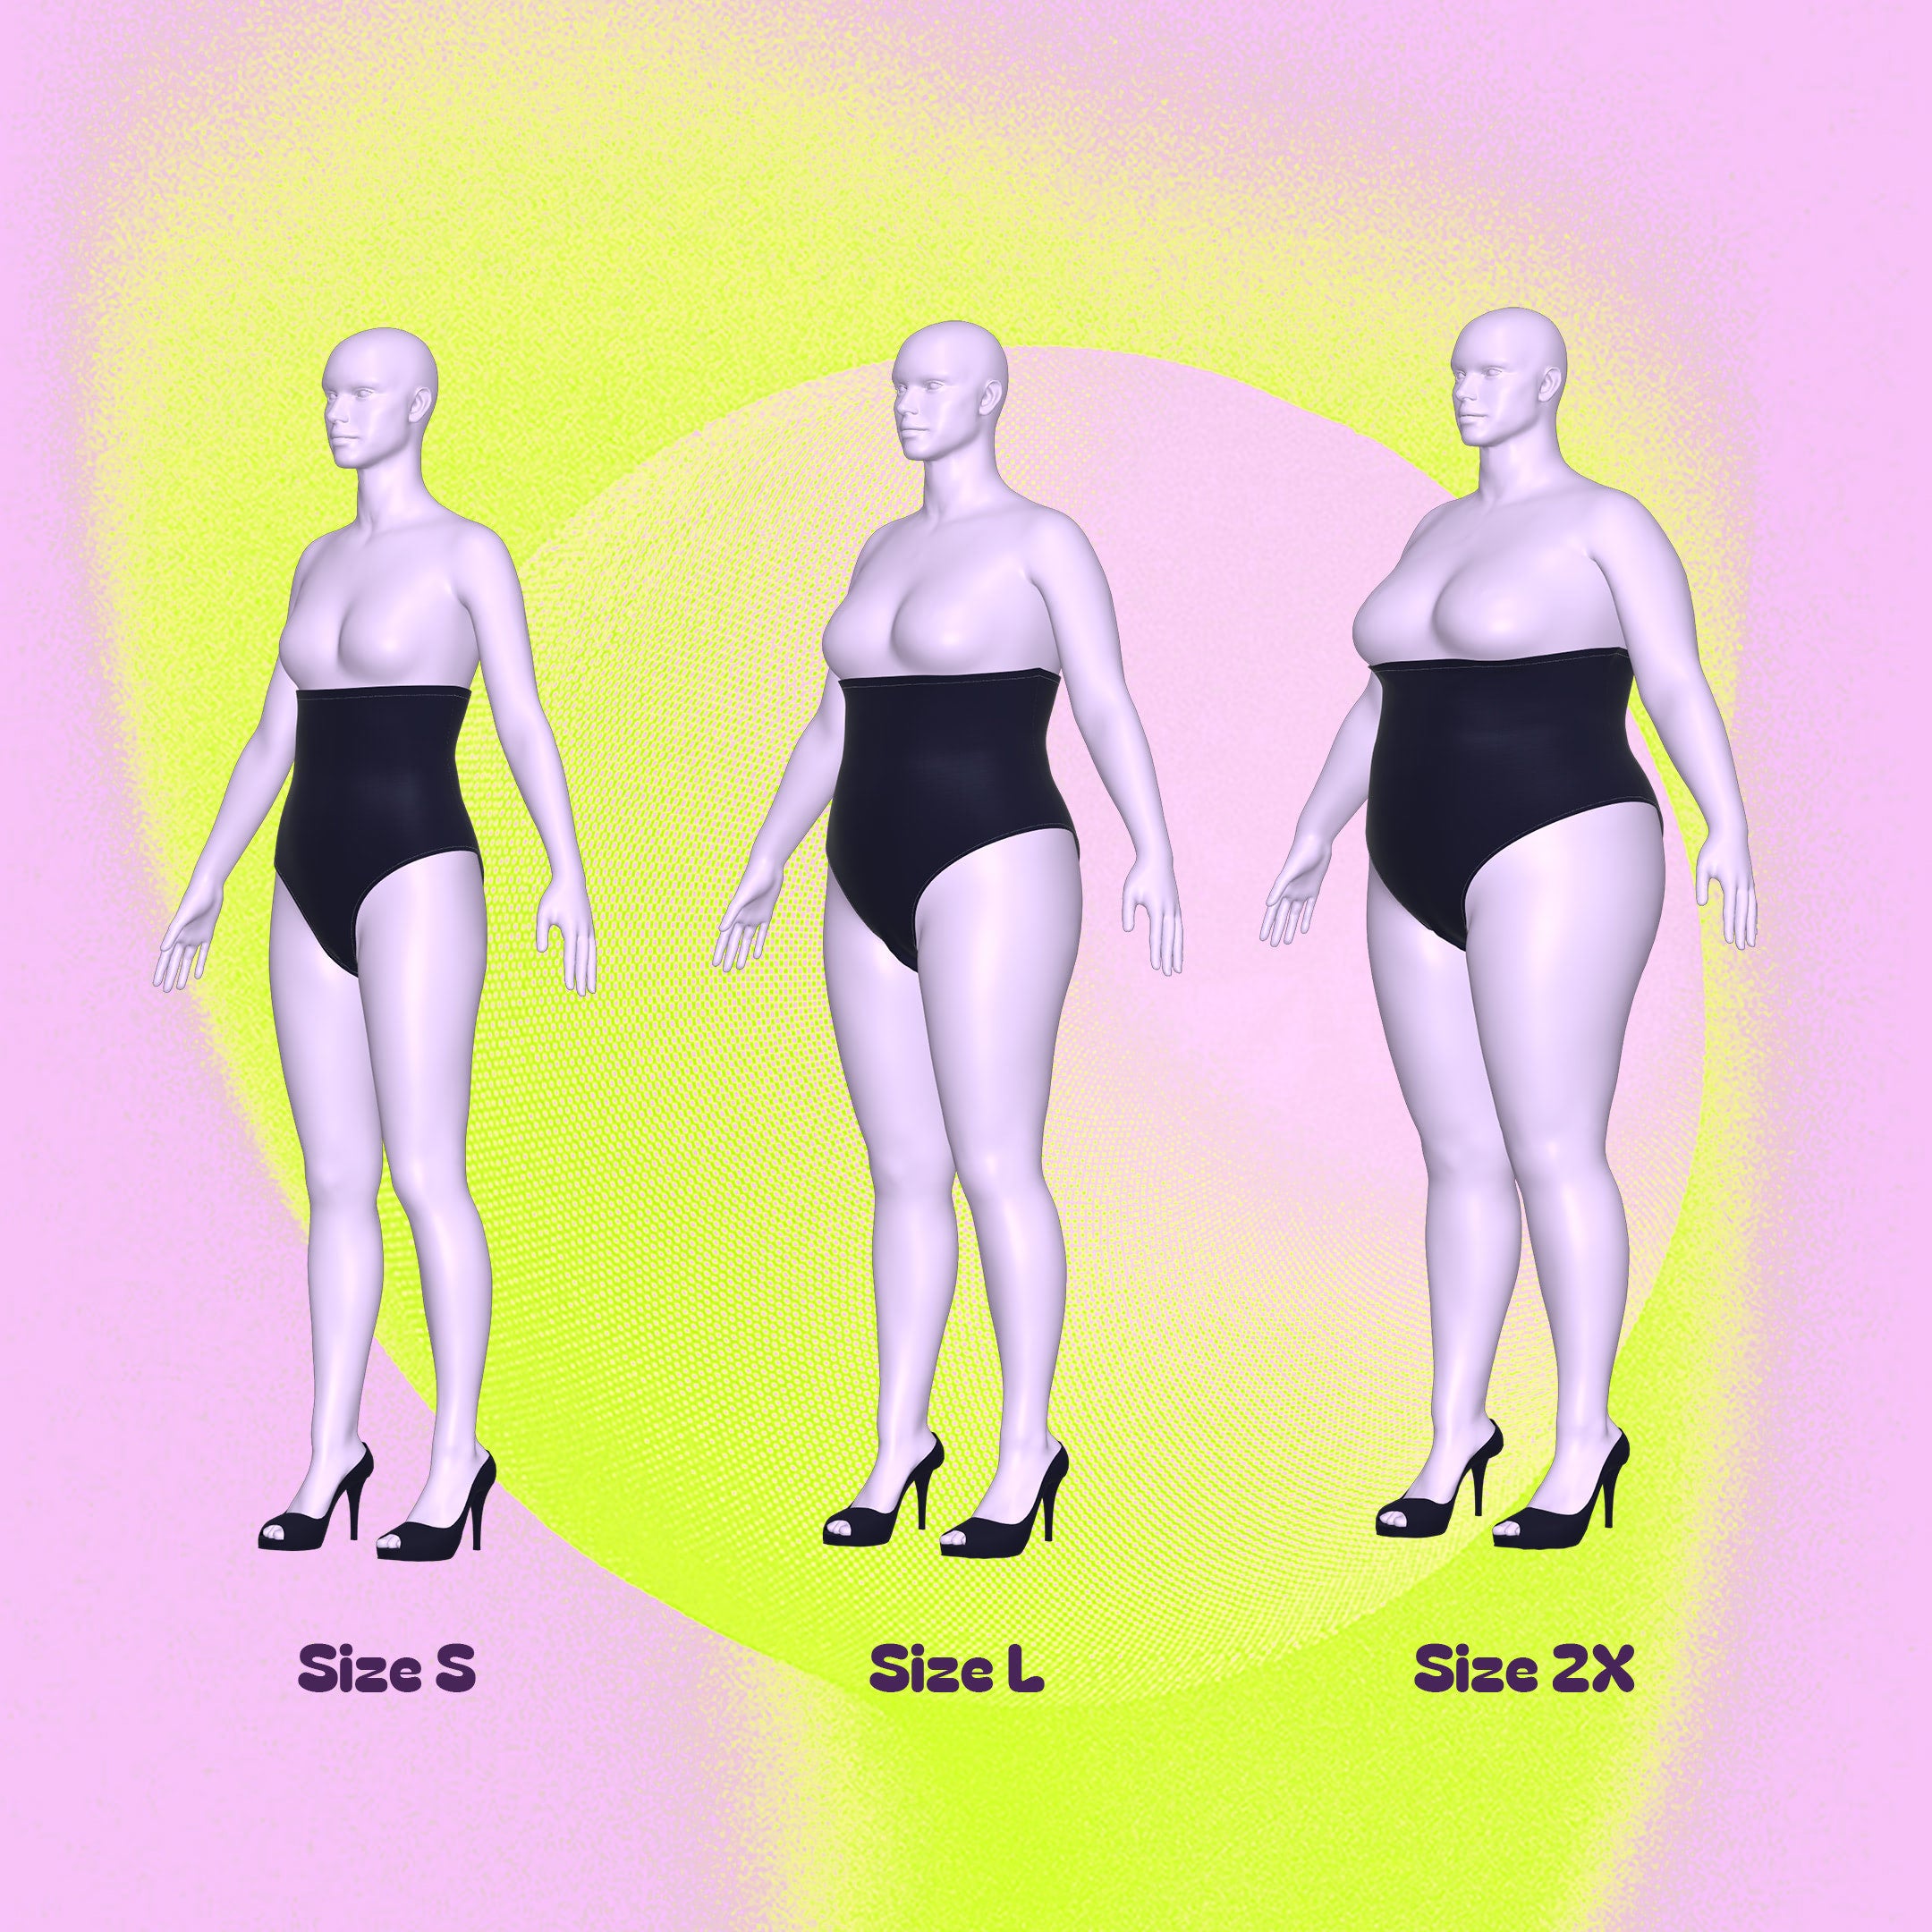
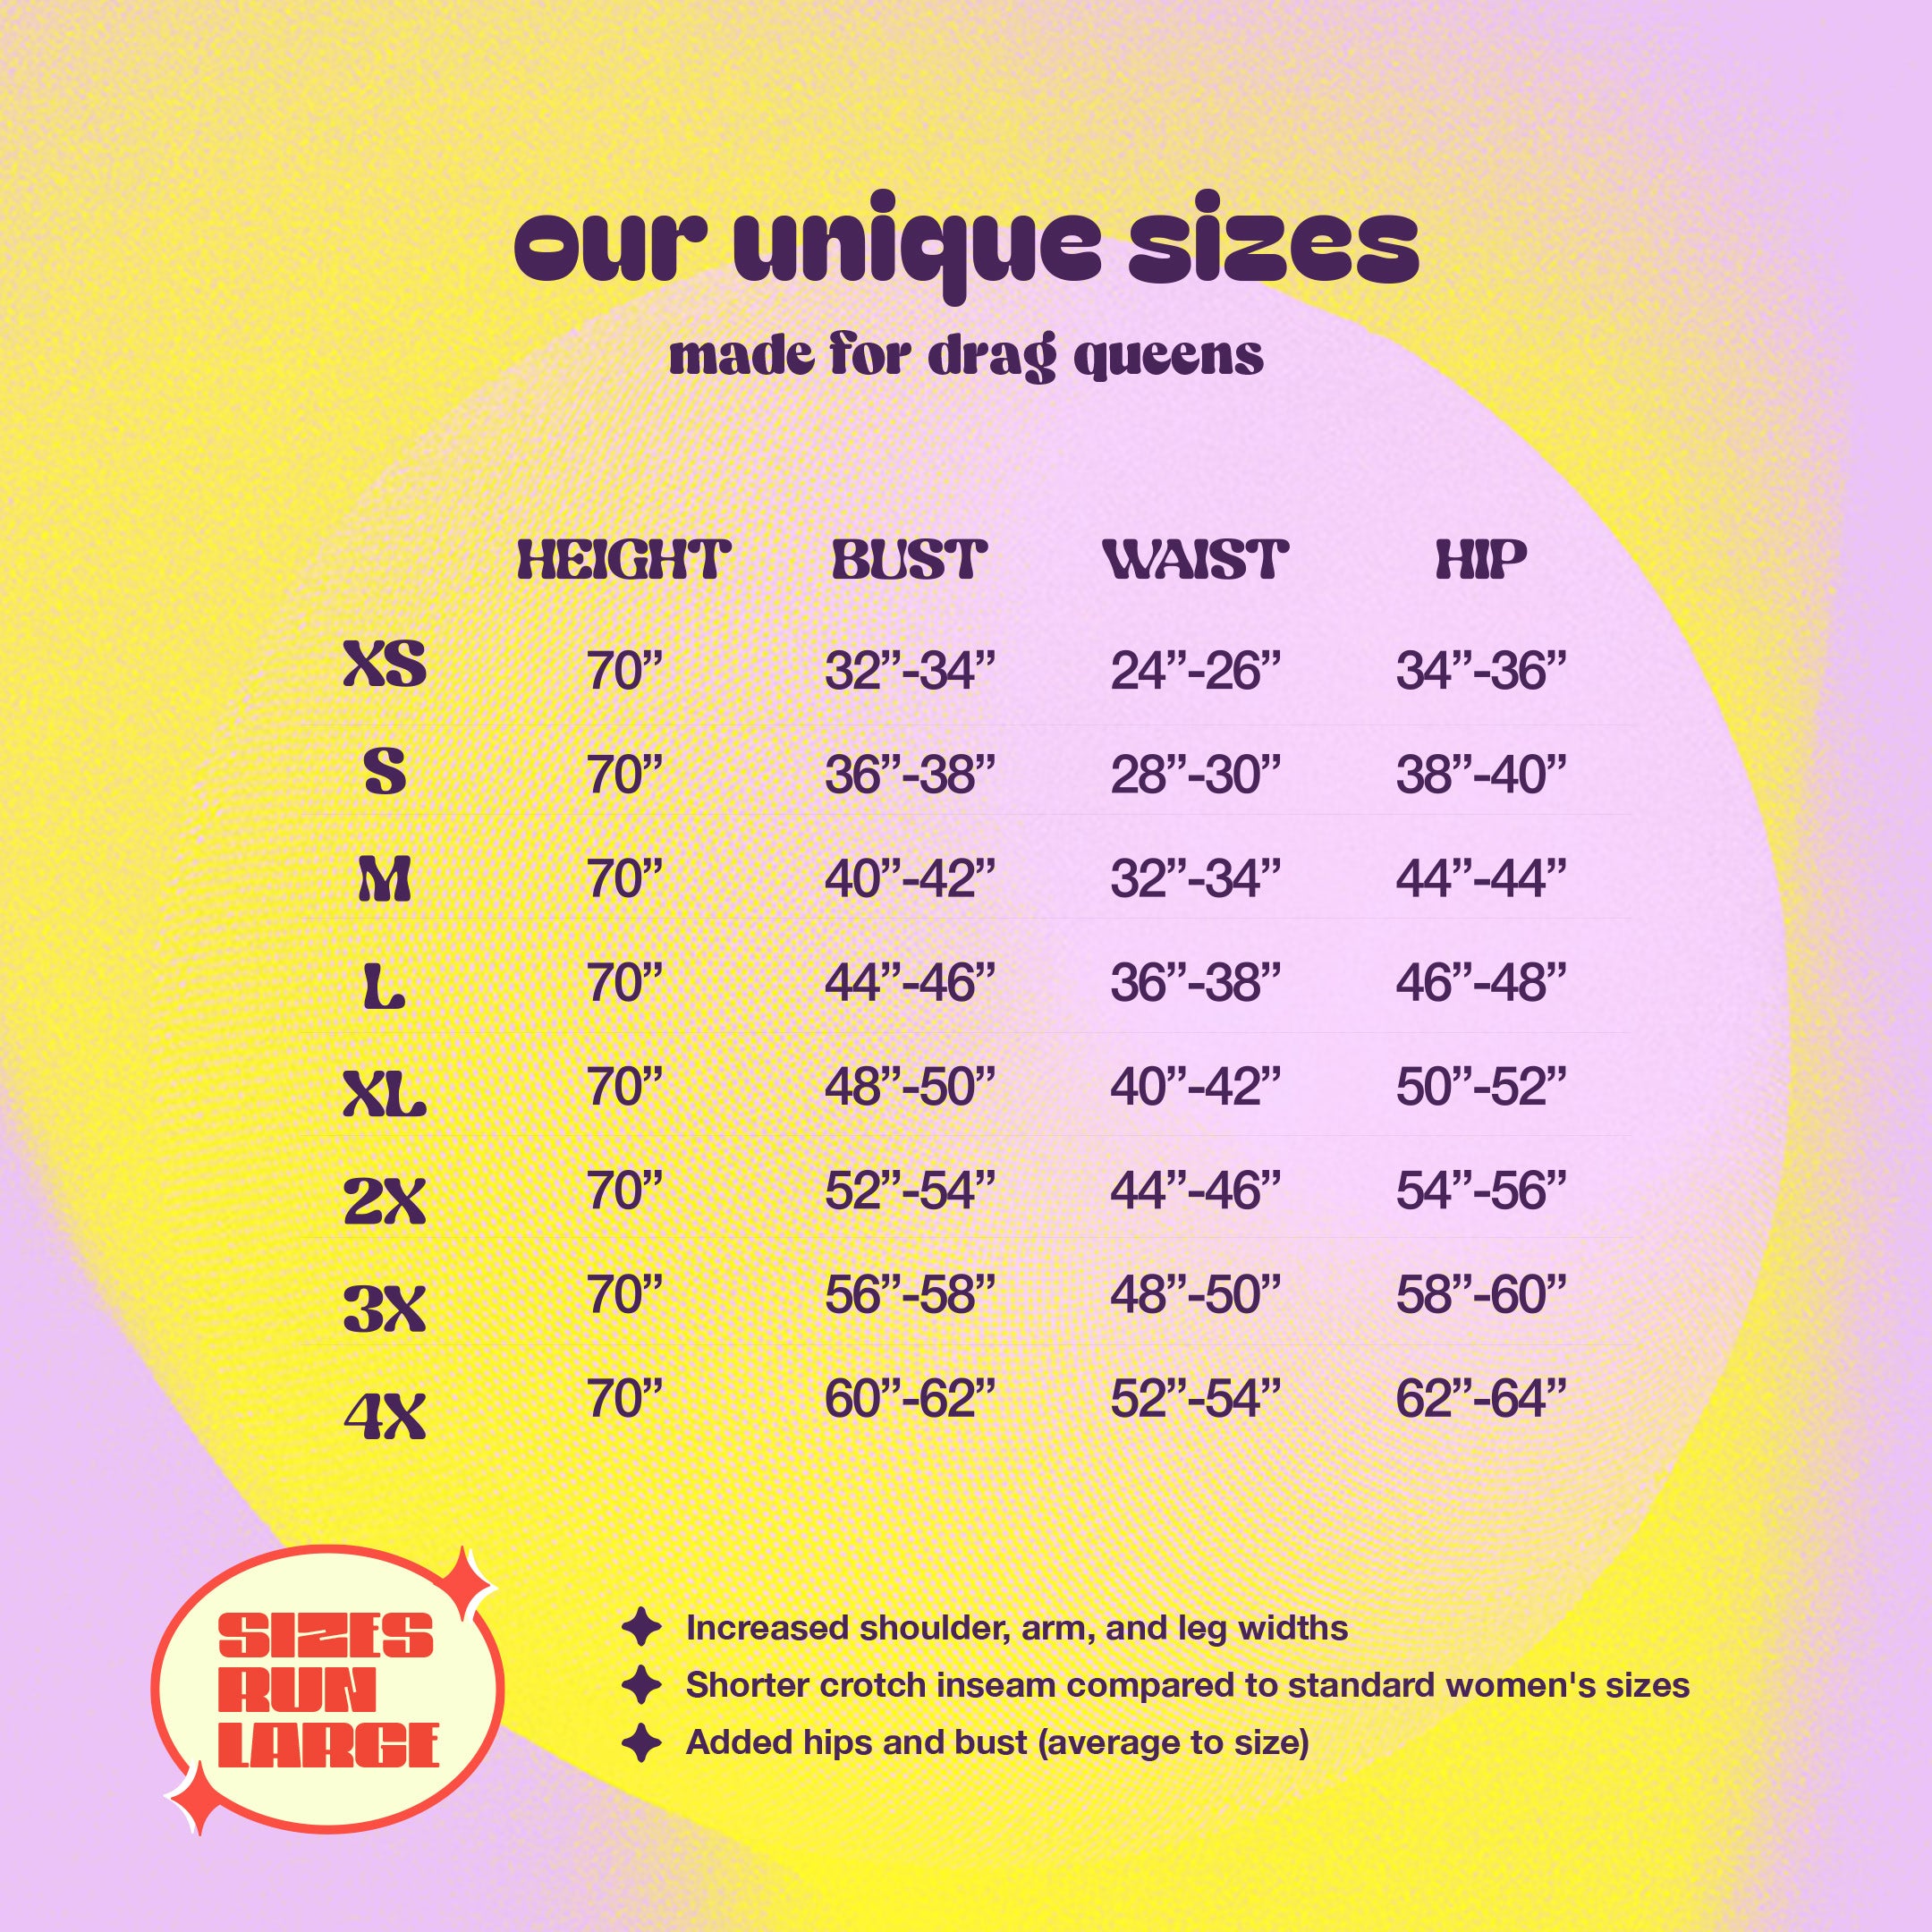
Detalles de tallas
Este patrón viene en tallas desde XS hasta 4X. Nuestras tallas son únicas y están hechas para drag queens, así que revisa nuestra guía de medidas para obtener más información sobre las medidas de nuestras tallas.
Instrucciones de costura


STEP 1
Begin by gathering the shell's front and back fabric pieces. Place them right sides together and stitch along the crotch seam using a stretch stitch, zig-zag stitch, or a serger. Repeat the same for the lining fabric.

STEP 2
Align your shell and lining with the right sides facing each other. Proceed to sew along the leg openings.

STEP 3
Turn the undergarment right side out. At the sides, the fabric should naturally fold over, revealing the wrong side.

STEP 4
Pin the front and back sides at the seam of the leg holes together. Layout the sides fabric so they overlap.

STEP 5
Stitch the front and back sides of both the shell and lining, with their right sides facing each other.

STEP 6
Gently roll the fabric over to flip the garment right side out. At this point, both the undergarment's lining and shell should be connected, leaving the top waist unsewn.

STEP 7
For the elastic, measure it to match the undergarment's waist circumference. For a snugger fit, reduce the elastic's length by 1-2 inches. Once cut, fold the elastic in half and sew its ends to form a loop.

STEP 8
Position the elastic onto the garment, stretching it uniformly around the waist's top. Align the elastic's seam with one of the undergarment's side seams.

STEP 9
Stitch the top of the elastic to the undergarment's upper edge.

STEP 10
Fold the elastic over once or twice and sew along its bottom edge, anchoring it to the waist. This forms the waistband.

STEP 11
Finish by topstitching around the leg openings for a polished look.
Obtén el patrón