How to Sew a Belted Ribbon Top
Jump to InstructionsOverview
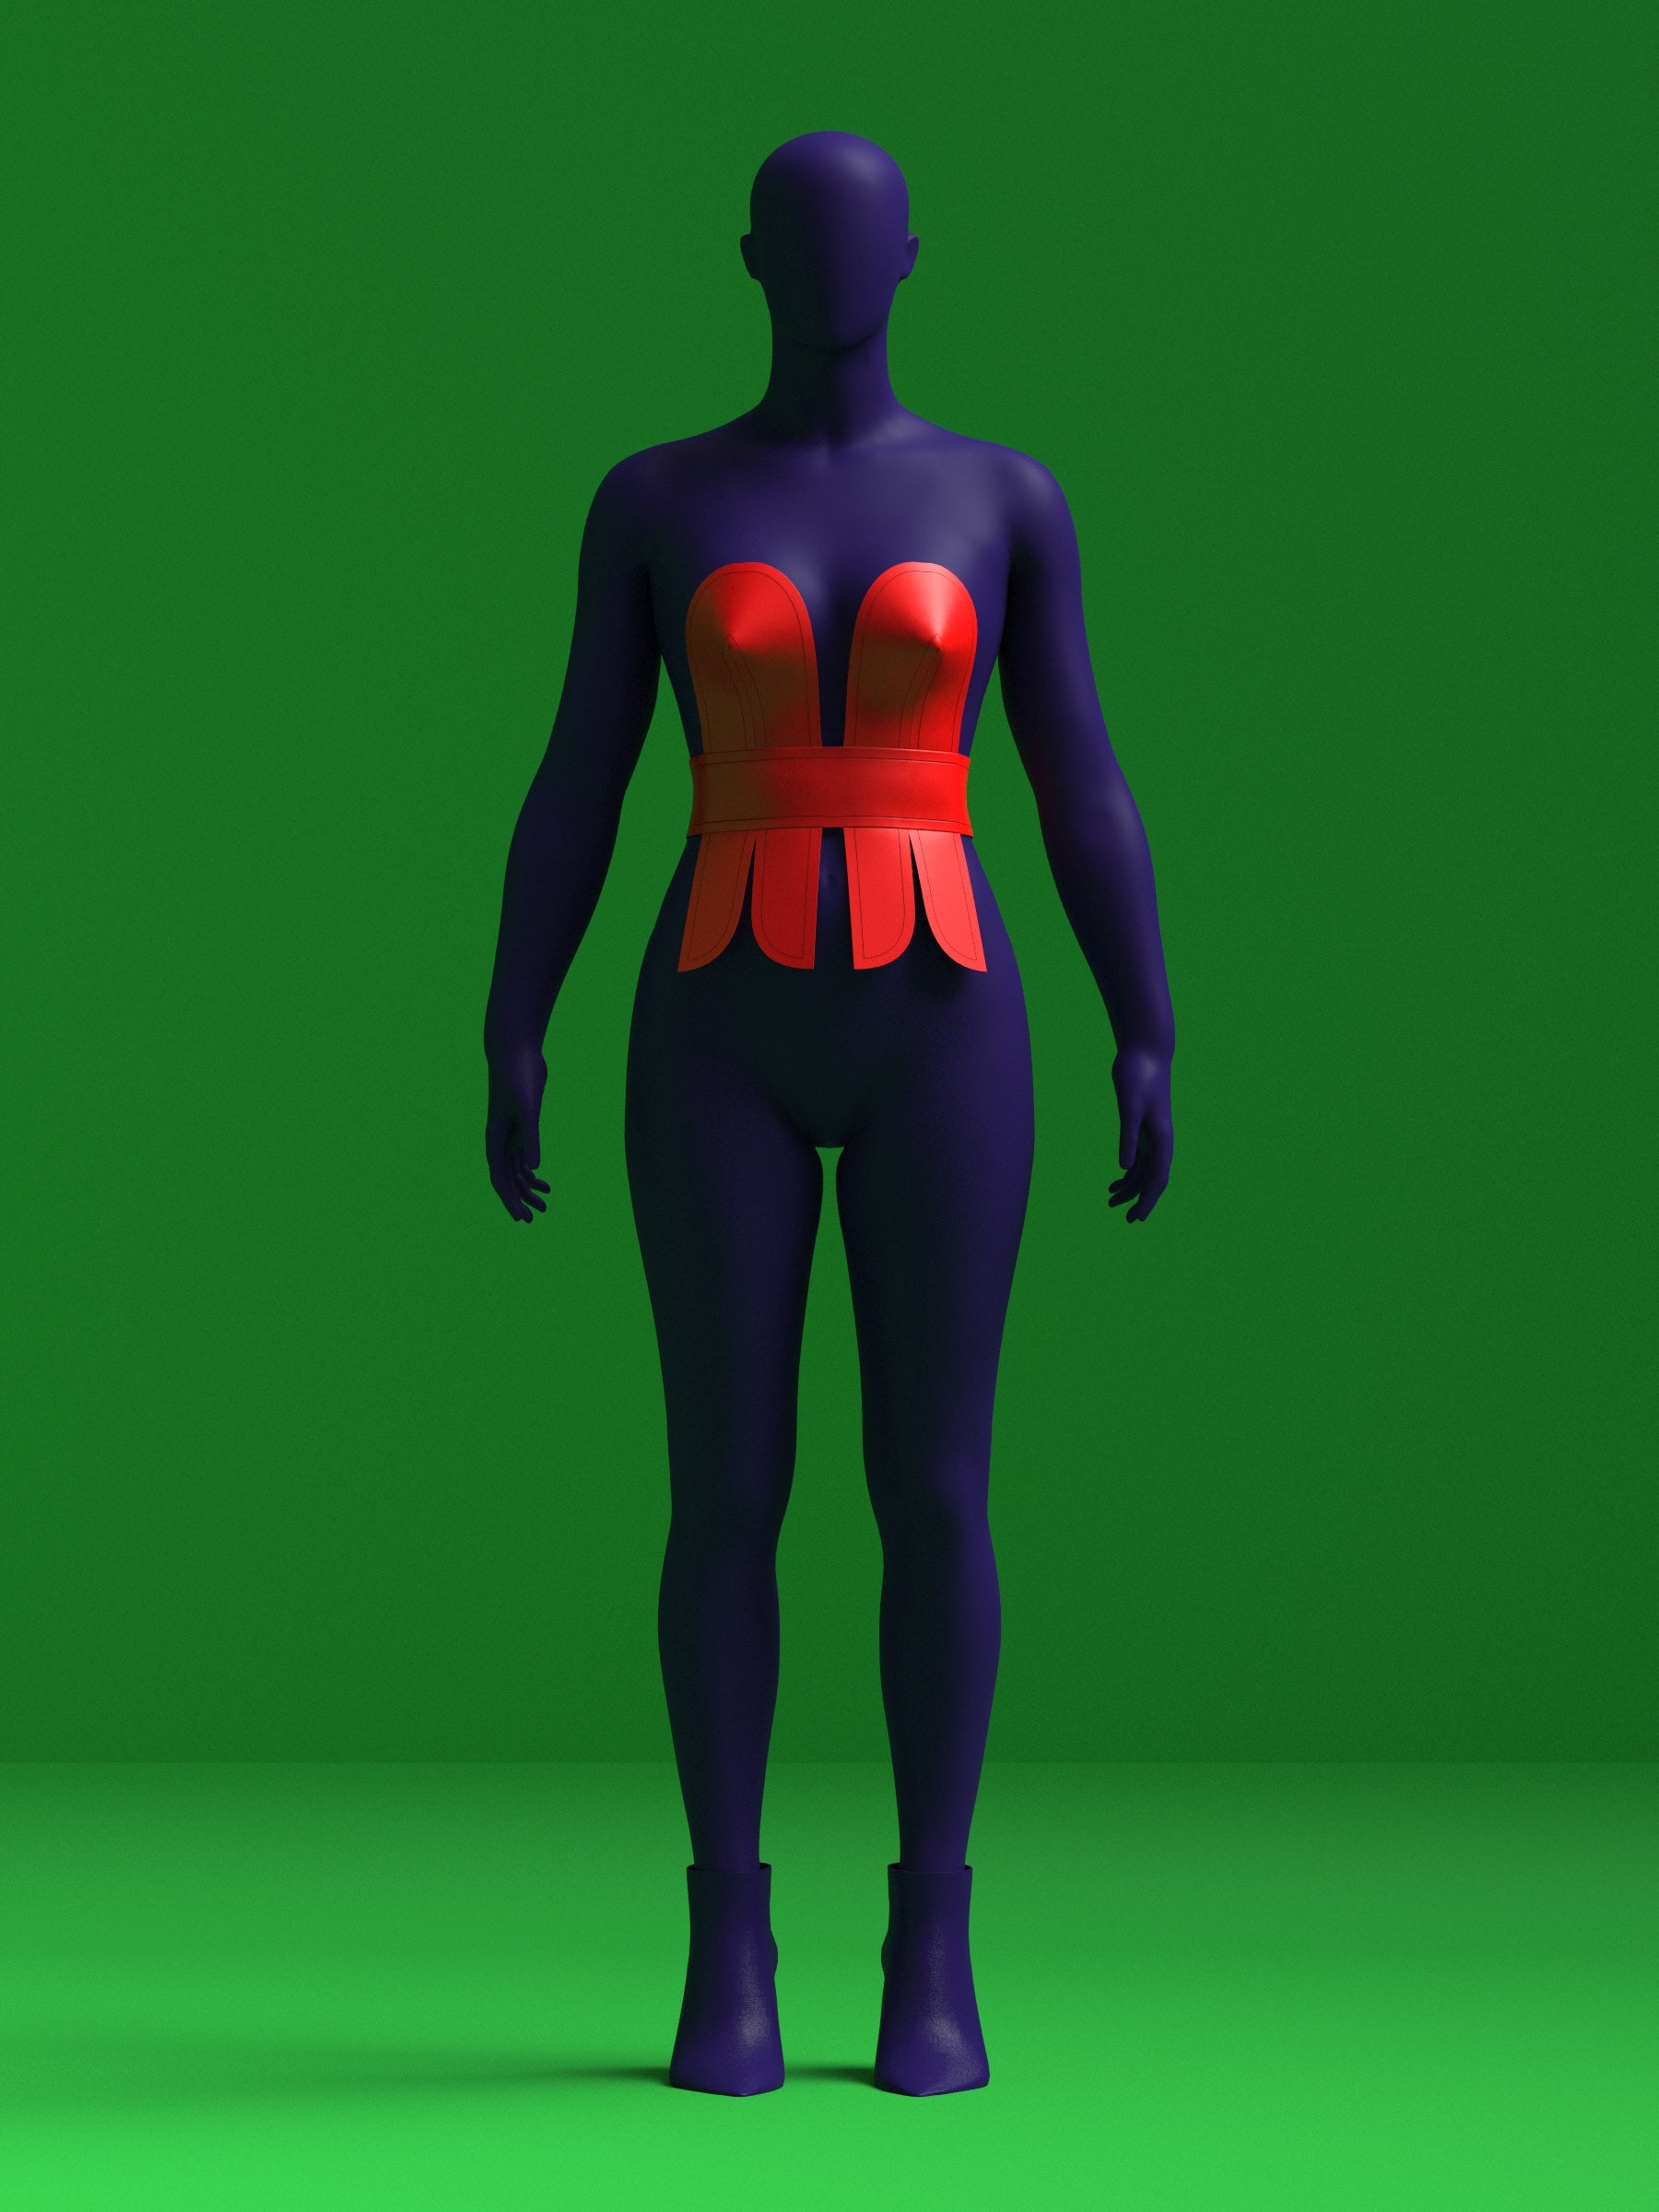
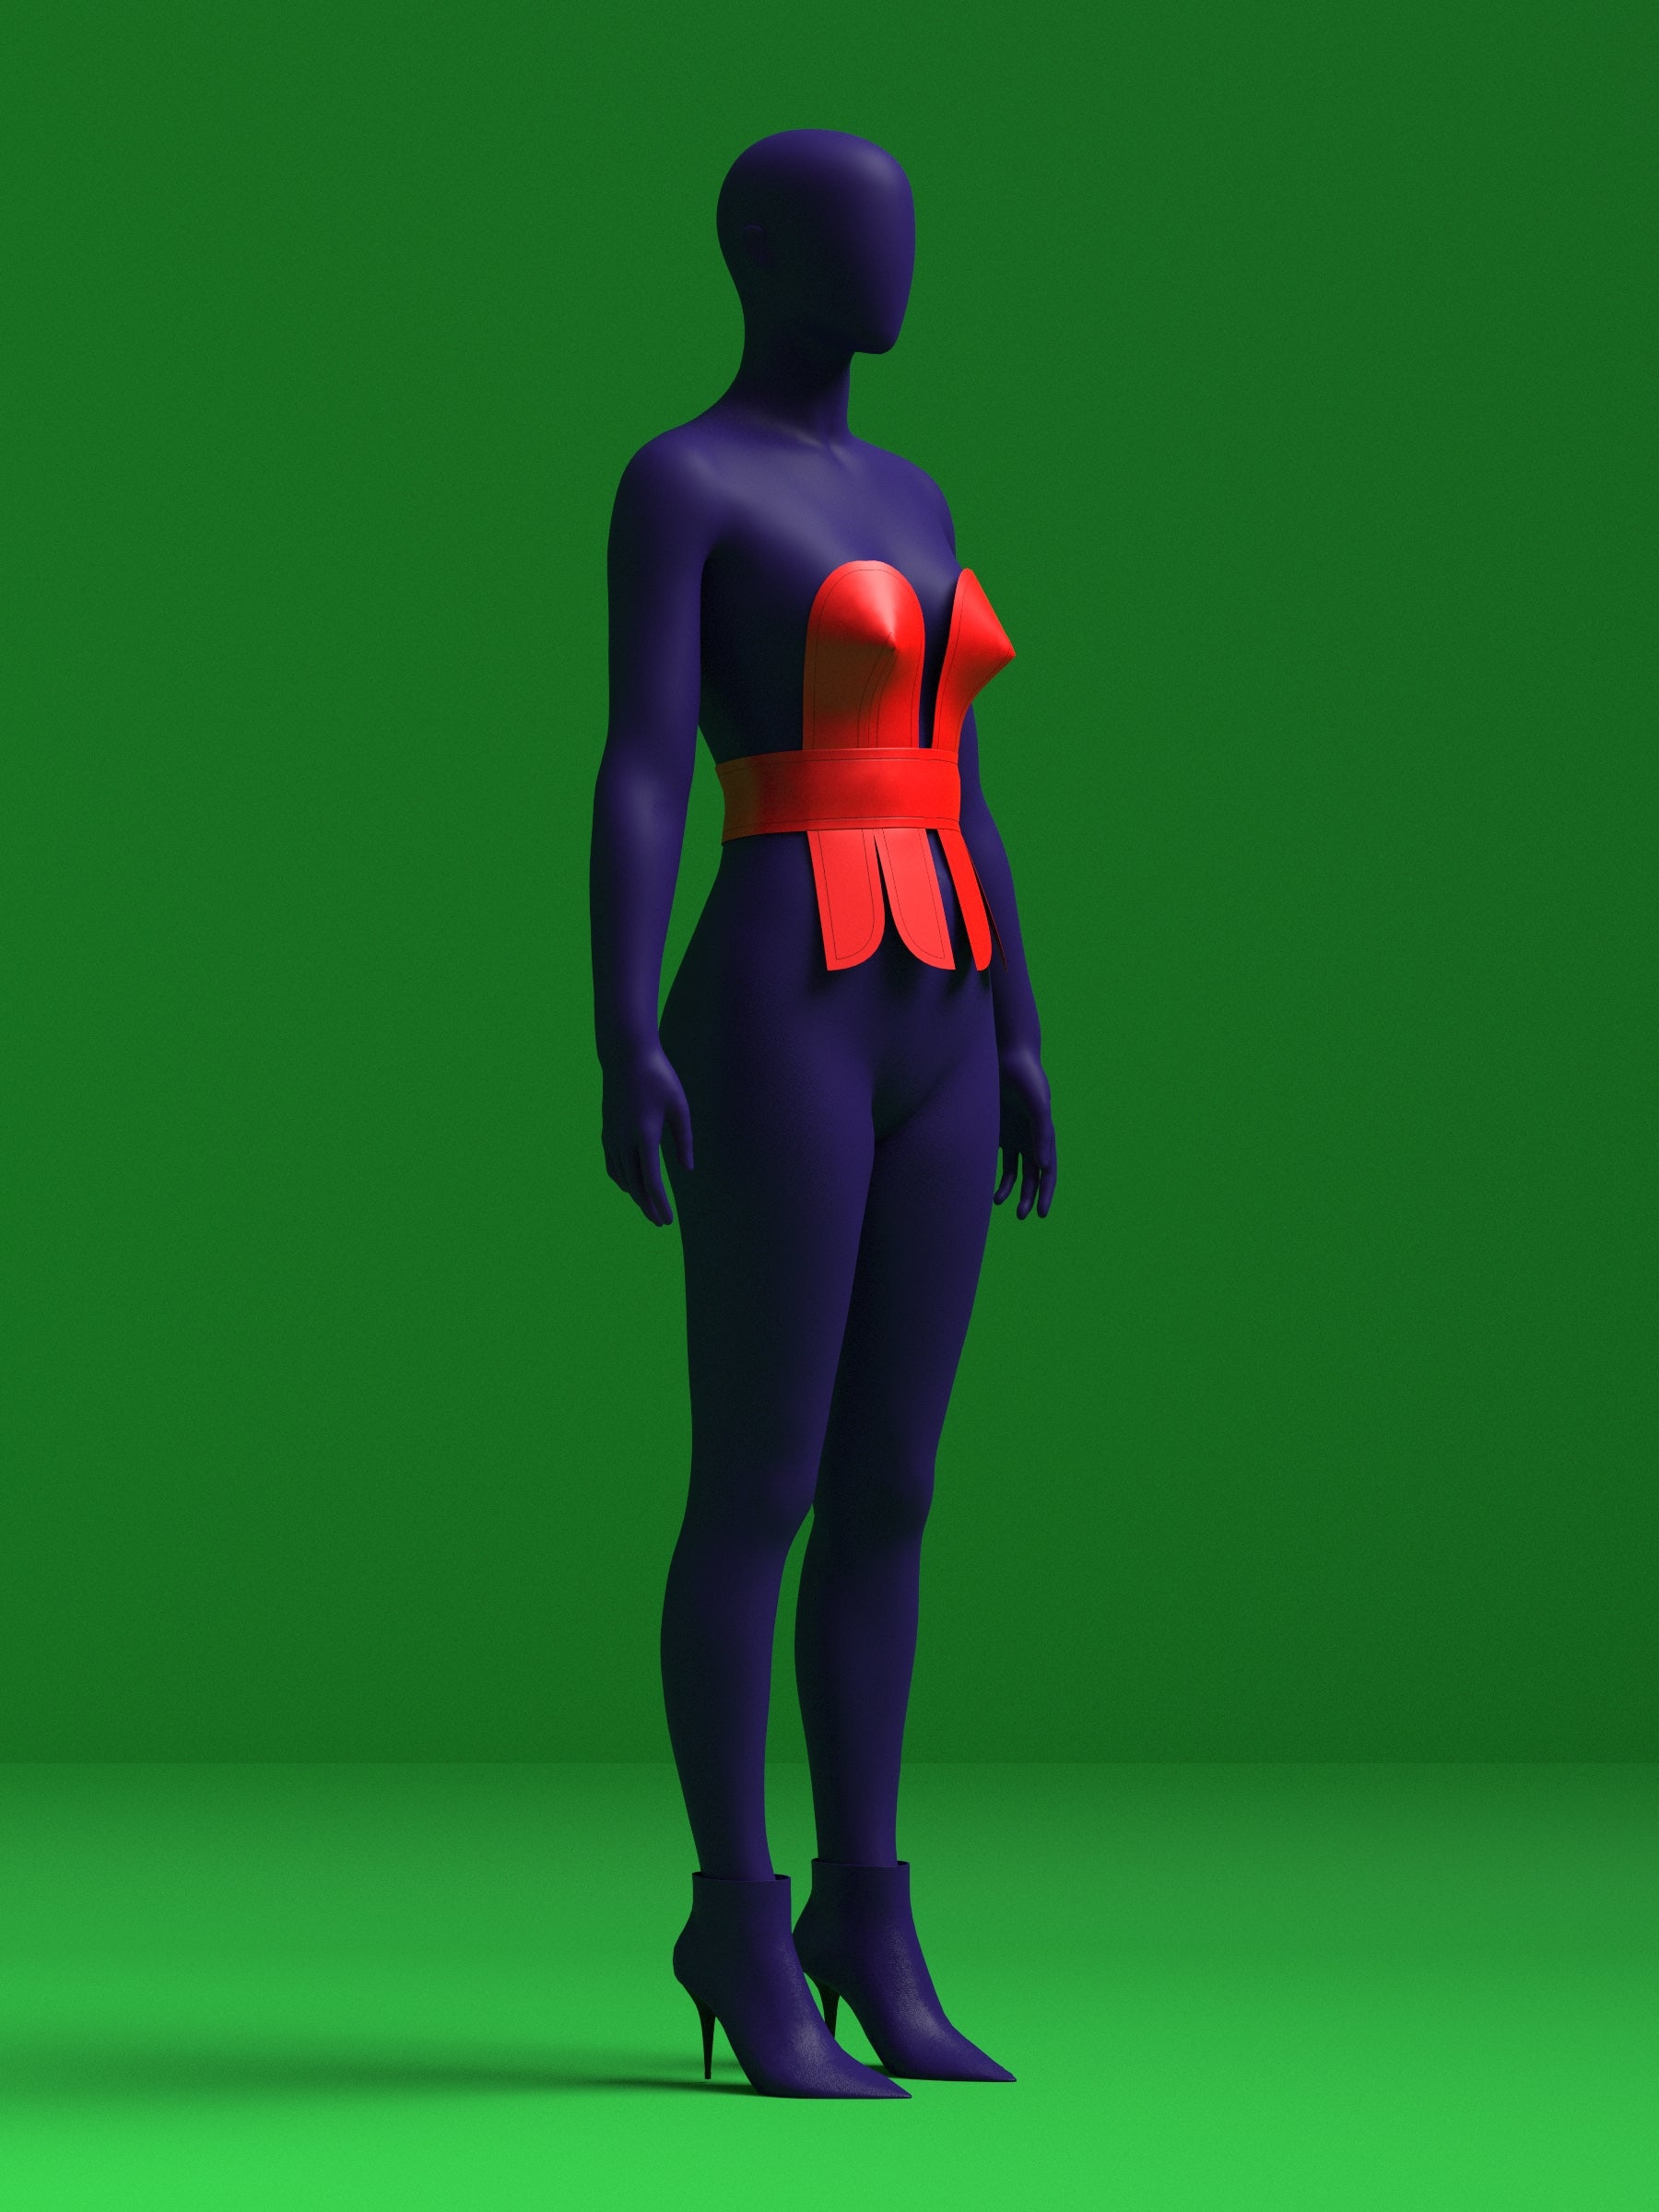
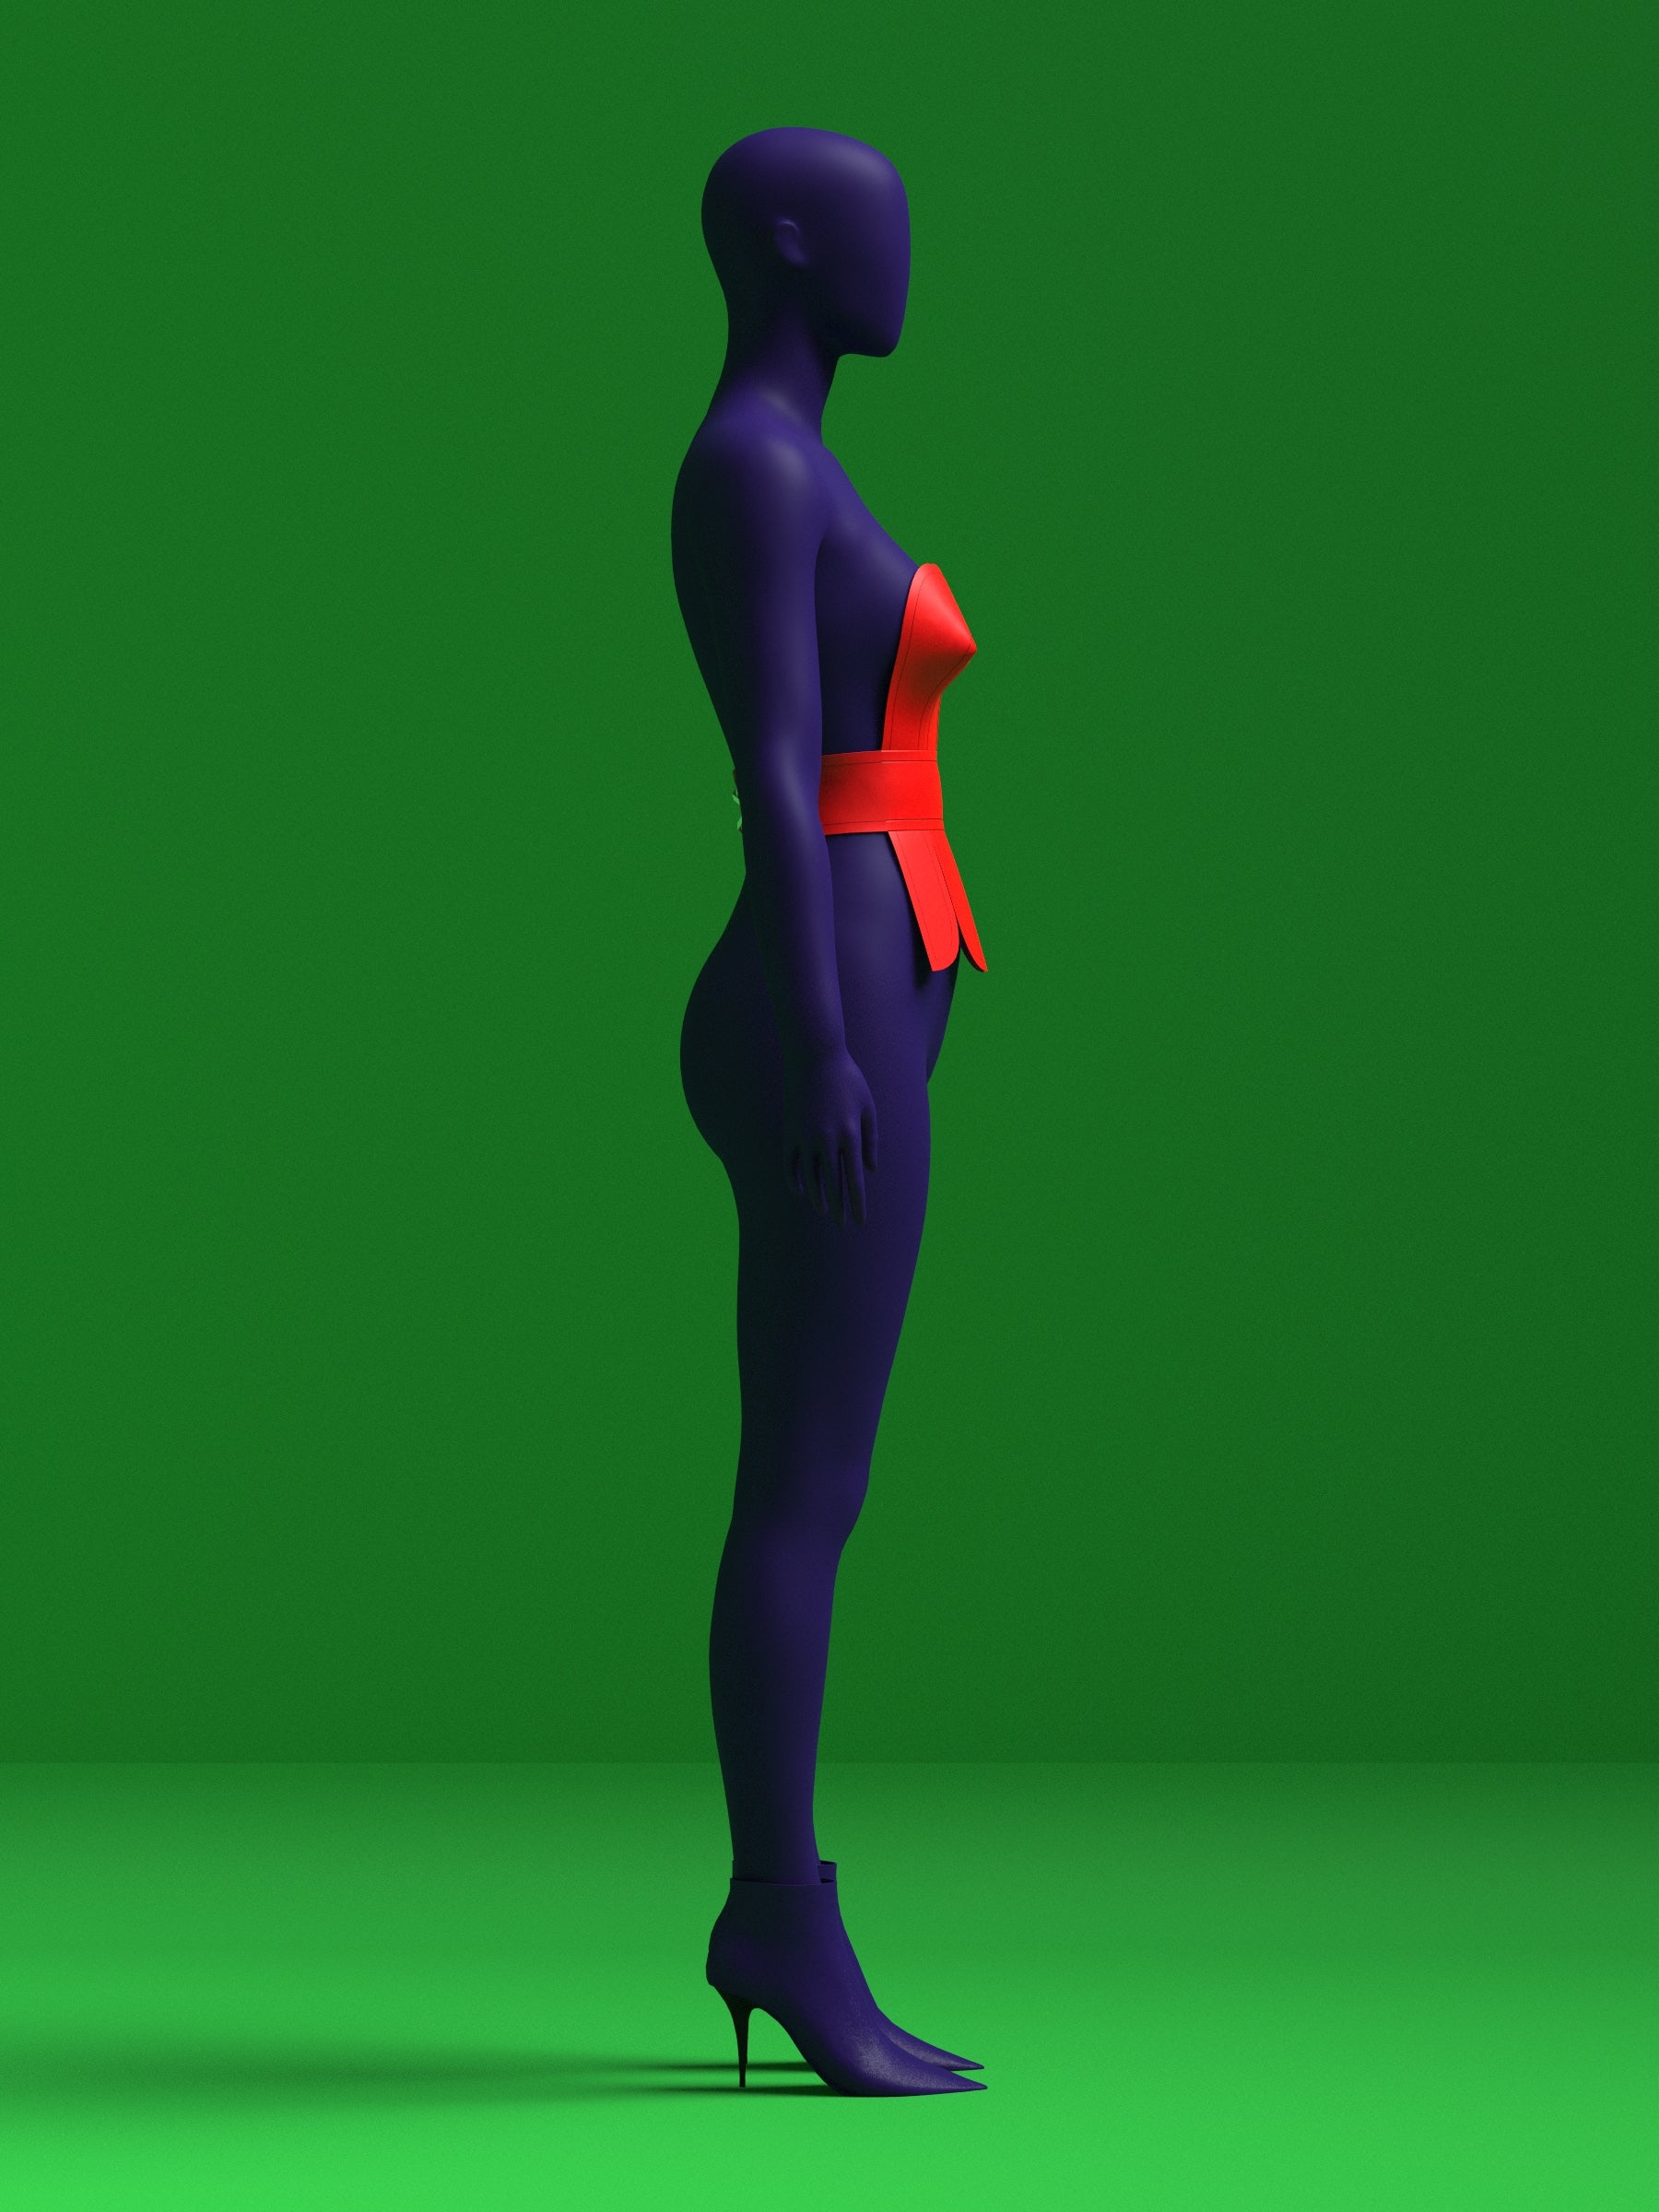
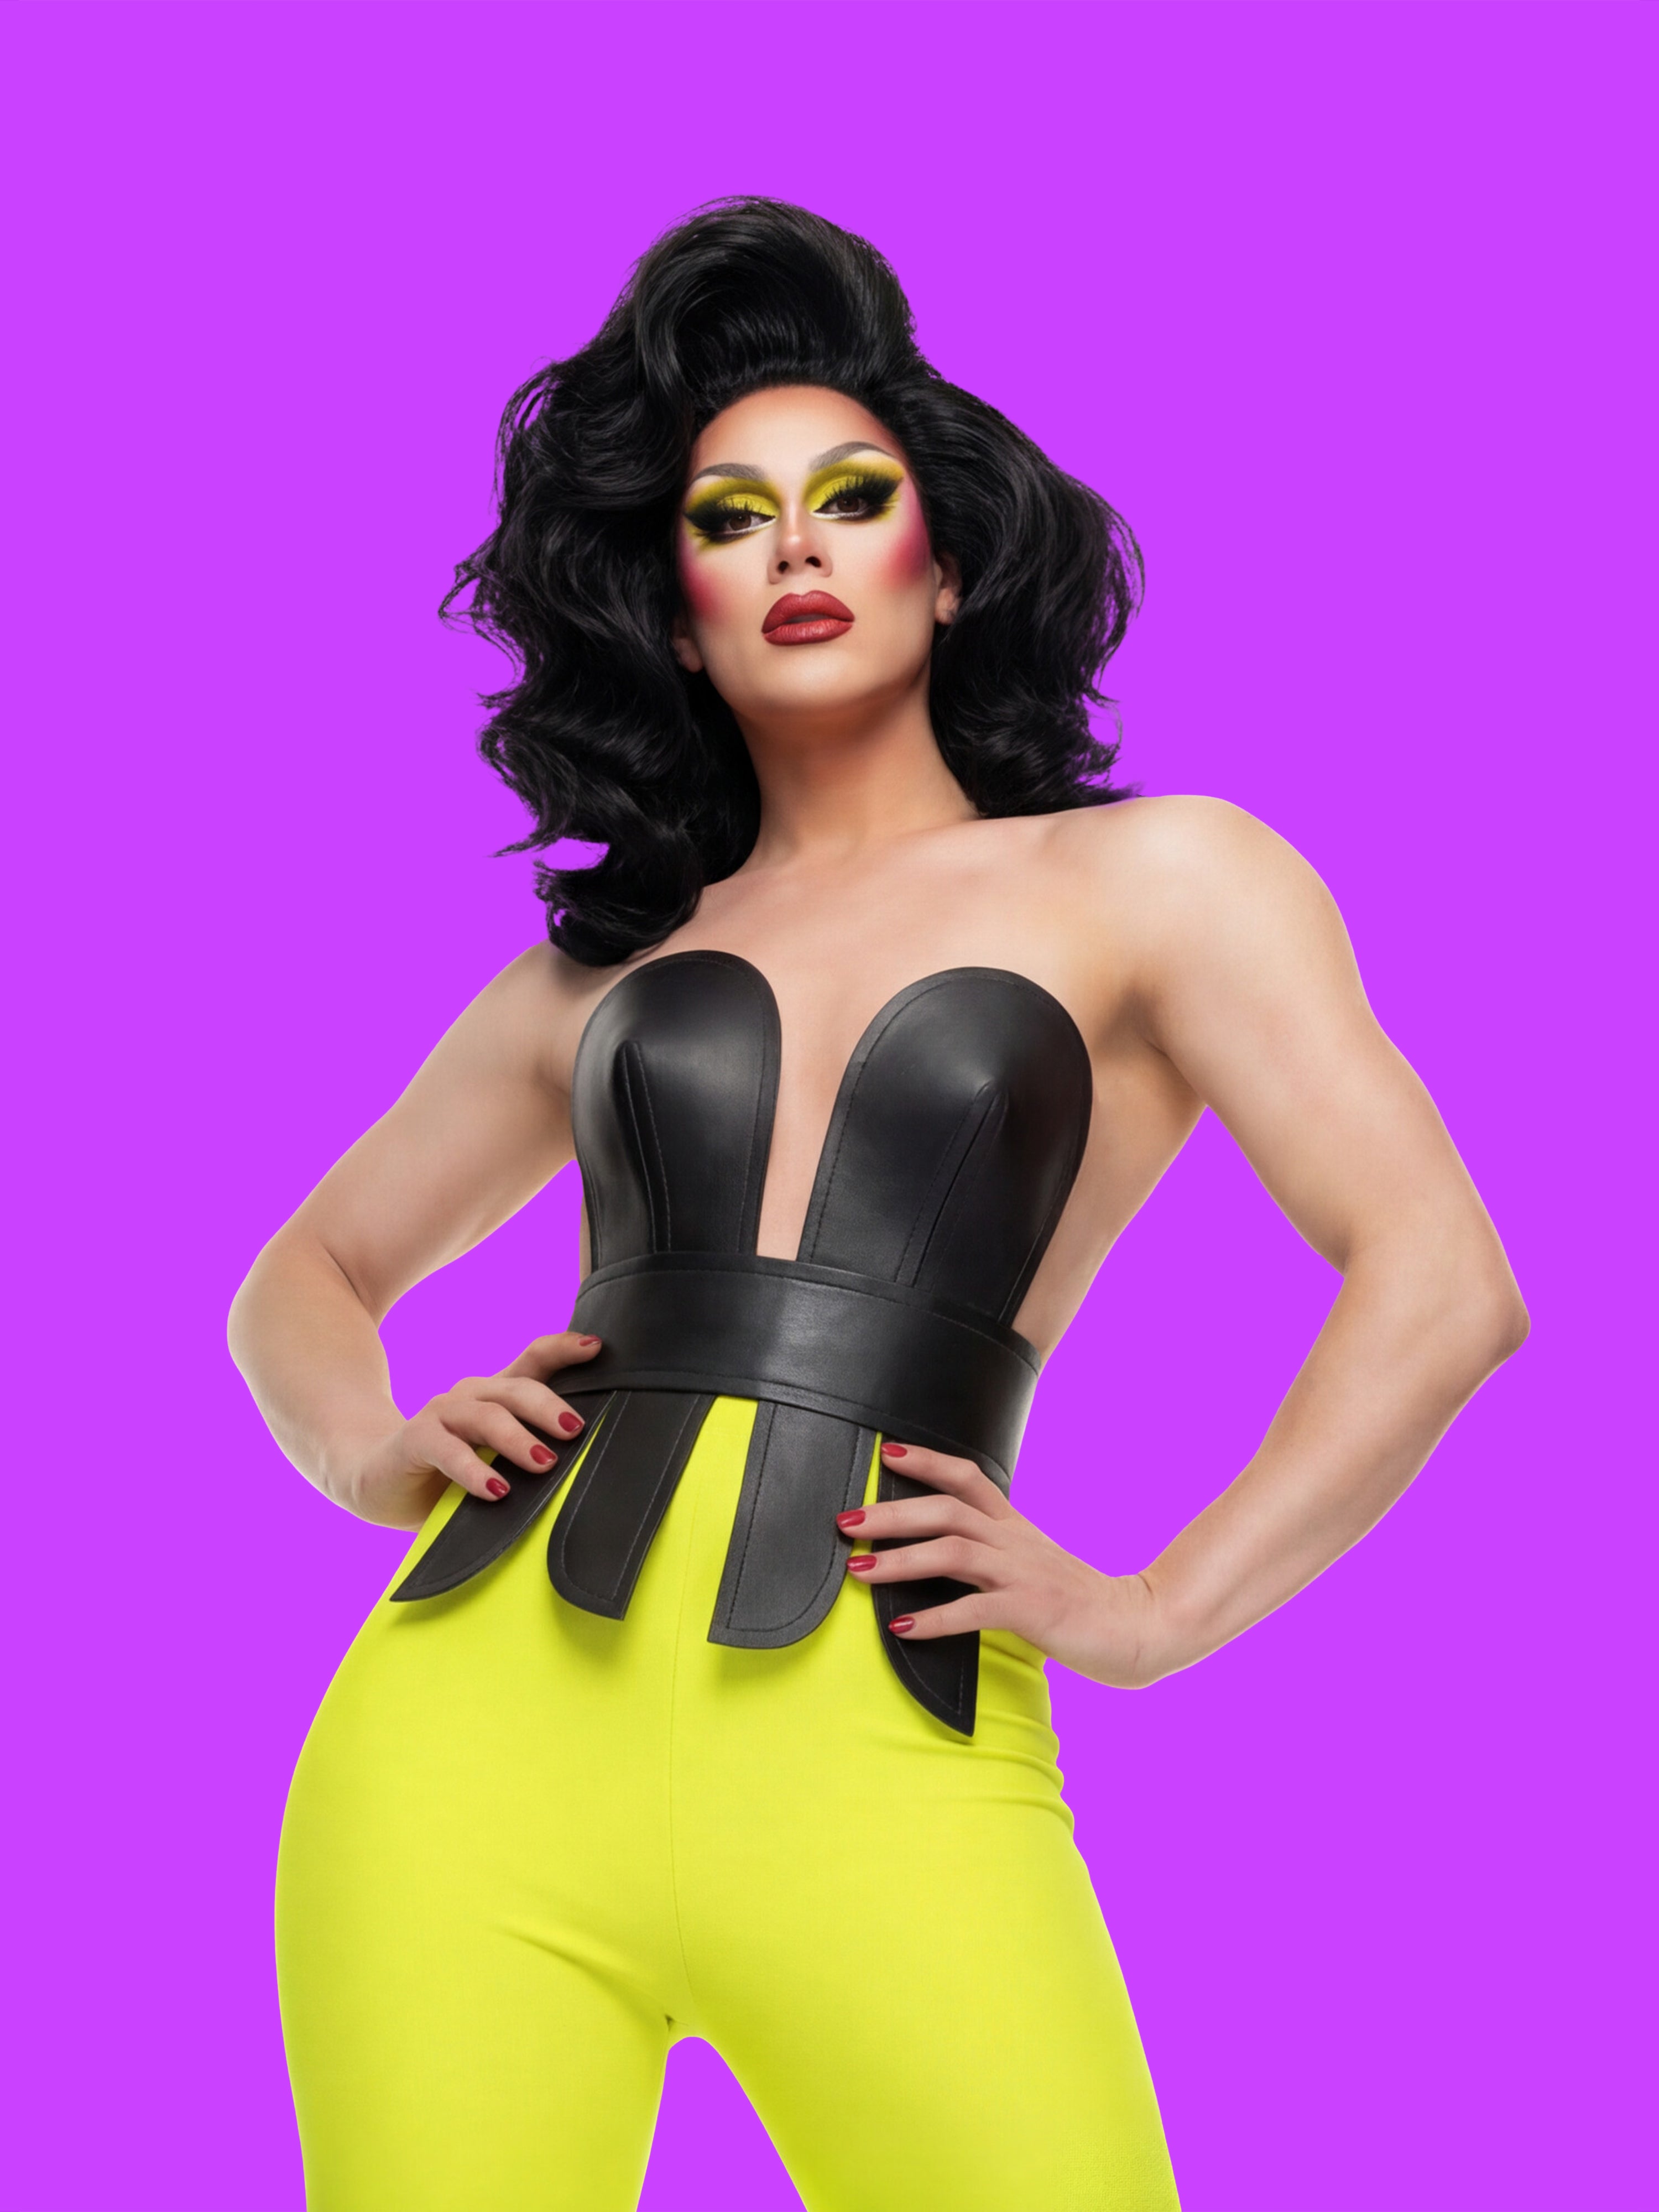
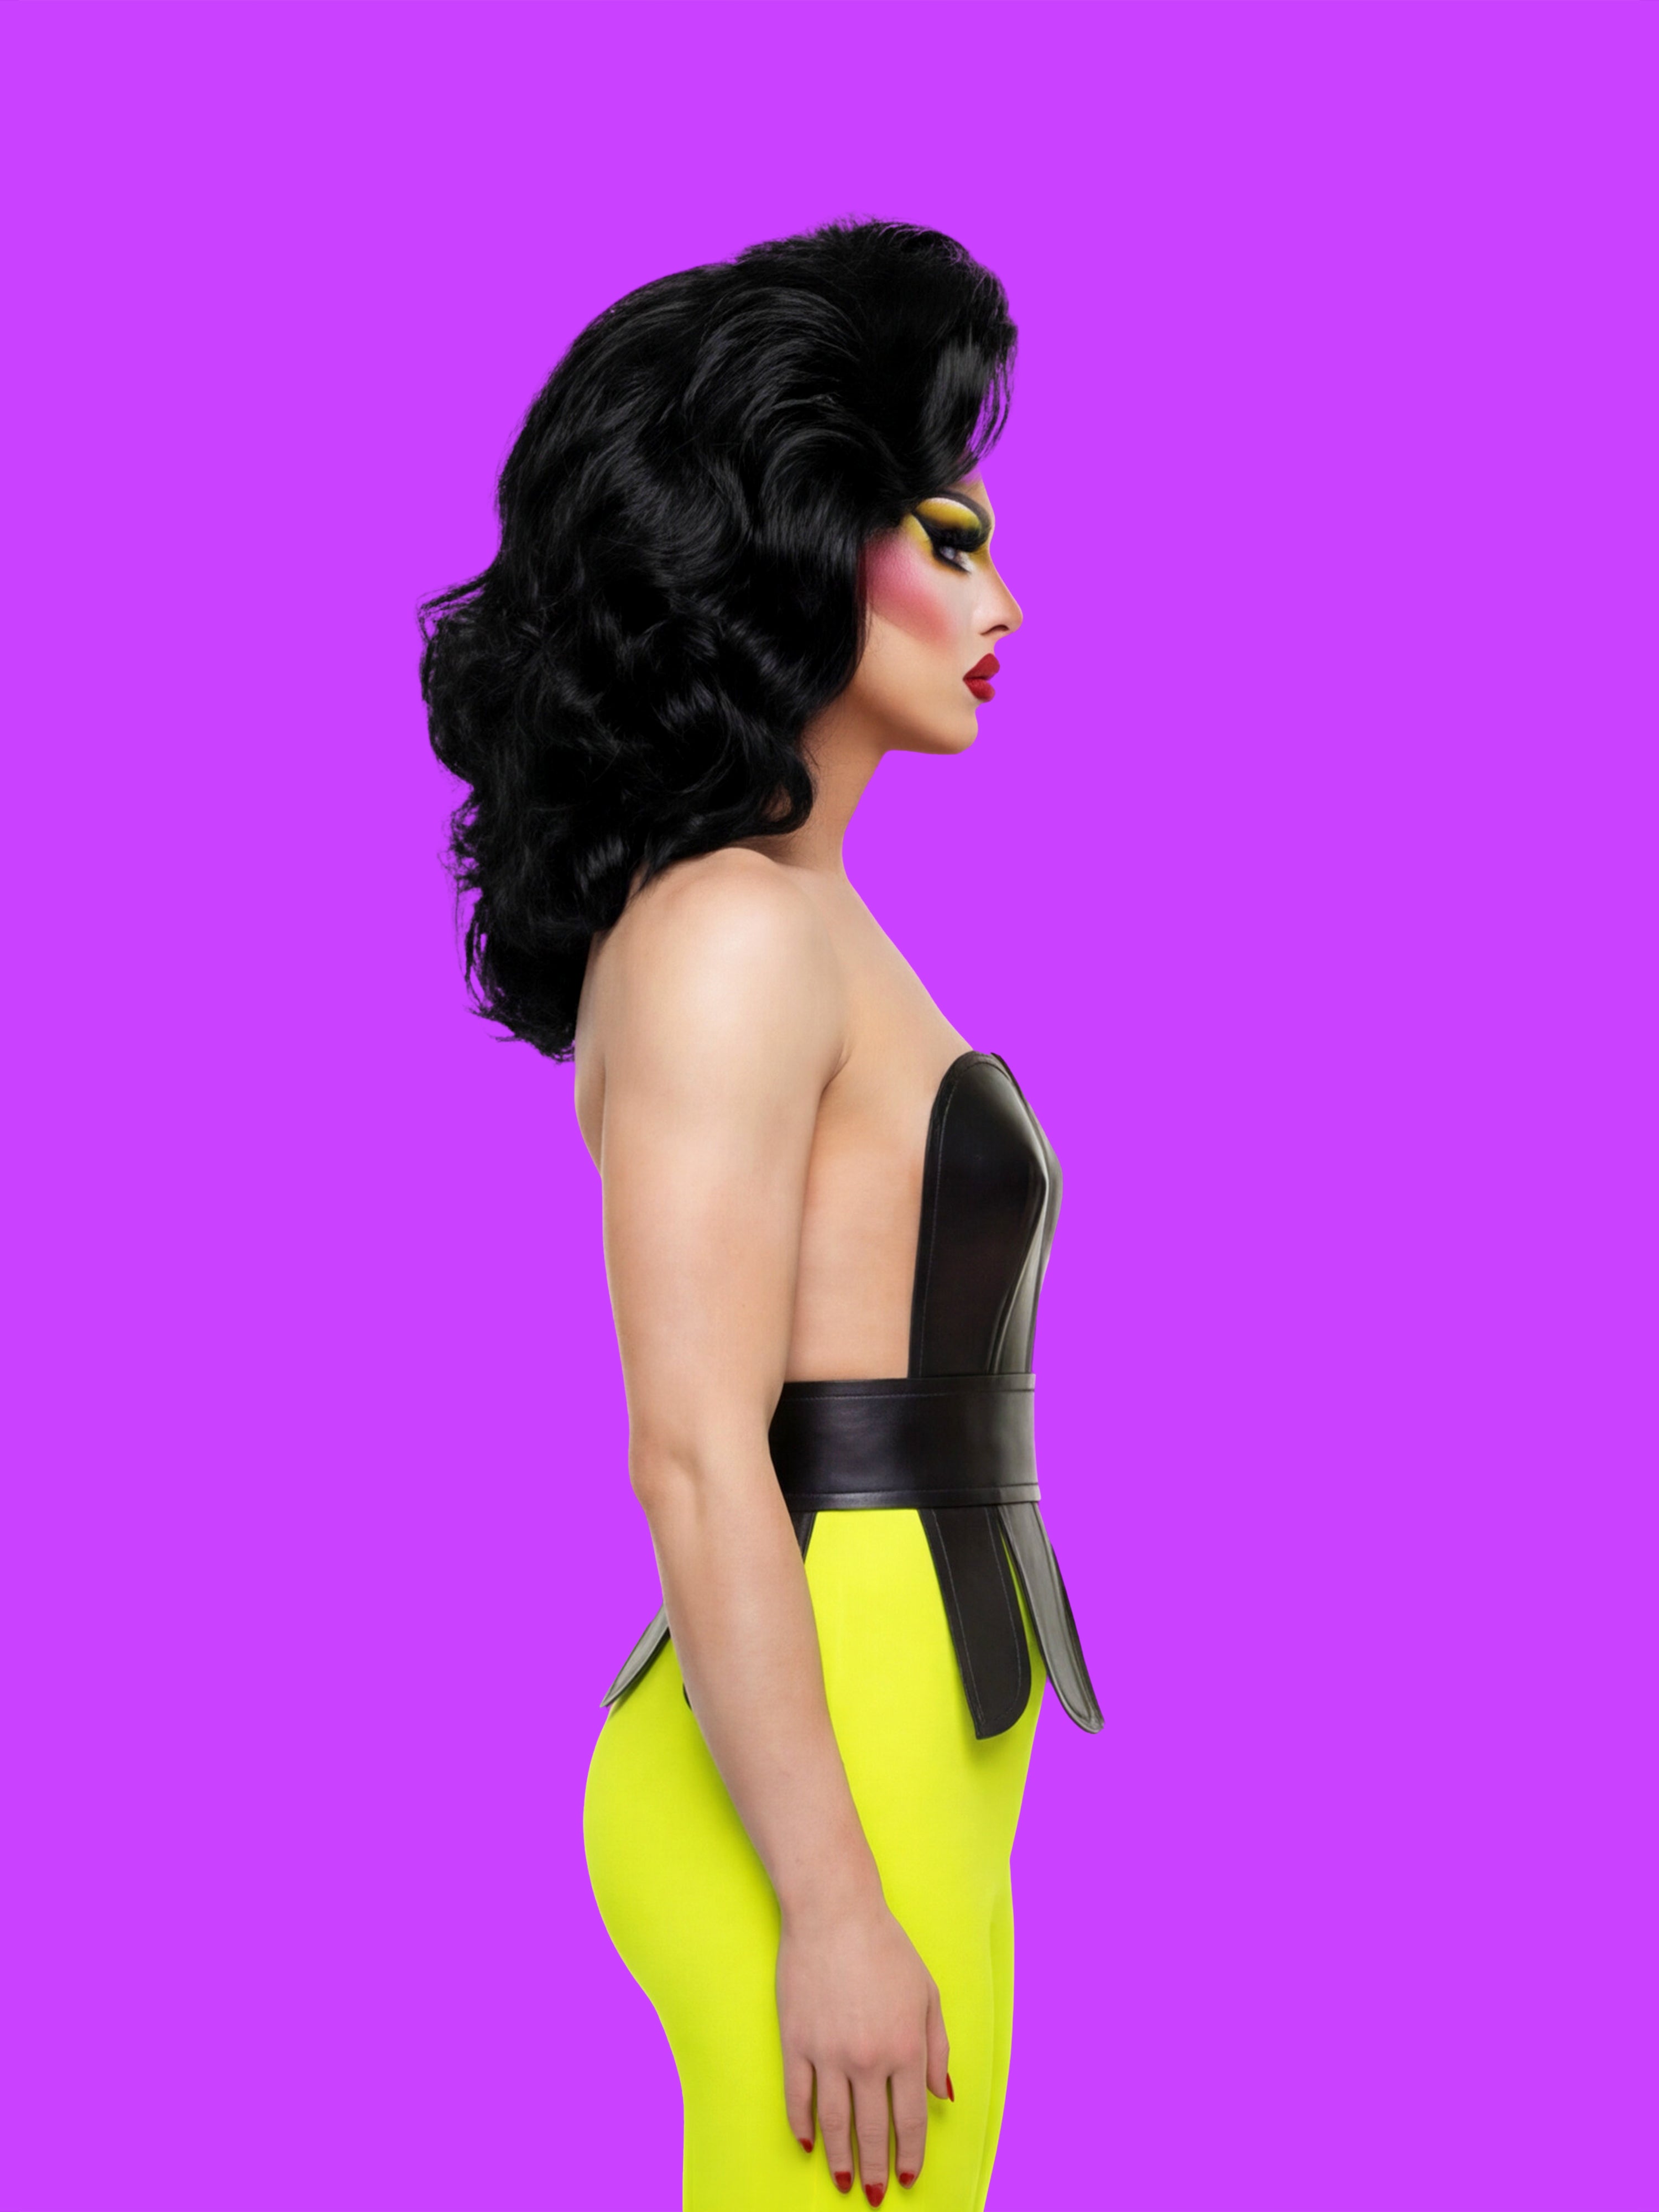
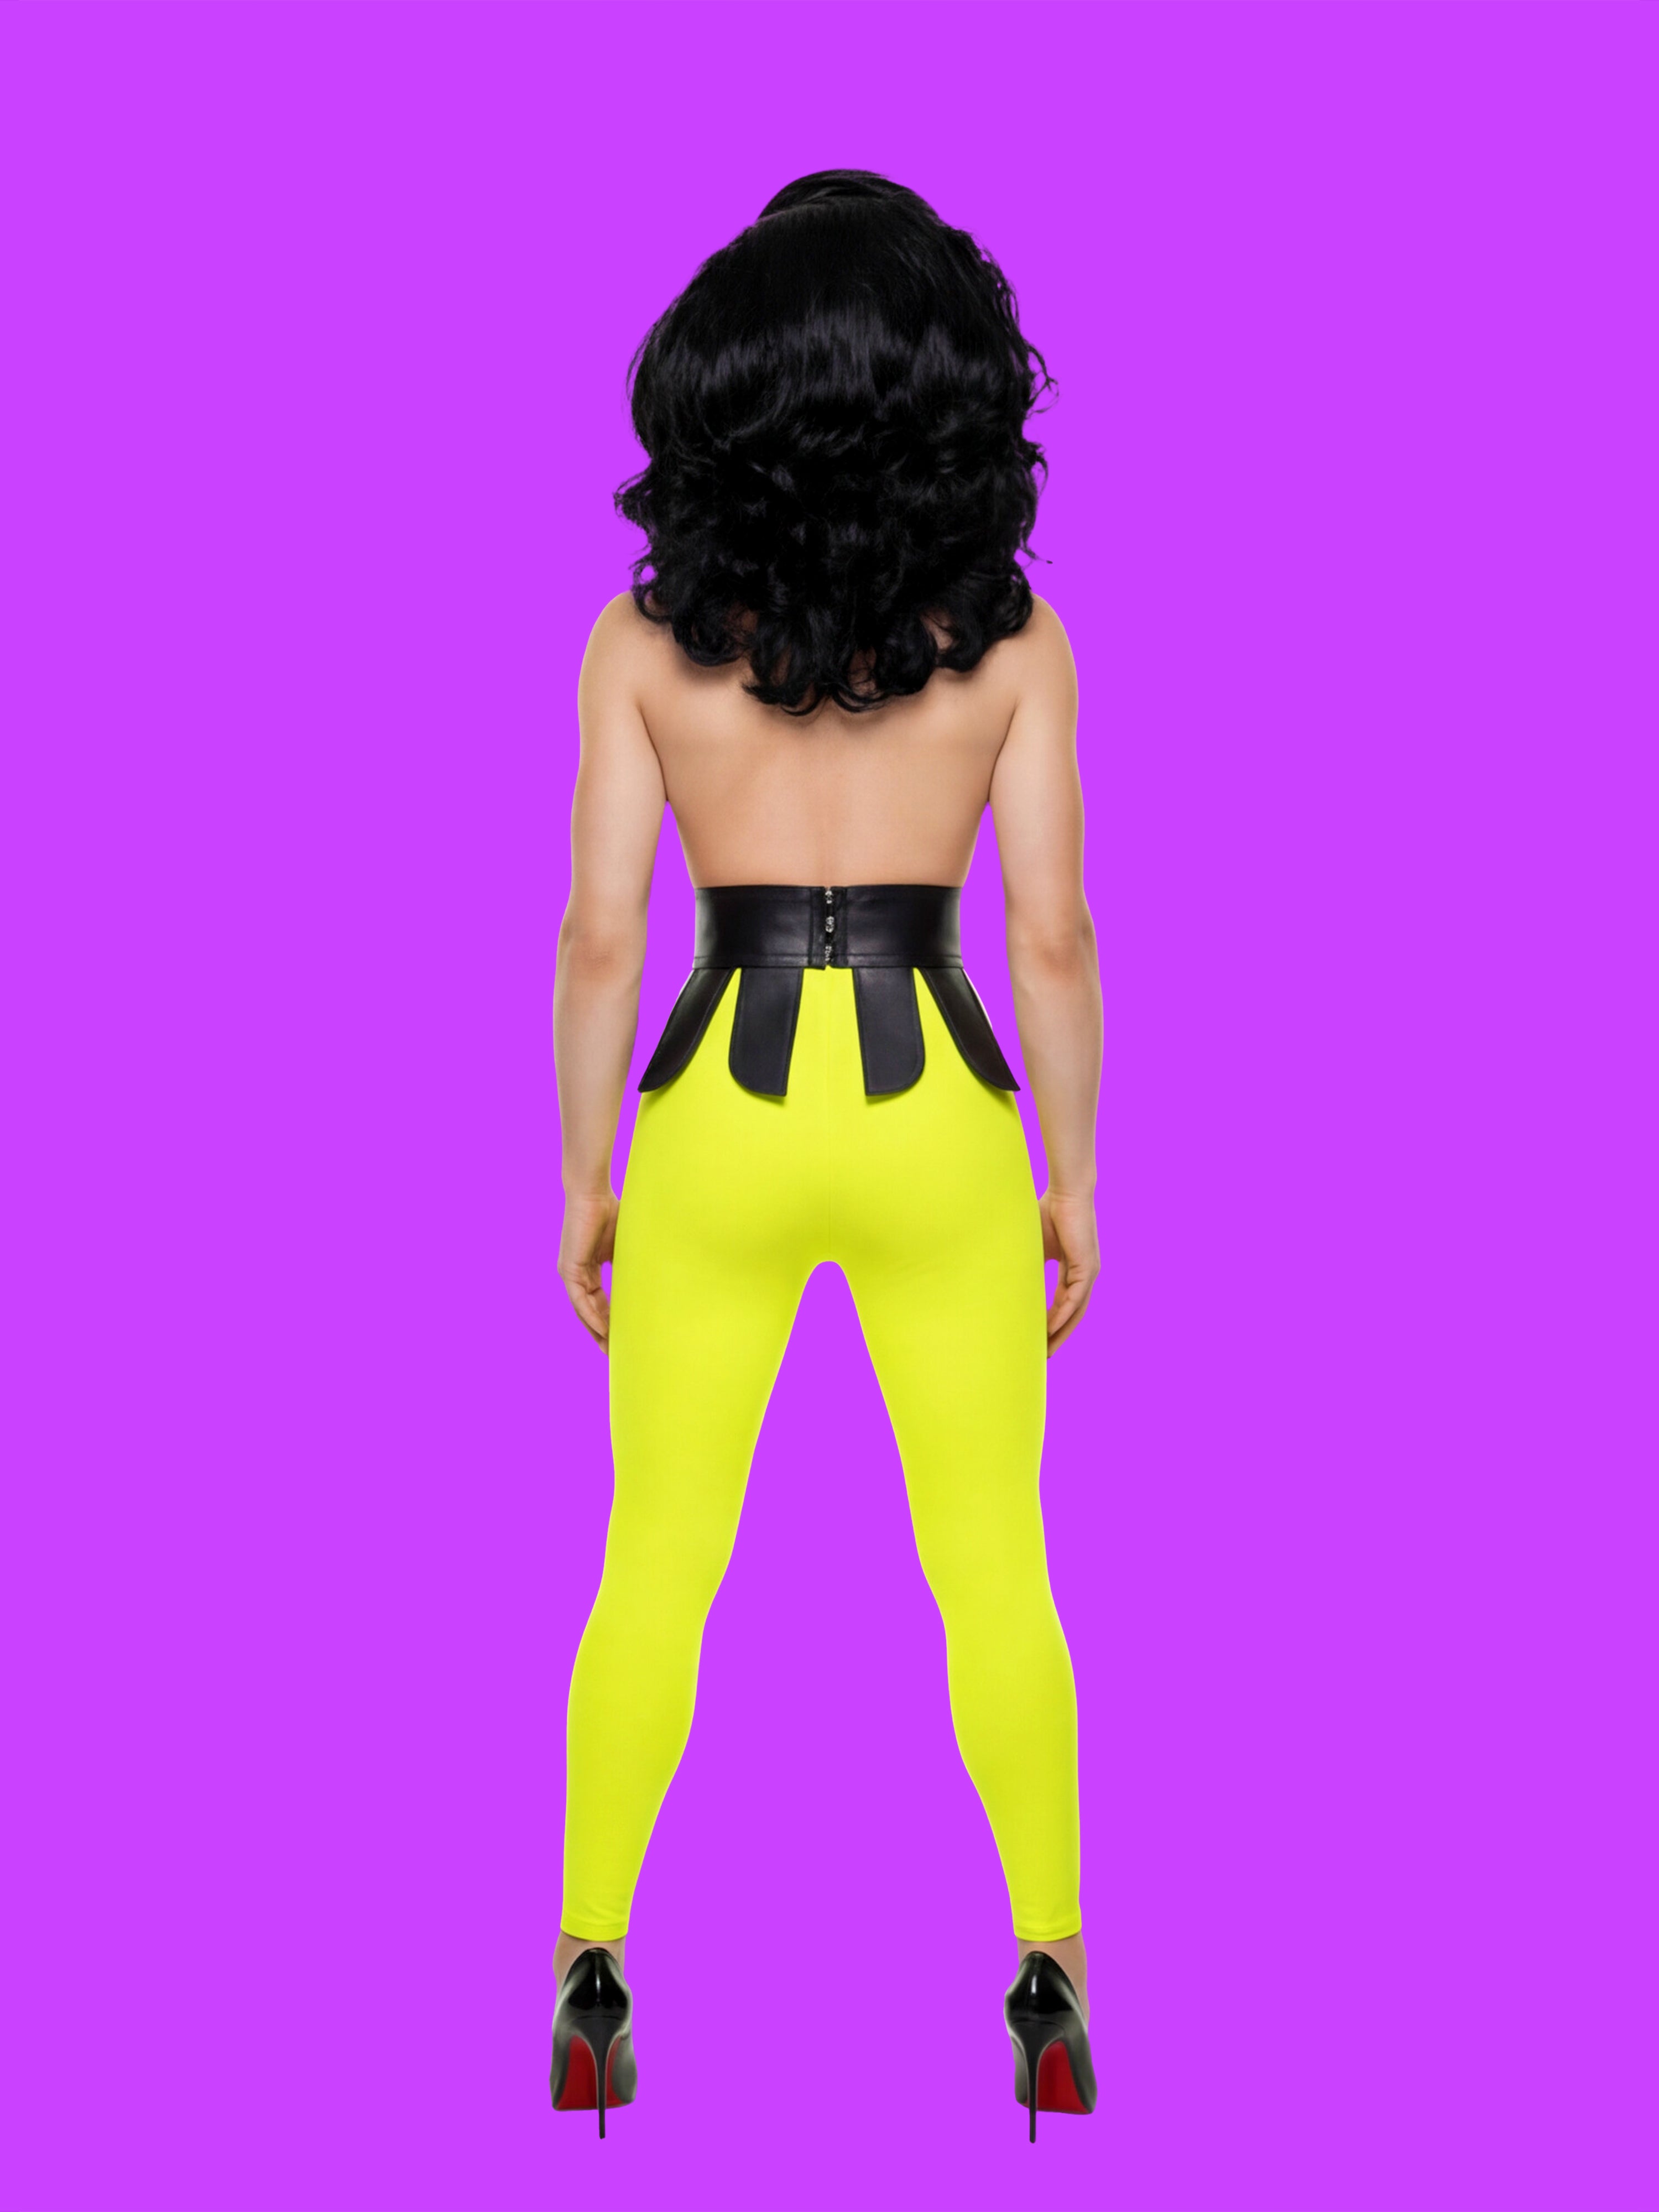
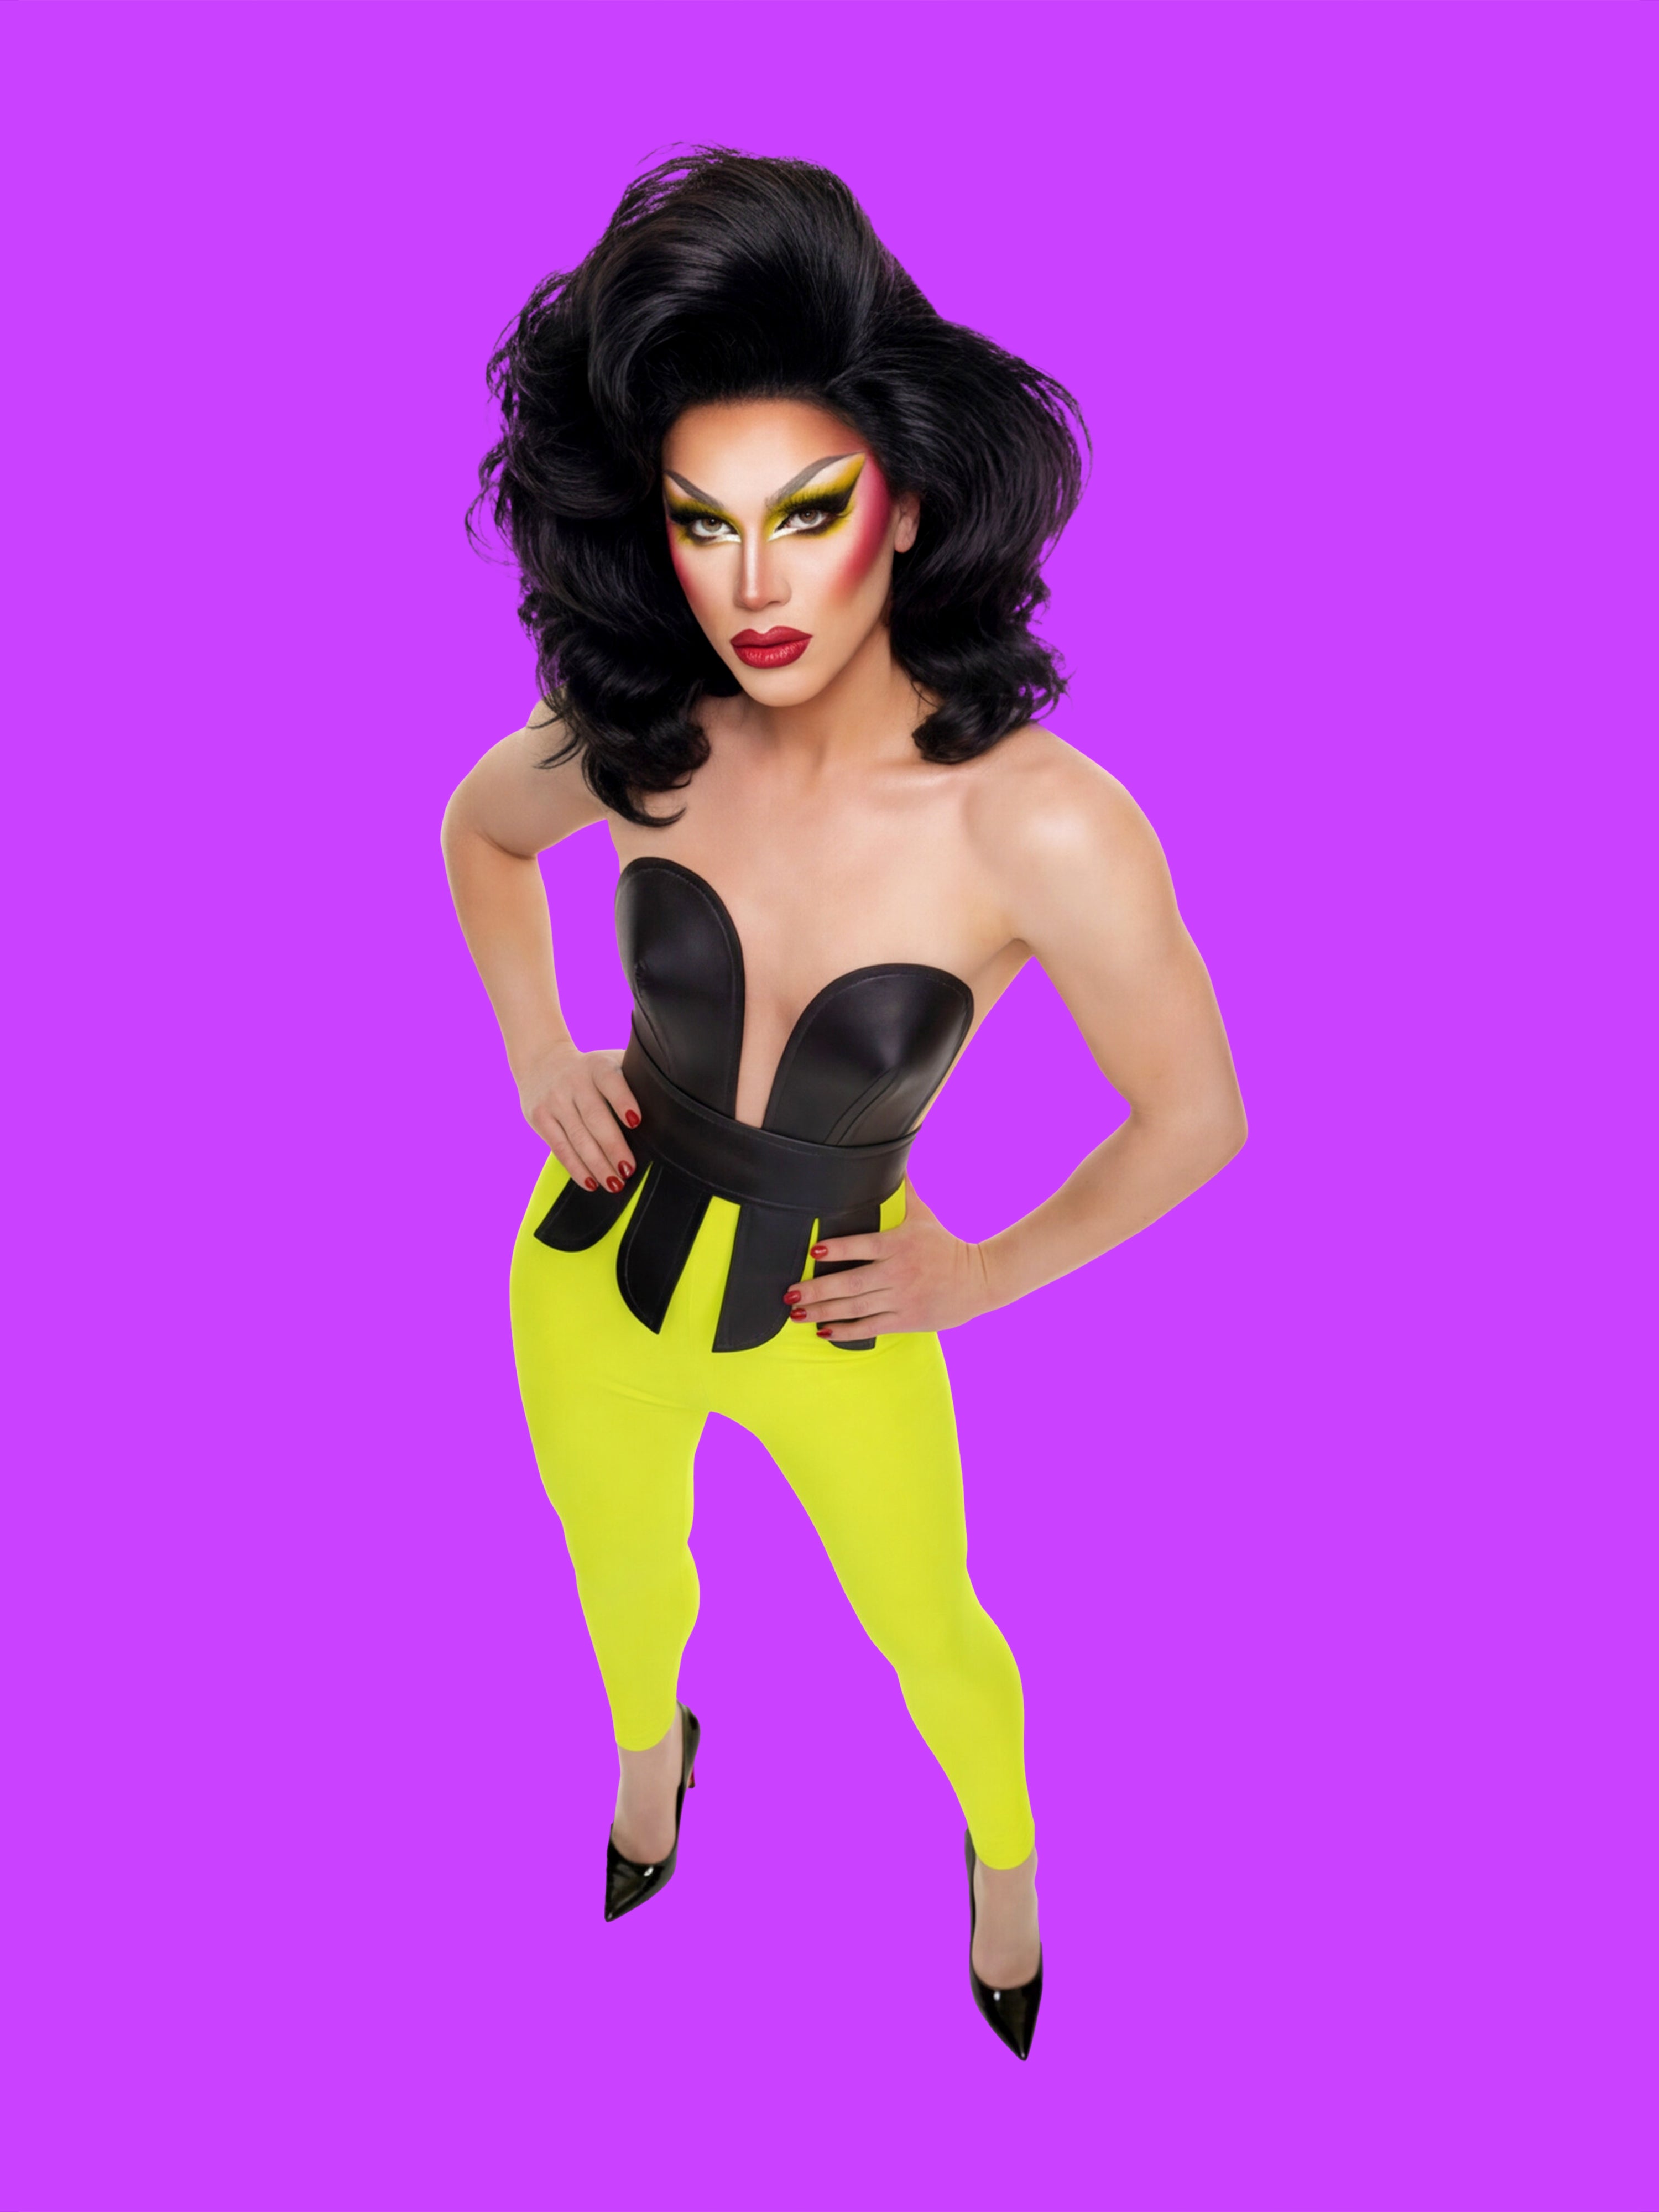
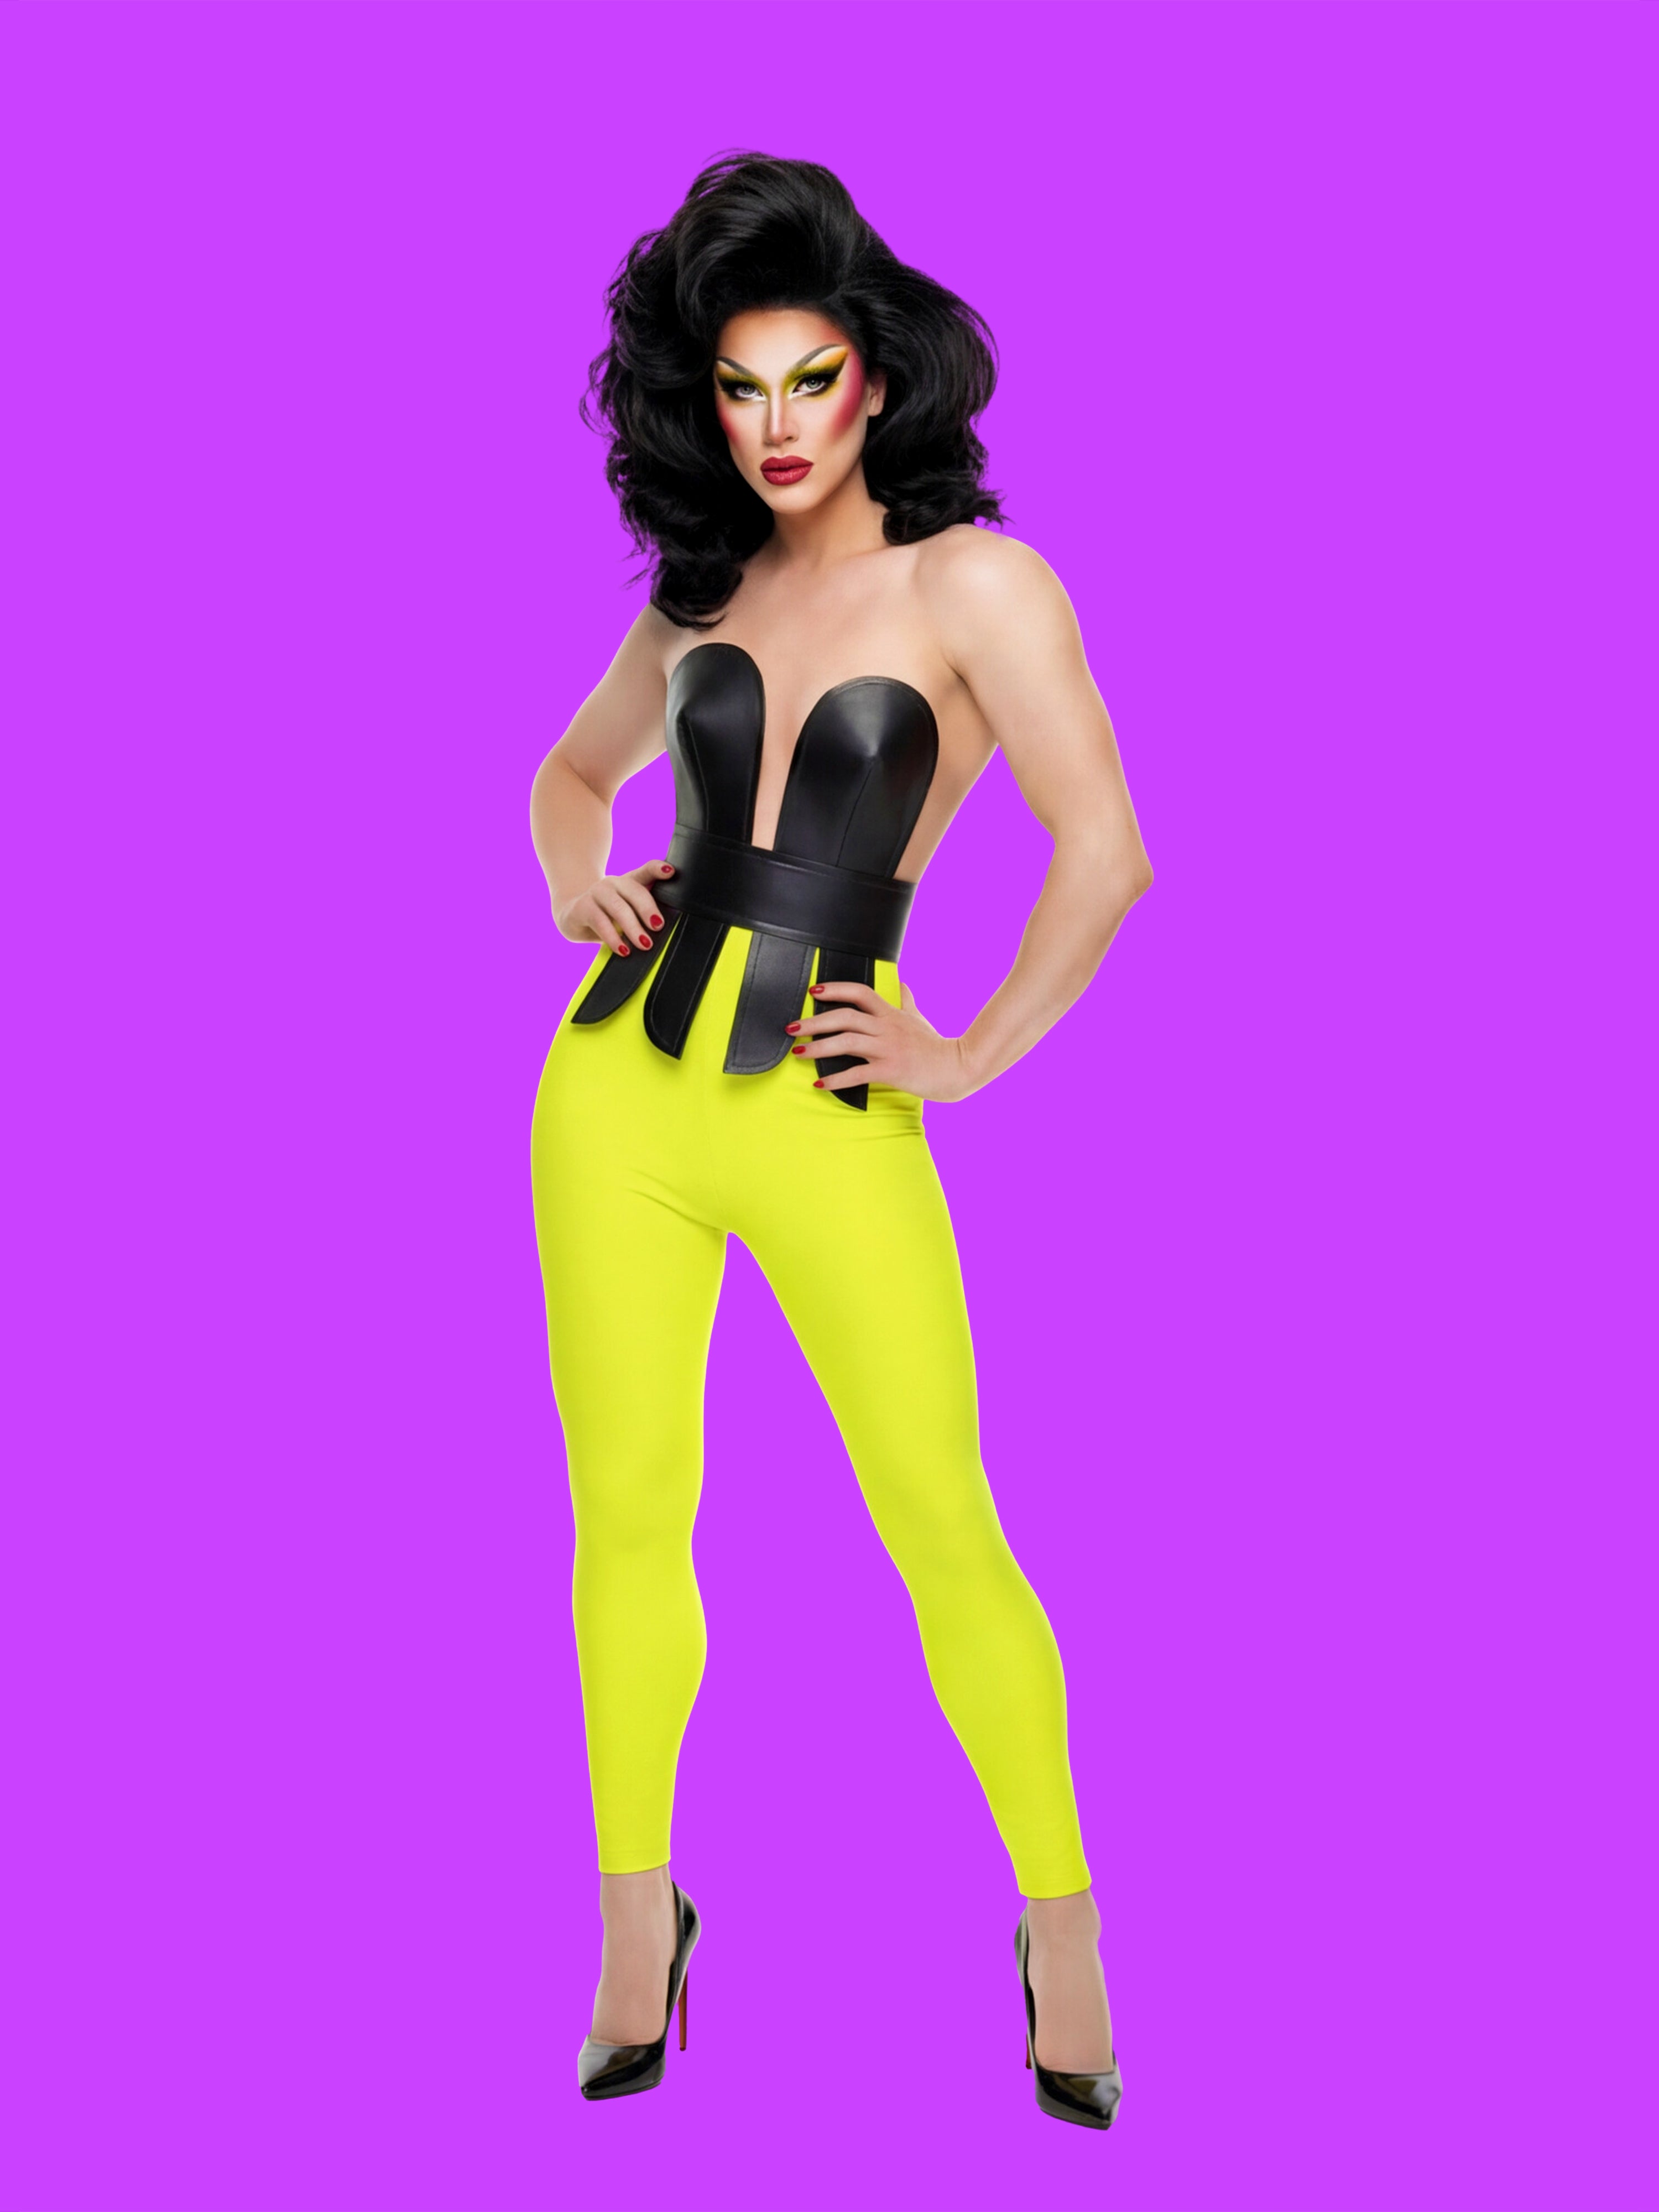
Learn how to sew our Belted Bust Ribbon Top, a structured vinyl based design made for drag queens and performers who want a sculpted bust shape with a bold belted finish. This tutorial guides you through stacked vinyl construction, boning channels, and precise topstitching to create a clean, professional result.
Fabric Yardage
The fabric yardage below is for fabric bolt widths of 54" or more.
| Size | Fabric |
|---|---|
| XS | .75y |
| S | .75y |
| M | 1y |
| L | 1y |
| XL | 1y |
| 2XL | 1y |
Fabric & Notions
Fabrics
Use non stretch thick vinyl, PVC, or faux leather for the shell and lining.
Notions
- Rigilene plastic sewable boning (6 mm, 3/8 inch, or similar width)
- Eyelets and grommets for the center back
- Lacing ribbon or cord for the back closure
- Optional:Double folded Bias tape or bias trim for finishing edges
- Optional: Fusible interfacing if you use light-weight non-stretch fabrics
Sizing Details
This pattern is drafted in our exclusive drag queen sizes from XS to 2XL, created to fit padded bodies with broader shoulders, arms, and legs. While this pattern is made with drag performers in mind, it can be worn by any gender who matches the size measurements provided below.
| Size | Mens Chest | Drag Chest (Padded) | Mens Waist | Drag Waist (Corseted) | Mens Hip | Drag Hip (Padded) | Height |
|---|---|---|---|---|---|---|---|
| XS | 33-35 | 36-38 | 27.5-29.5 | 24.5-26.5 | 32.5-34.5 | 38-40 | 70 |
| S | 35-37 | 38-40 | 29.5-31.5 | 26.5-28.5 | 34.5-36.5 | 40-42 | 70 |
| M | 39-41 | 42-44 | 33.5-35.5 | 30.5-32.5 | 38.5-40.5 | 44-46 | 70 |
| L | 43-45 | 46-48 | 37.5-39.5 | 34.5-36.5 | 42-44 | 47.5-49.5 | 70 |
| XL | 47-49 | 50-52 | 42.5-44.5 | 39.5-41.5 | 45-47 | 50.5-52.5 | 70 |
| 2XL | 51-53 | 55-57 | 47.5-49.5 | 44.5-46.5 | 48-50 | 54.5-56.5 | 70 |
Sewing Instructions
Color Guide

Unique Sewing Overview
This pattern is drafted without seam allowance and is meant to be sewn in sturdy materials such as vinyl, PVC, faux leather, or other thick fabrics. The shell and lining are stacked with their wrong sides touching, and the structure is built by creating topstitched boning channels with the boning sandwiched between the layers. Lightweight non stretch fabrics are not recommended, though you can experiment if you add stabilizing fusible interfacing. This construction method differs from ohter patterns, so read each step carefully before proceeding.
The vinyl of the lining touching the skin, combined with the vertical bones inside, will help the garment stay upright on the body.
This project is intended for a heavy duty, denim or industrial sewing machine since you will be working with stacked vinyl or faux leather and multiple topstitch layers.
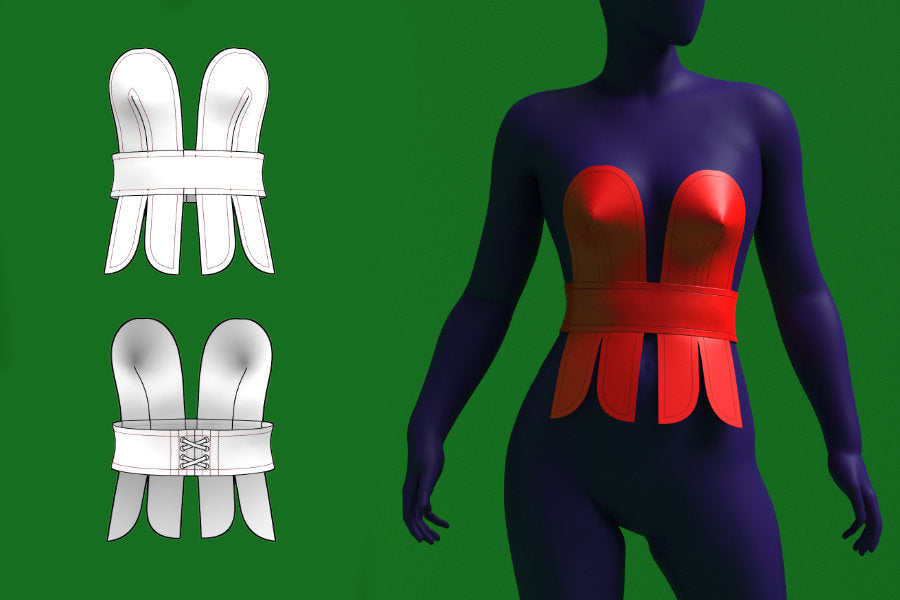
Paper Pattern Pieces
This pattern comes with two paper pattern pieces.
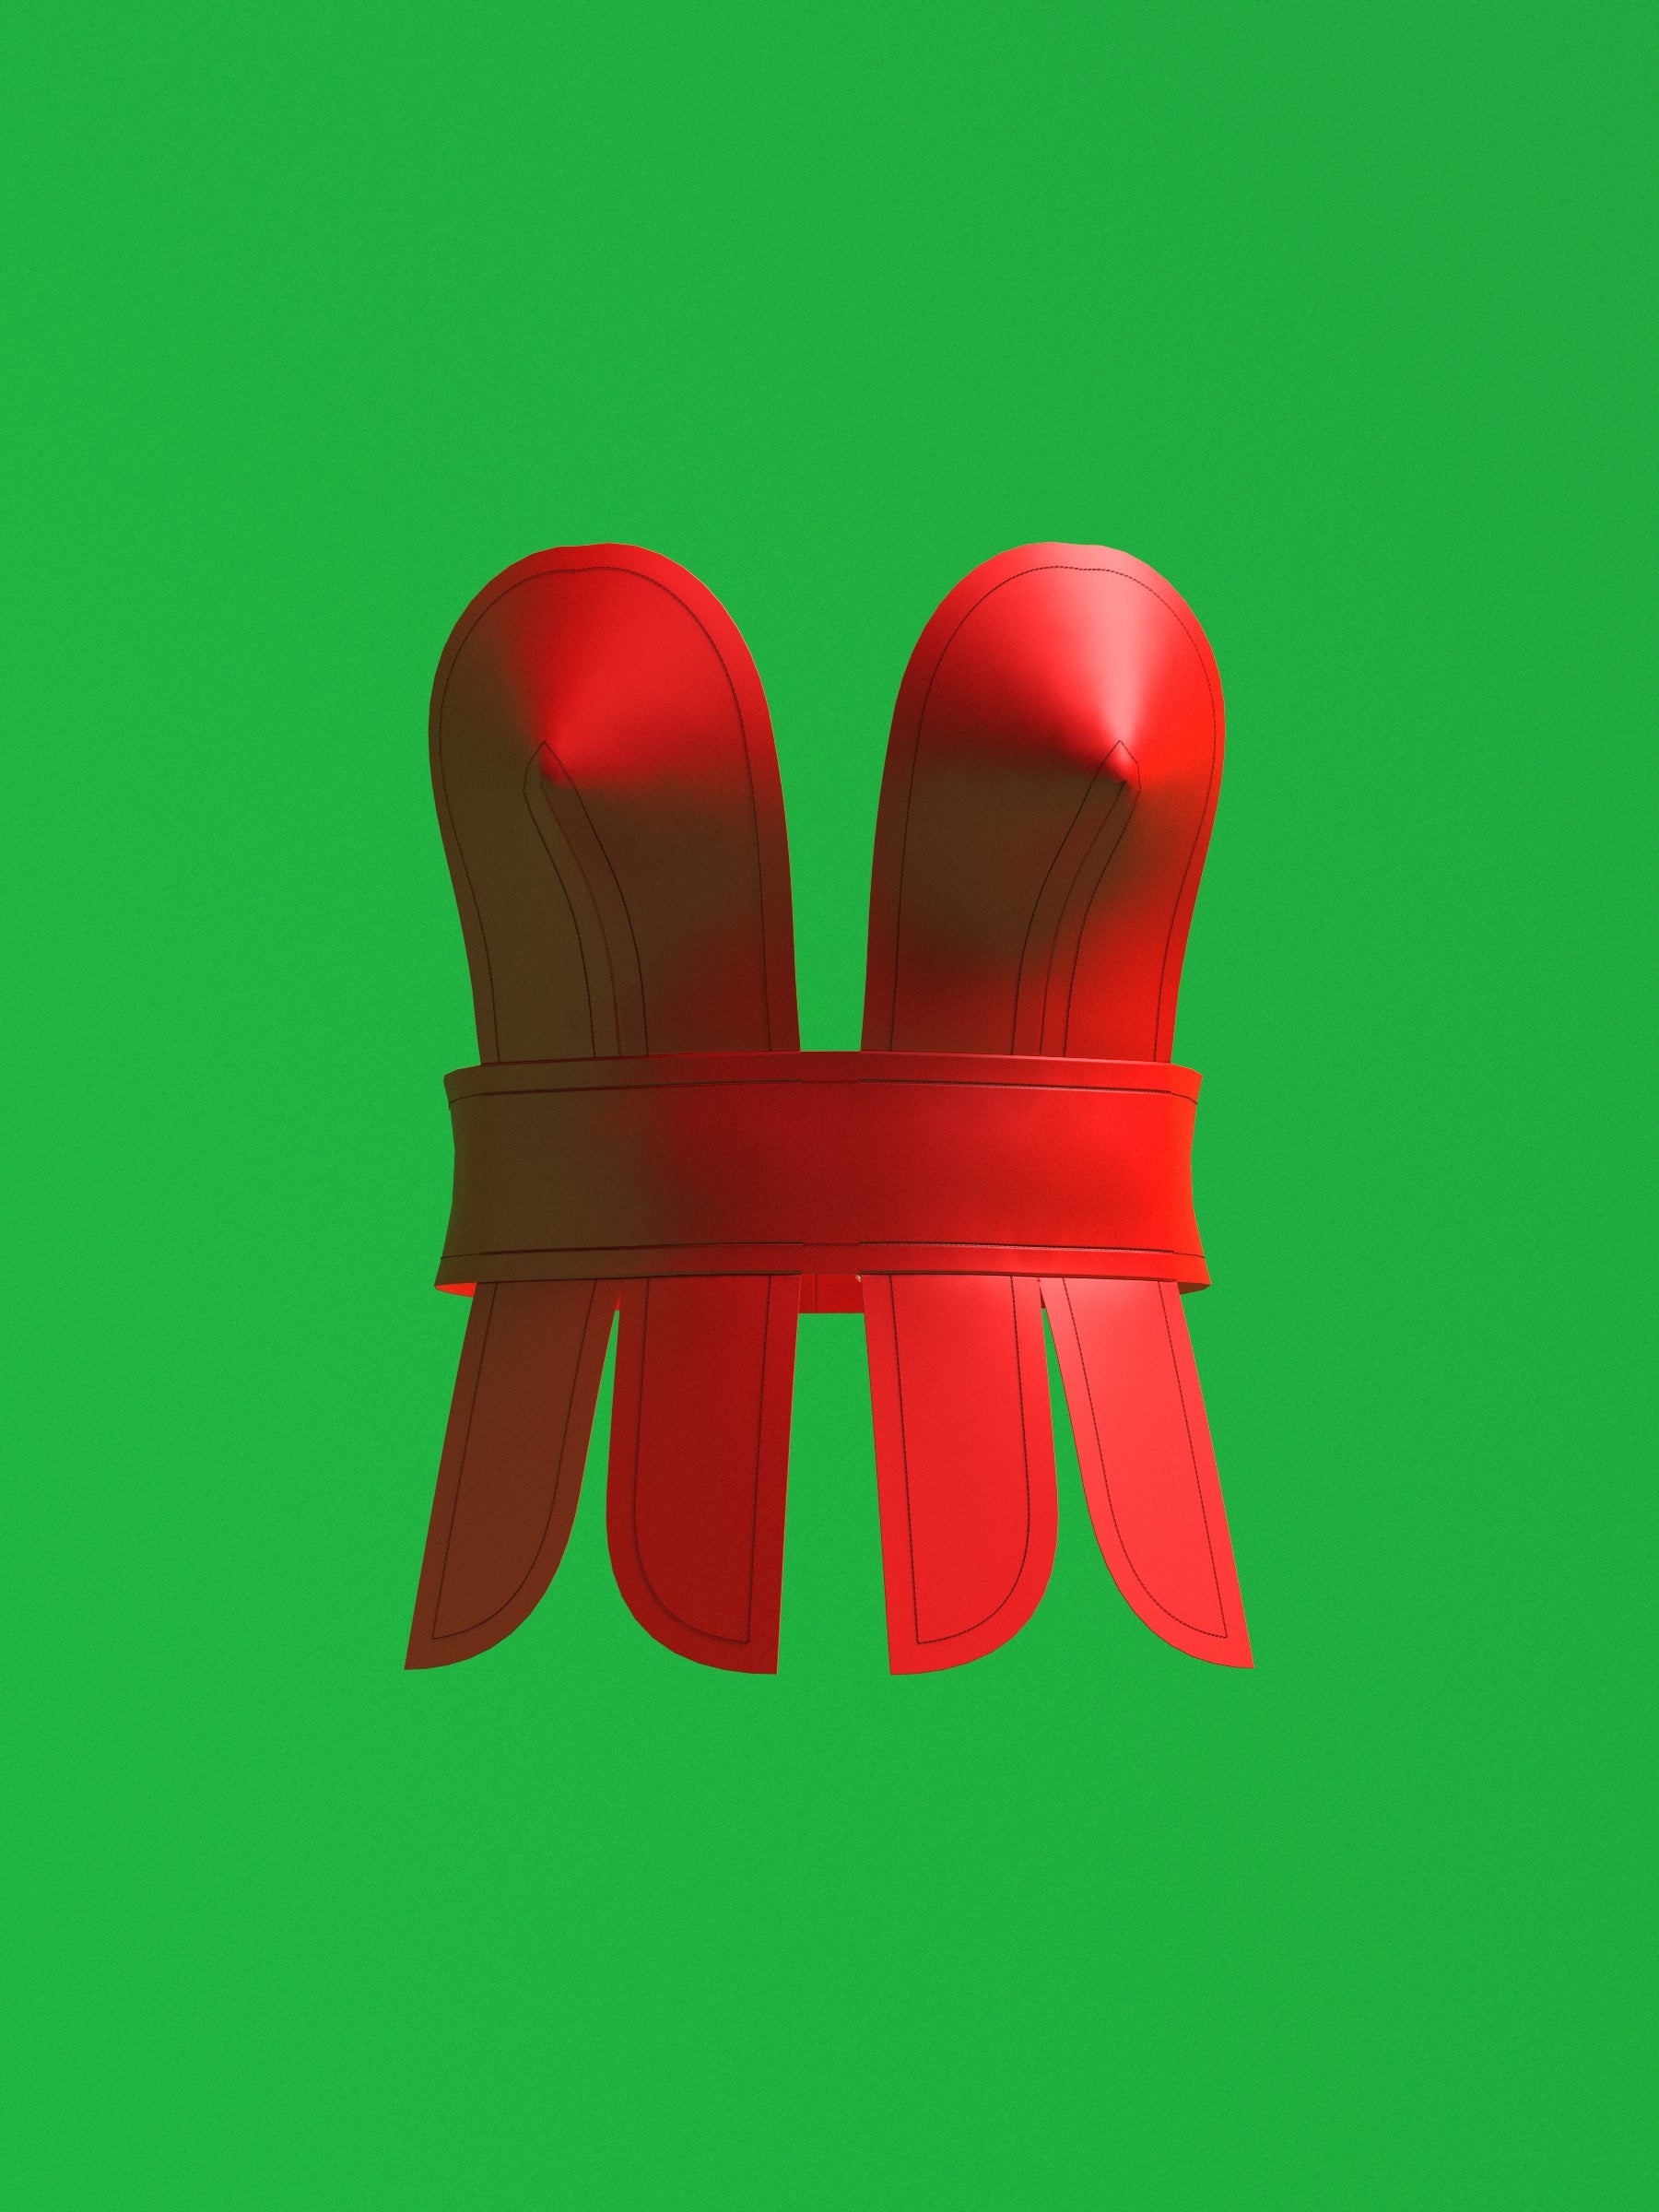
The first piece is the Bust Ribbon. It is placed on the fold and used for both the shell and the lining. You will cut two on the fold for the shell and two on the fold for the lining. Each cut represents one half of the garment, so you will have a complete mirrored set for both layers.
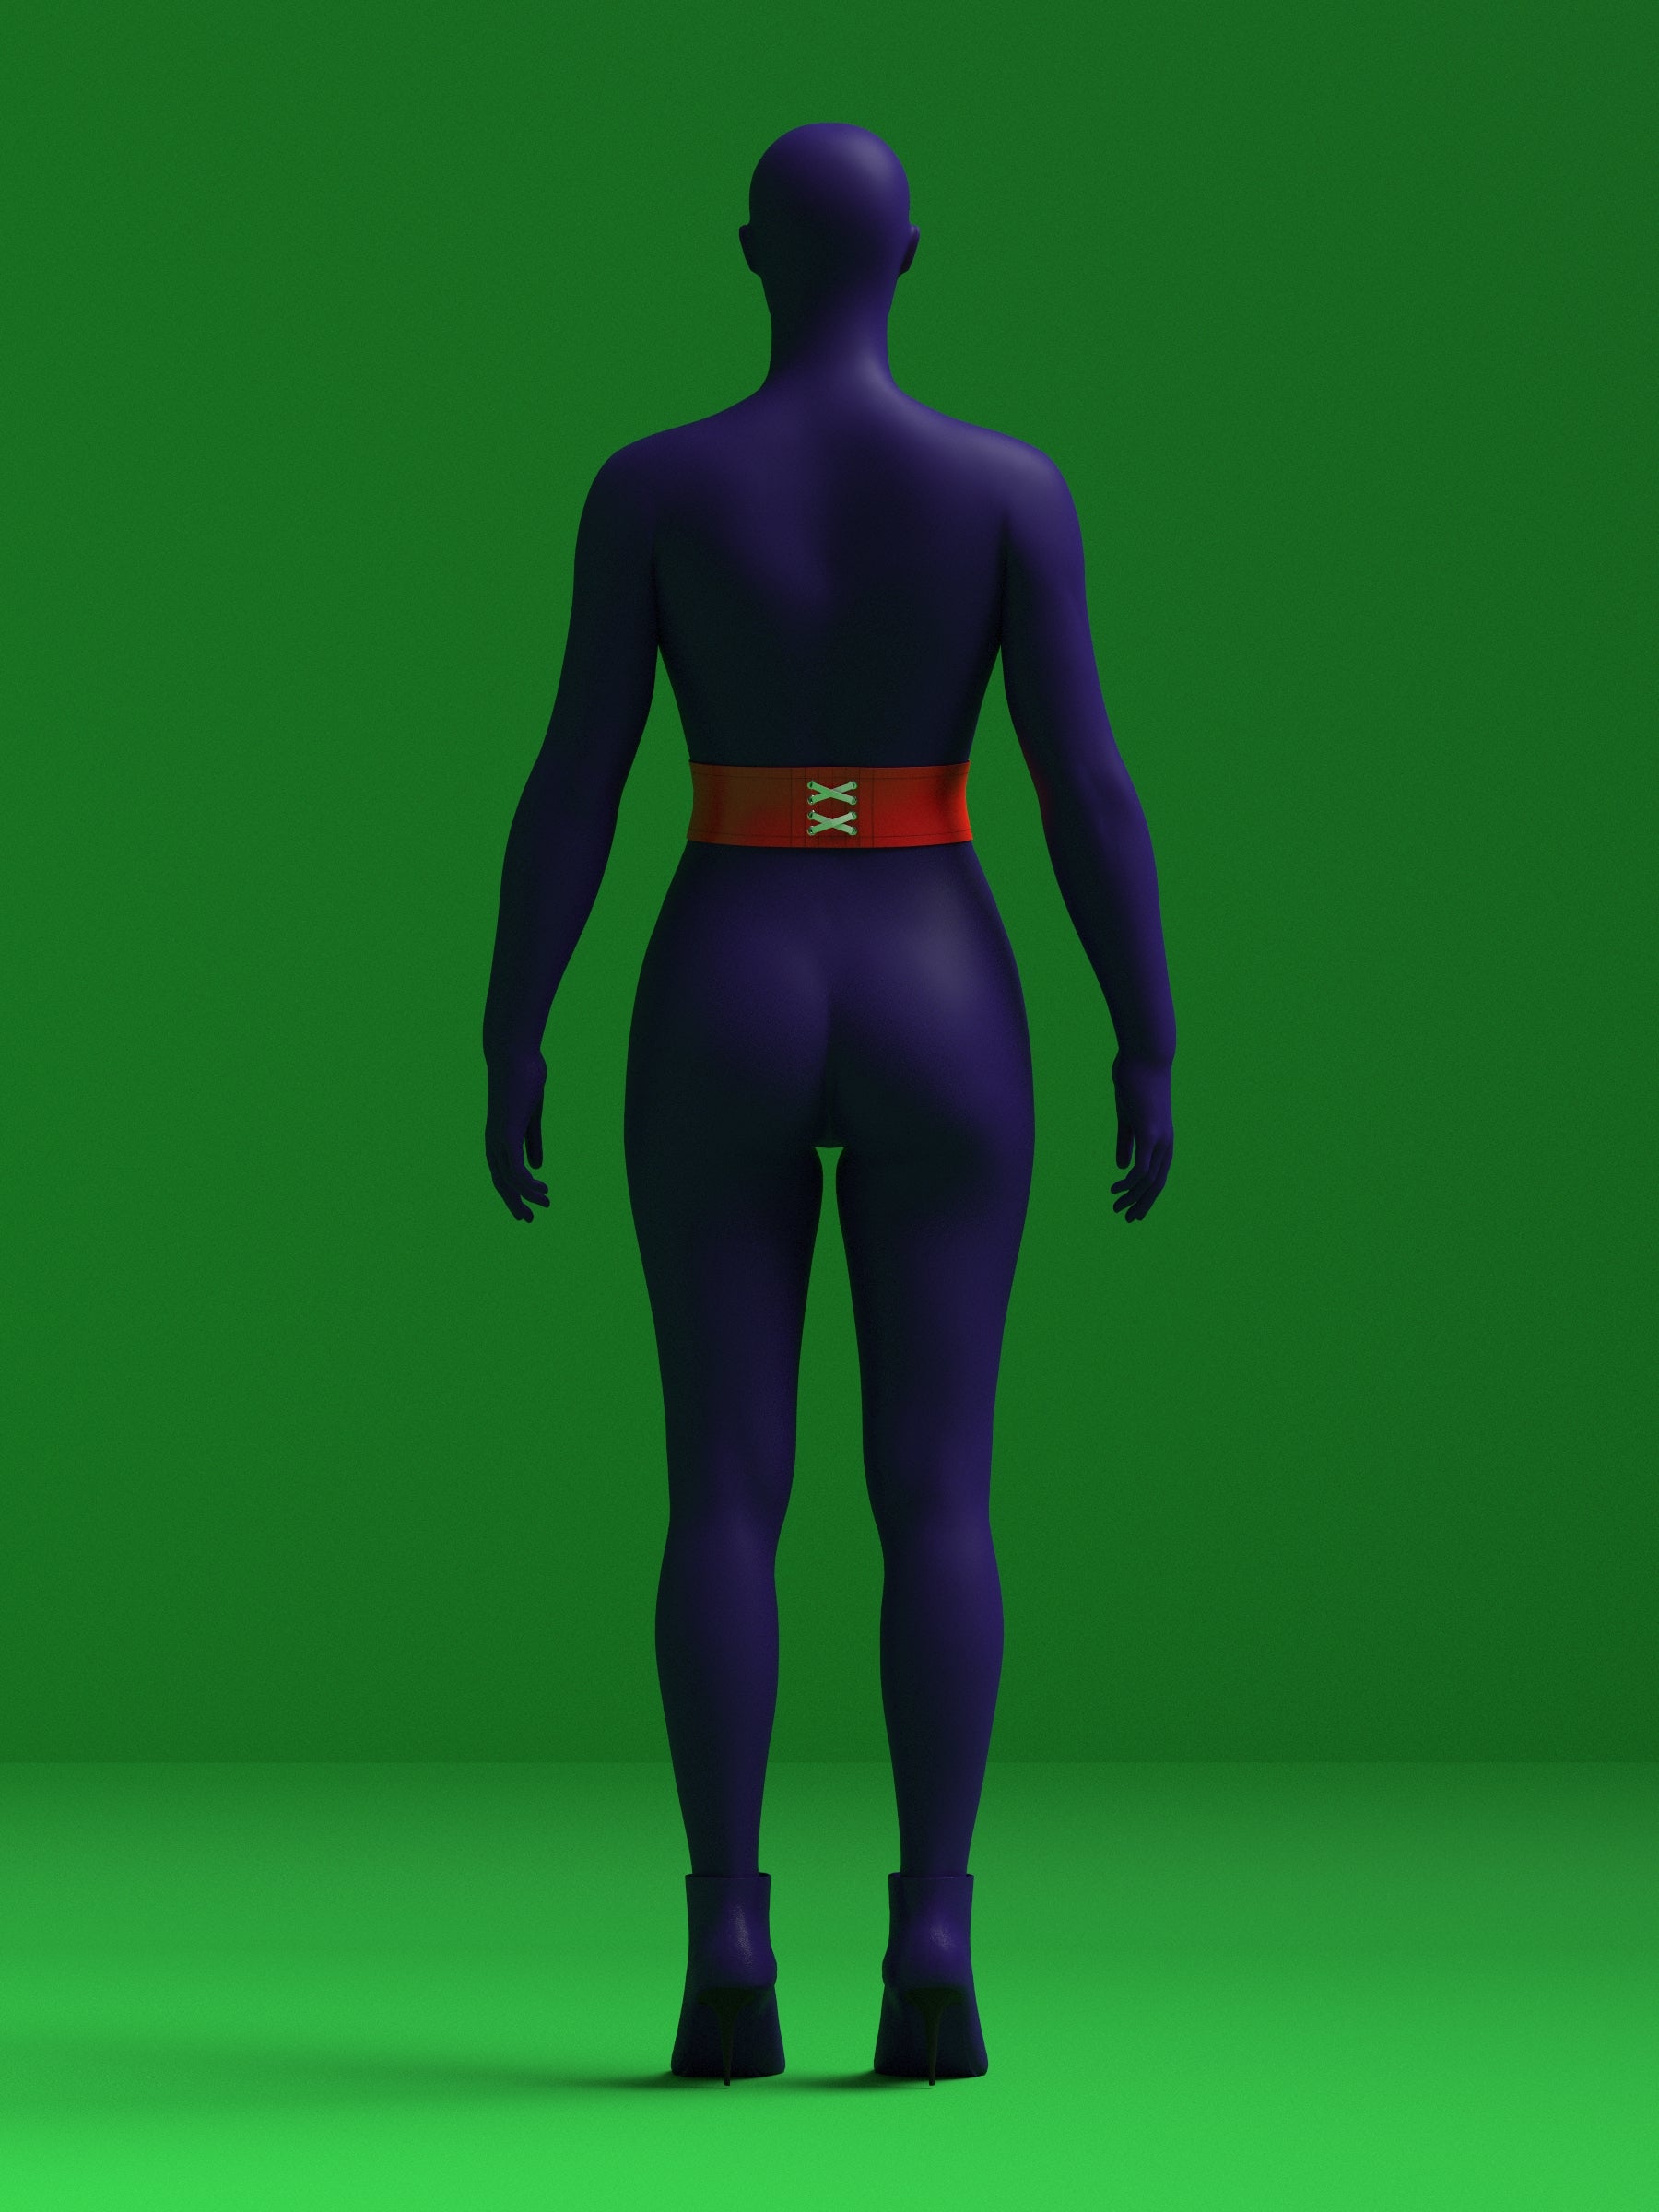
The second piece is the Belt. This piece is also placed on the fold. You will cut one for the shell and one for the lining. The belt will later be finished with eyelets at the back so it can lace up.

Sewing the Shell for Bust Ribbon Piece 1
Use vinyl, PVC, faux leather, or another sturdy fabric for this step. Bring the two center edges together with your hands so they meet at the bust apex. Feed both sides through the machine with the raw edges touching, right side up, and sew them together using a zigzag stitch.
Sew straight down past the lowest horizontal guideline where the belt will overlap. You can continue the seam a little farther to your desired length. Use chalk or washable markers to guide placement. Do not cut notches into vinyl or faux leather. After the first pass, sew several more zigzag rows directly over the same seam to secure and keep the fabric stable.

Repeat the same process for the opposite shell piece and for both lining pieces. The lining should use the same vinyl fabric.

Assembling the Bust Ribbon Piece 1
Gather the shell and lining pieces for the sewn number 1 units. Stack them wrong sides together and use clips rather than pins to avoid puncturing vinyl or faux leather. Align all edges carefully so the layers sit perfectly on top of each other.
Edge stitch around the outer sides and the top curved edge. Use a narrow edge stitch, keeping the seam as close to the edge as possible since this is only to hold the layers together. Also add a narrow edge stitch along both sides of the center zigzag seam to lock the layers in place there. Leave the bottom edge unsewn because the boning will be inserted from this opening.
Begin creating tunnels for boning by stitching straight channels along the outer sides and on each side of the center apex seam. Each channel should be about a half inch wide for 6 to 8 millimeters boning or slightly wider than your selected boning.

Inserting Boning
After the side and center tunnels are sewn, measure your boning. Use regular plastic rigilene sewable boning because you will stitch across it later. Cut the boning to match the length of each tunnel. The side bones only need to run vertically to help the piece stand upright on the body. They do not need to wrap along the upper curve of the bust. The center apex bones should match the height of your zigzag seam and do not need to extend below the curve at the bottom.
Round the ends with scissors, lightly melt the tips, or apply boning tape so the edges will not puncture the fabric. Insert each bone from the open bottom edge until it sits fully inside its channel.
Once all bones are in place, close the bottom by edge stitching across it. Then continue your topstitching around the entire bottom and top edges to match the tunnel lines. Repeat this full process for the opposite number 1 piece.

Sewing the Belt
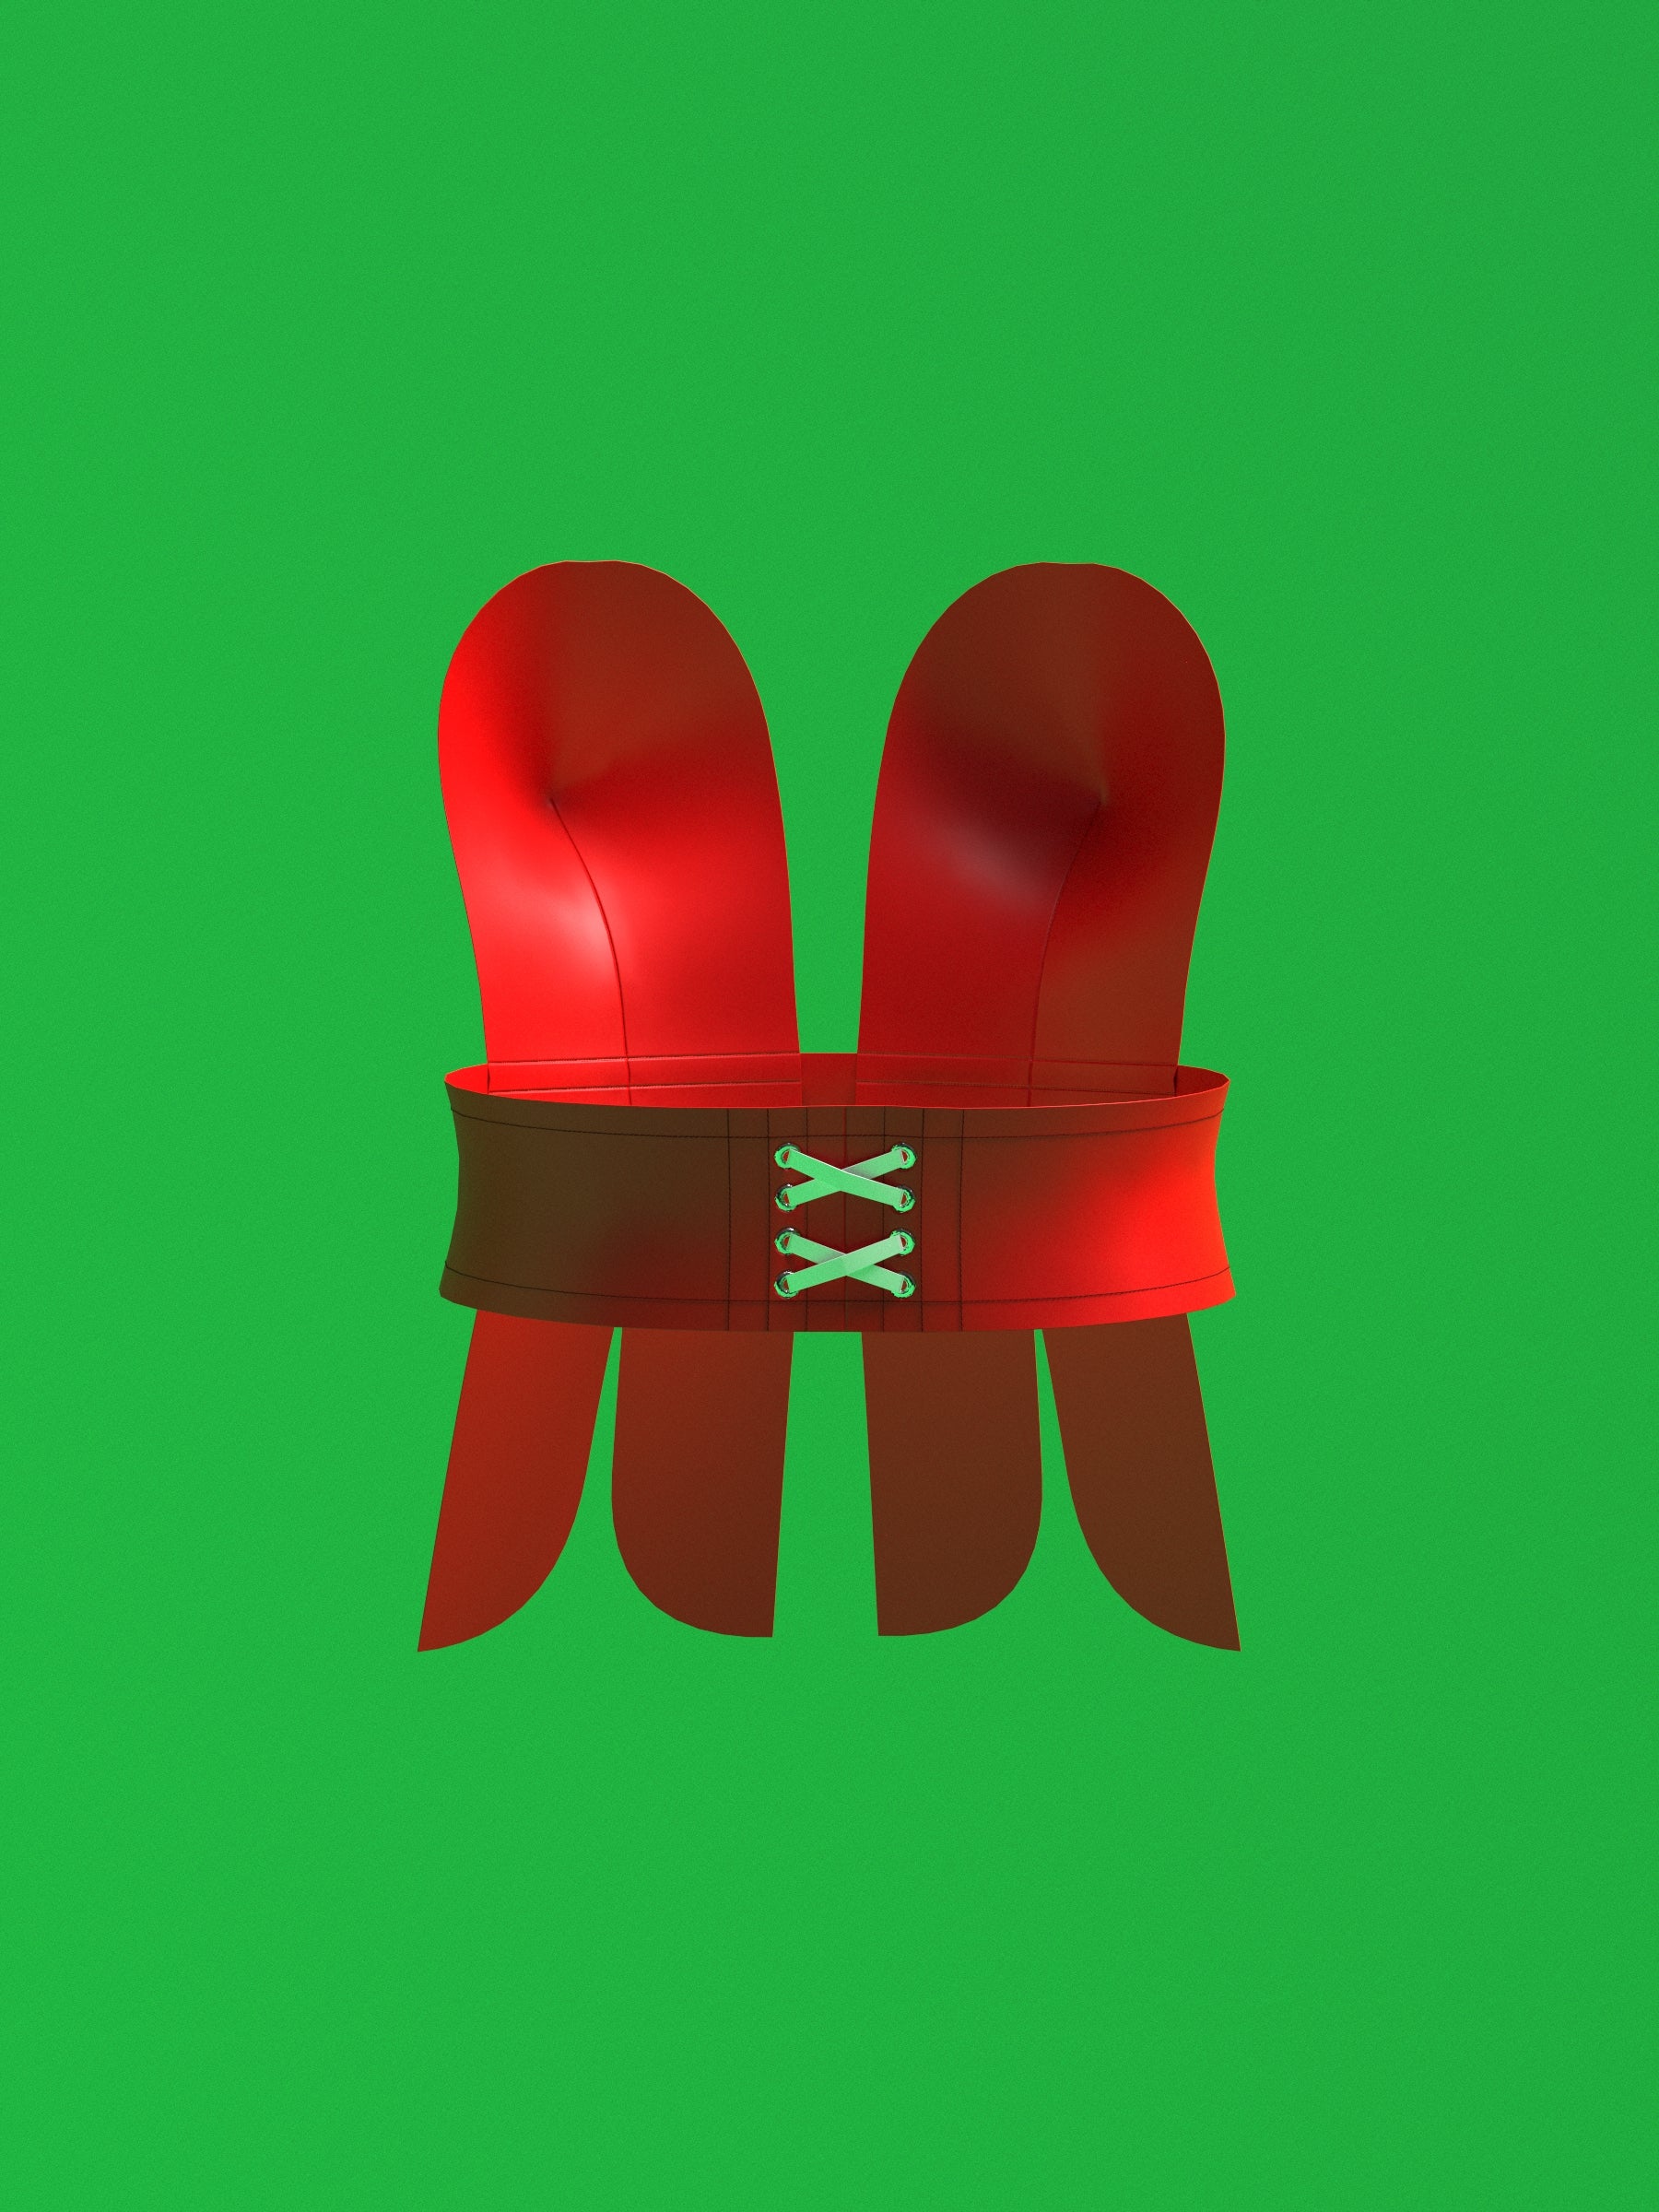
Stack the shell and lining belt pieces wrong sides together. Sew only along the side areas where the lacing support will be. This section uses three vertical tunnels. The inner tunnel is for boning, the center tunnel is where your eyelets will go, and the outer tunnel is for extra boning to support the eyelets. Stitch these tunnels first. You can insert short bones into the outer tunnels if you want added strength.
After the tunnels are created, edge stitch all around the sides, the top, and the bottom to lock the layers together.

Place the finished belt over the two number 1 ribbon pieces. The two ribbon units should sit with a small gap between them, about one inch, though you can adjust this spacing to your preference. Position the belt so it aligns with the horizontal placement lines marked on the pattern. Center it on both sides. Use chalk or washable markers to guide placement. Do not cut notches into vinyl or faux leather. You can also use double folded tape, at the center of the belt, to hold the belt in place as it's topstitched.
Once positioned, topstitch straight down through the belt and the ribbon layers to secure it. Repeat this stitching at the top and bottom edges of the belt. Go slowly because this will be a thick stack of materials. You may need to hand walk the needle on a heavy duty machine. Use a strong denim thread or another heavy thread for stability.

Finish by adding your eyelets to the center tunnel of the belt and lace it with your cord.

Get the Pattern