How to Sew a Mad Scientist Lab Coat Drag Halloween Costume
Jump to InstructionsOverview
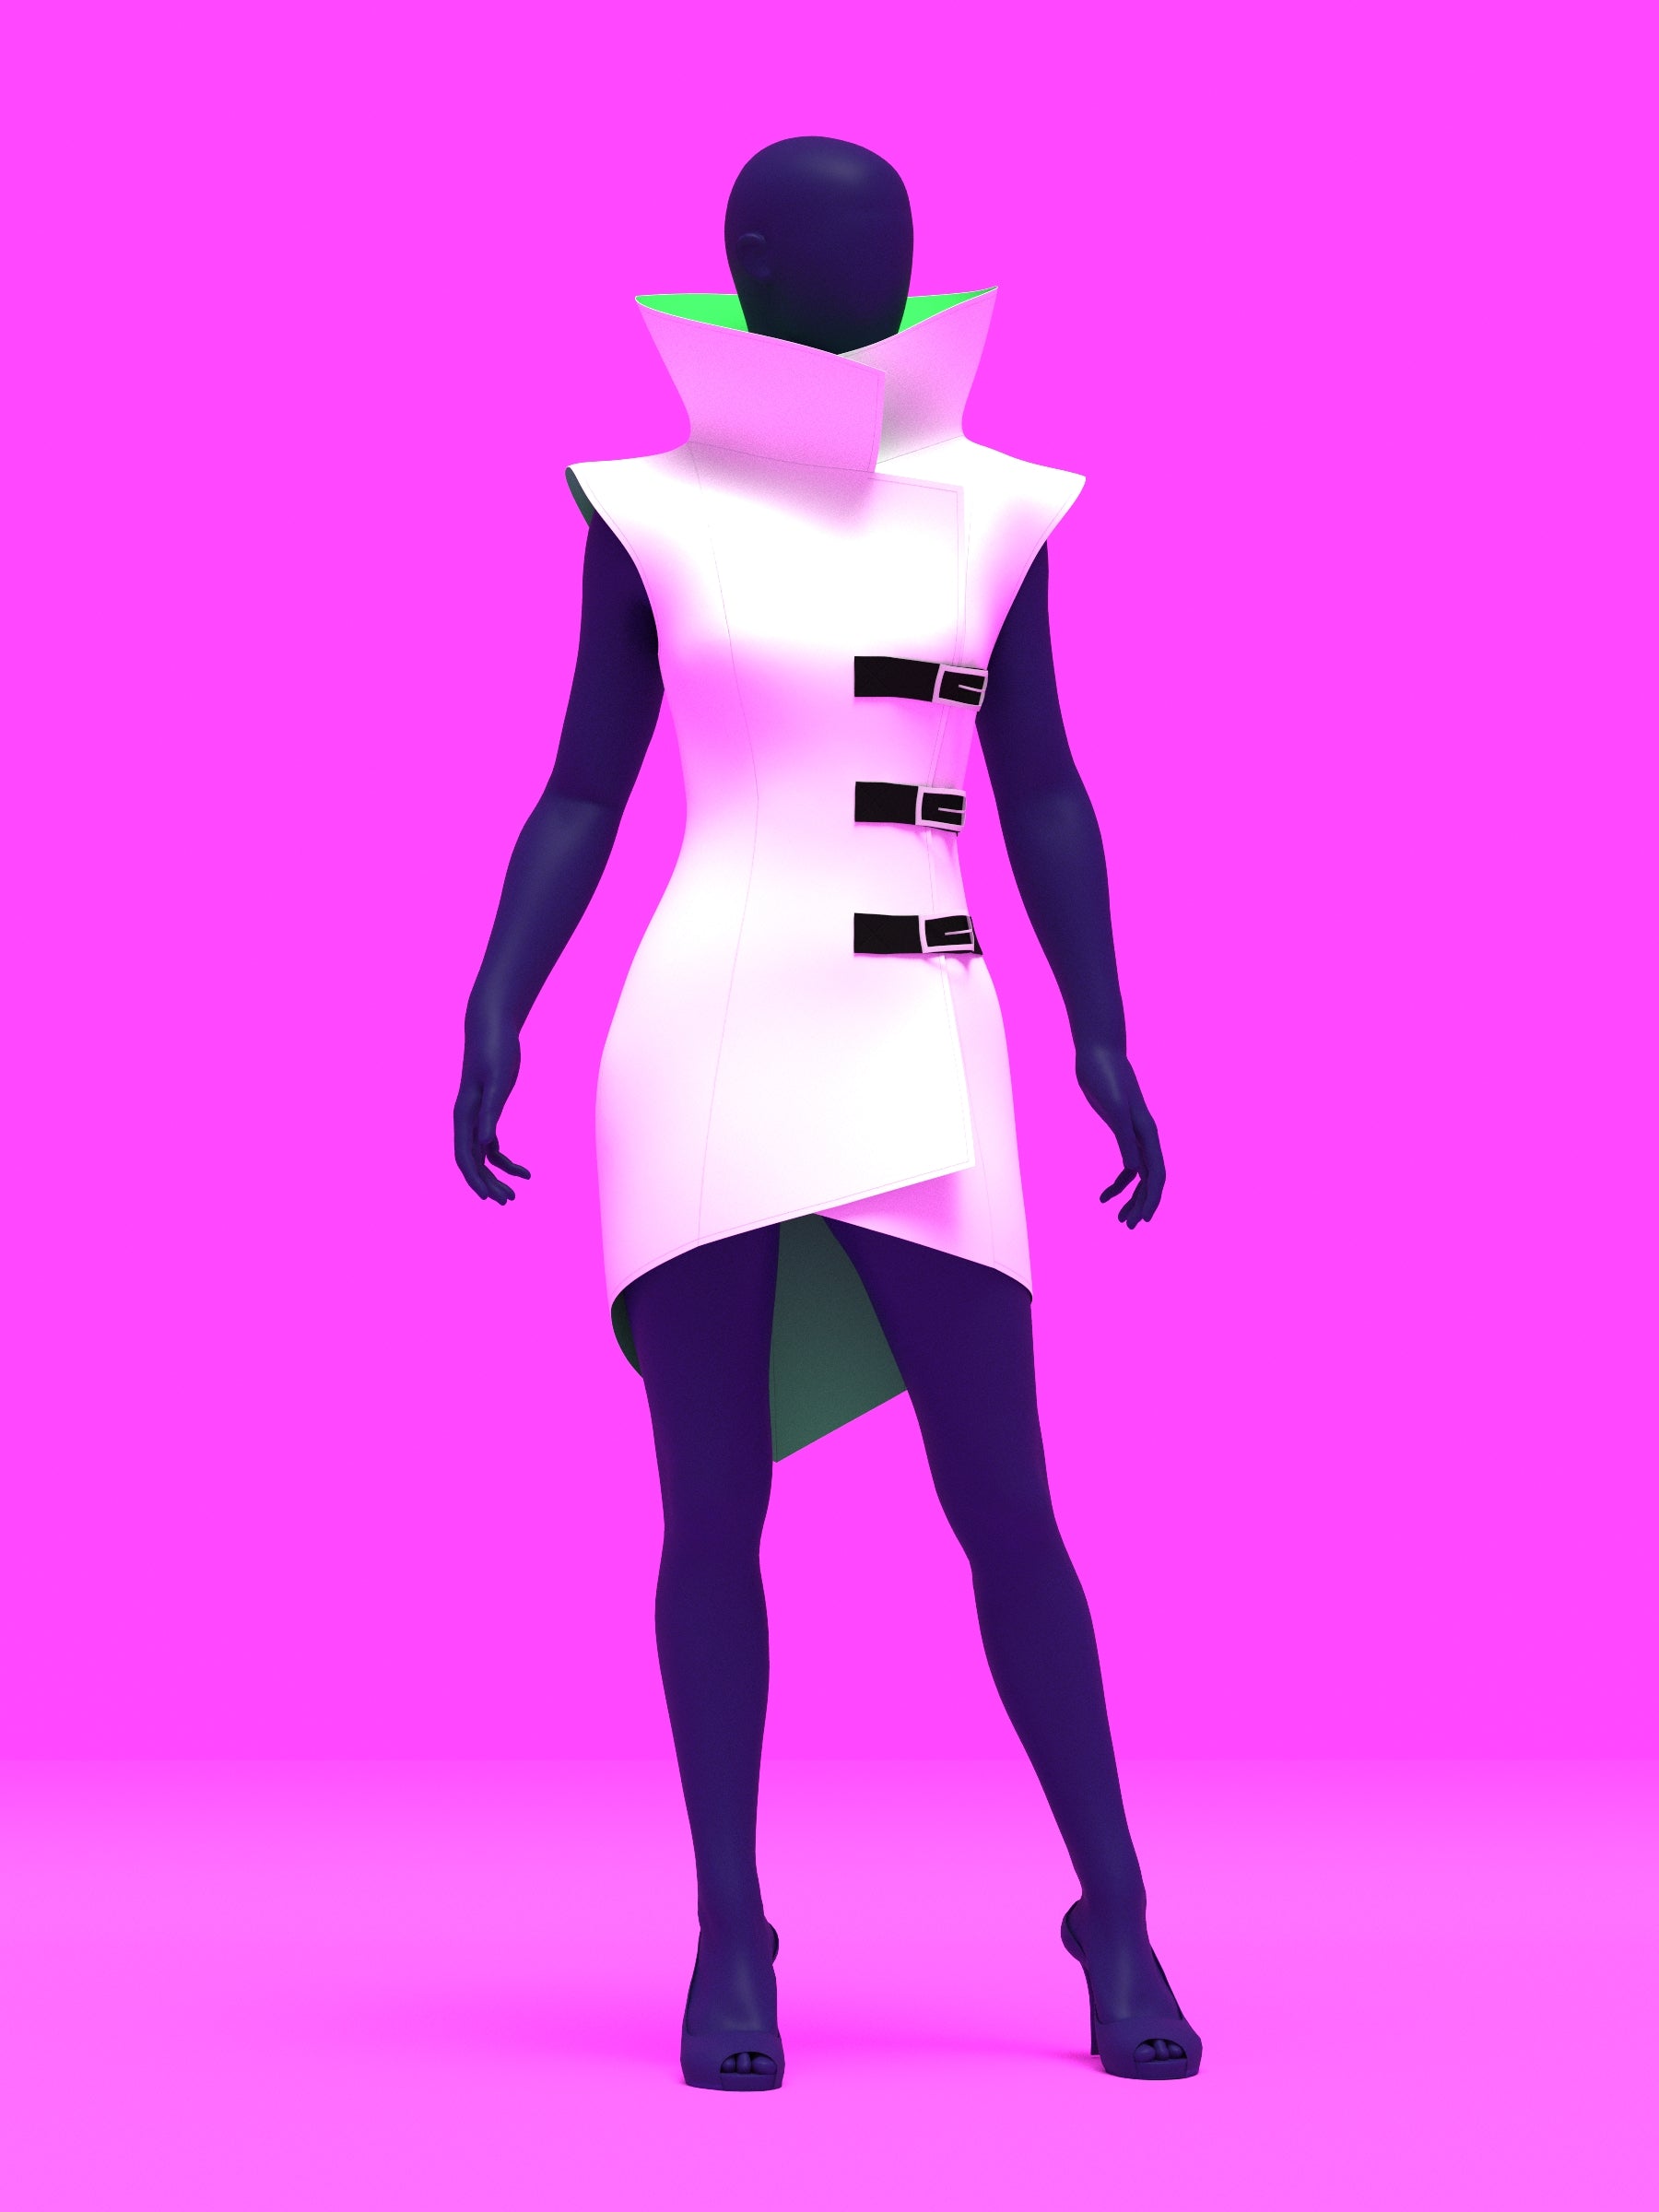
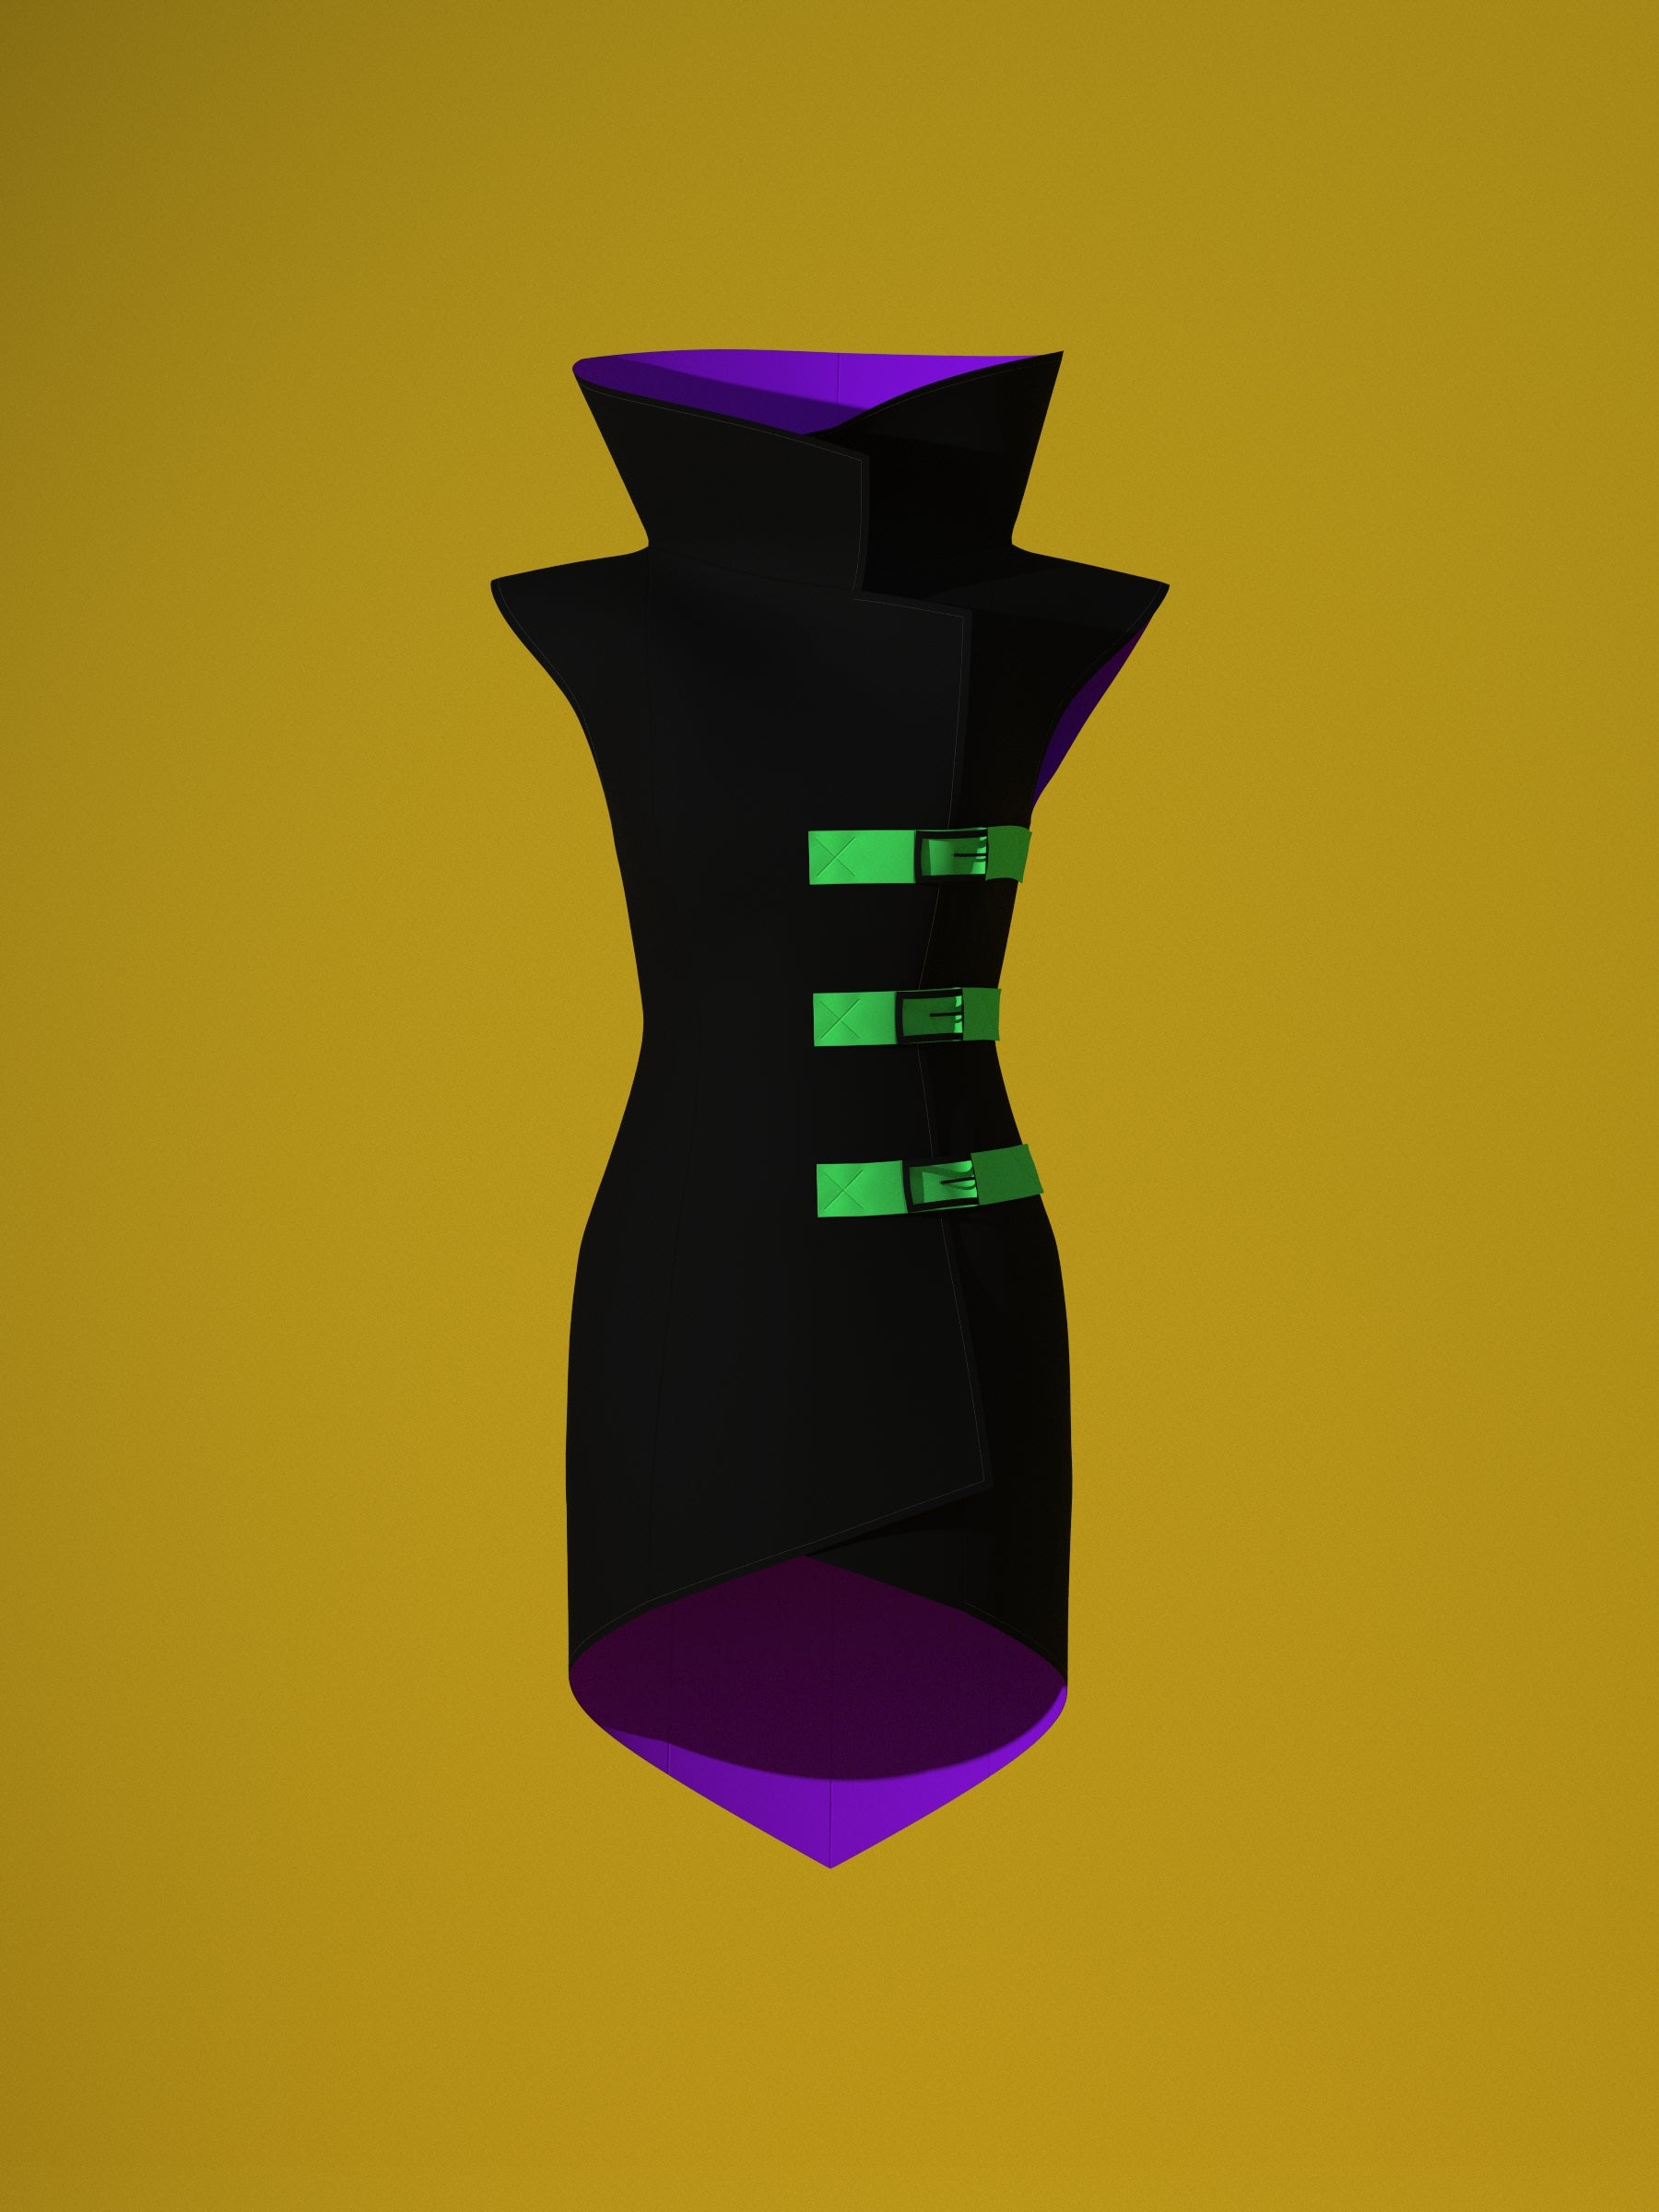
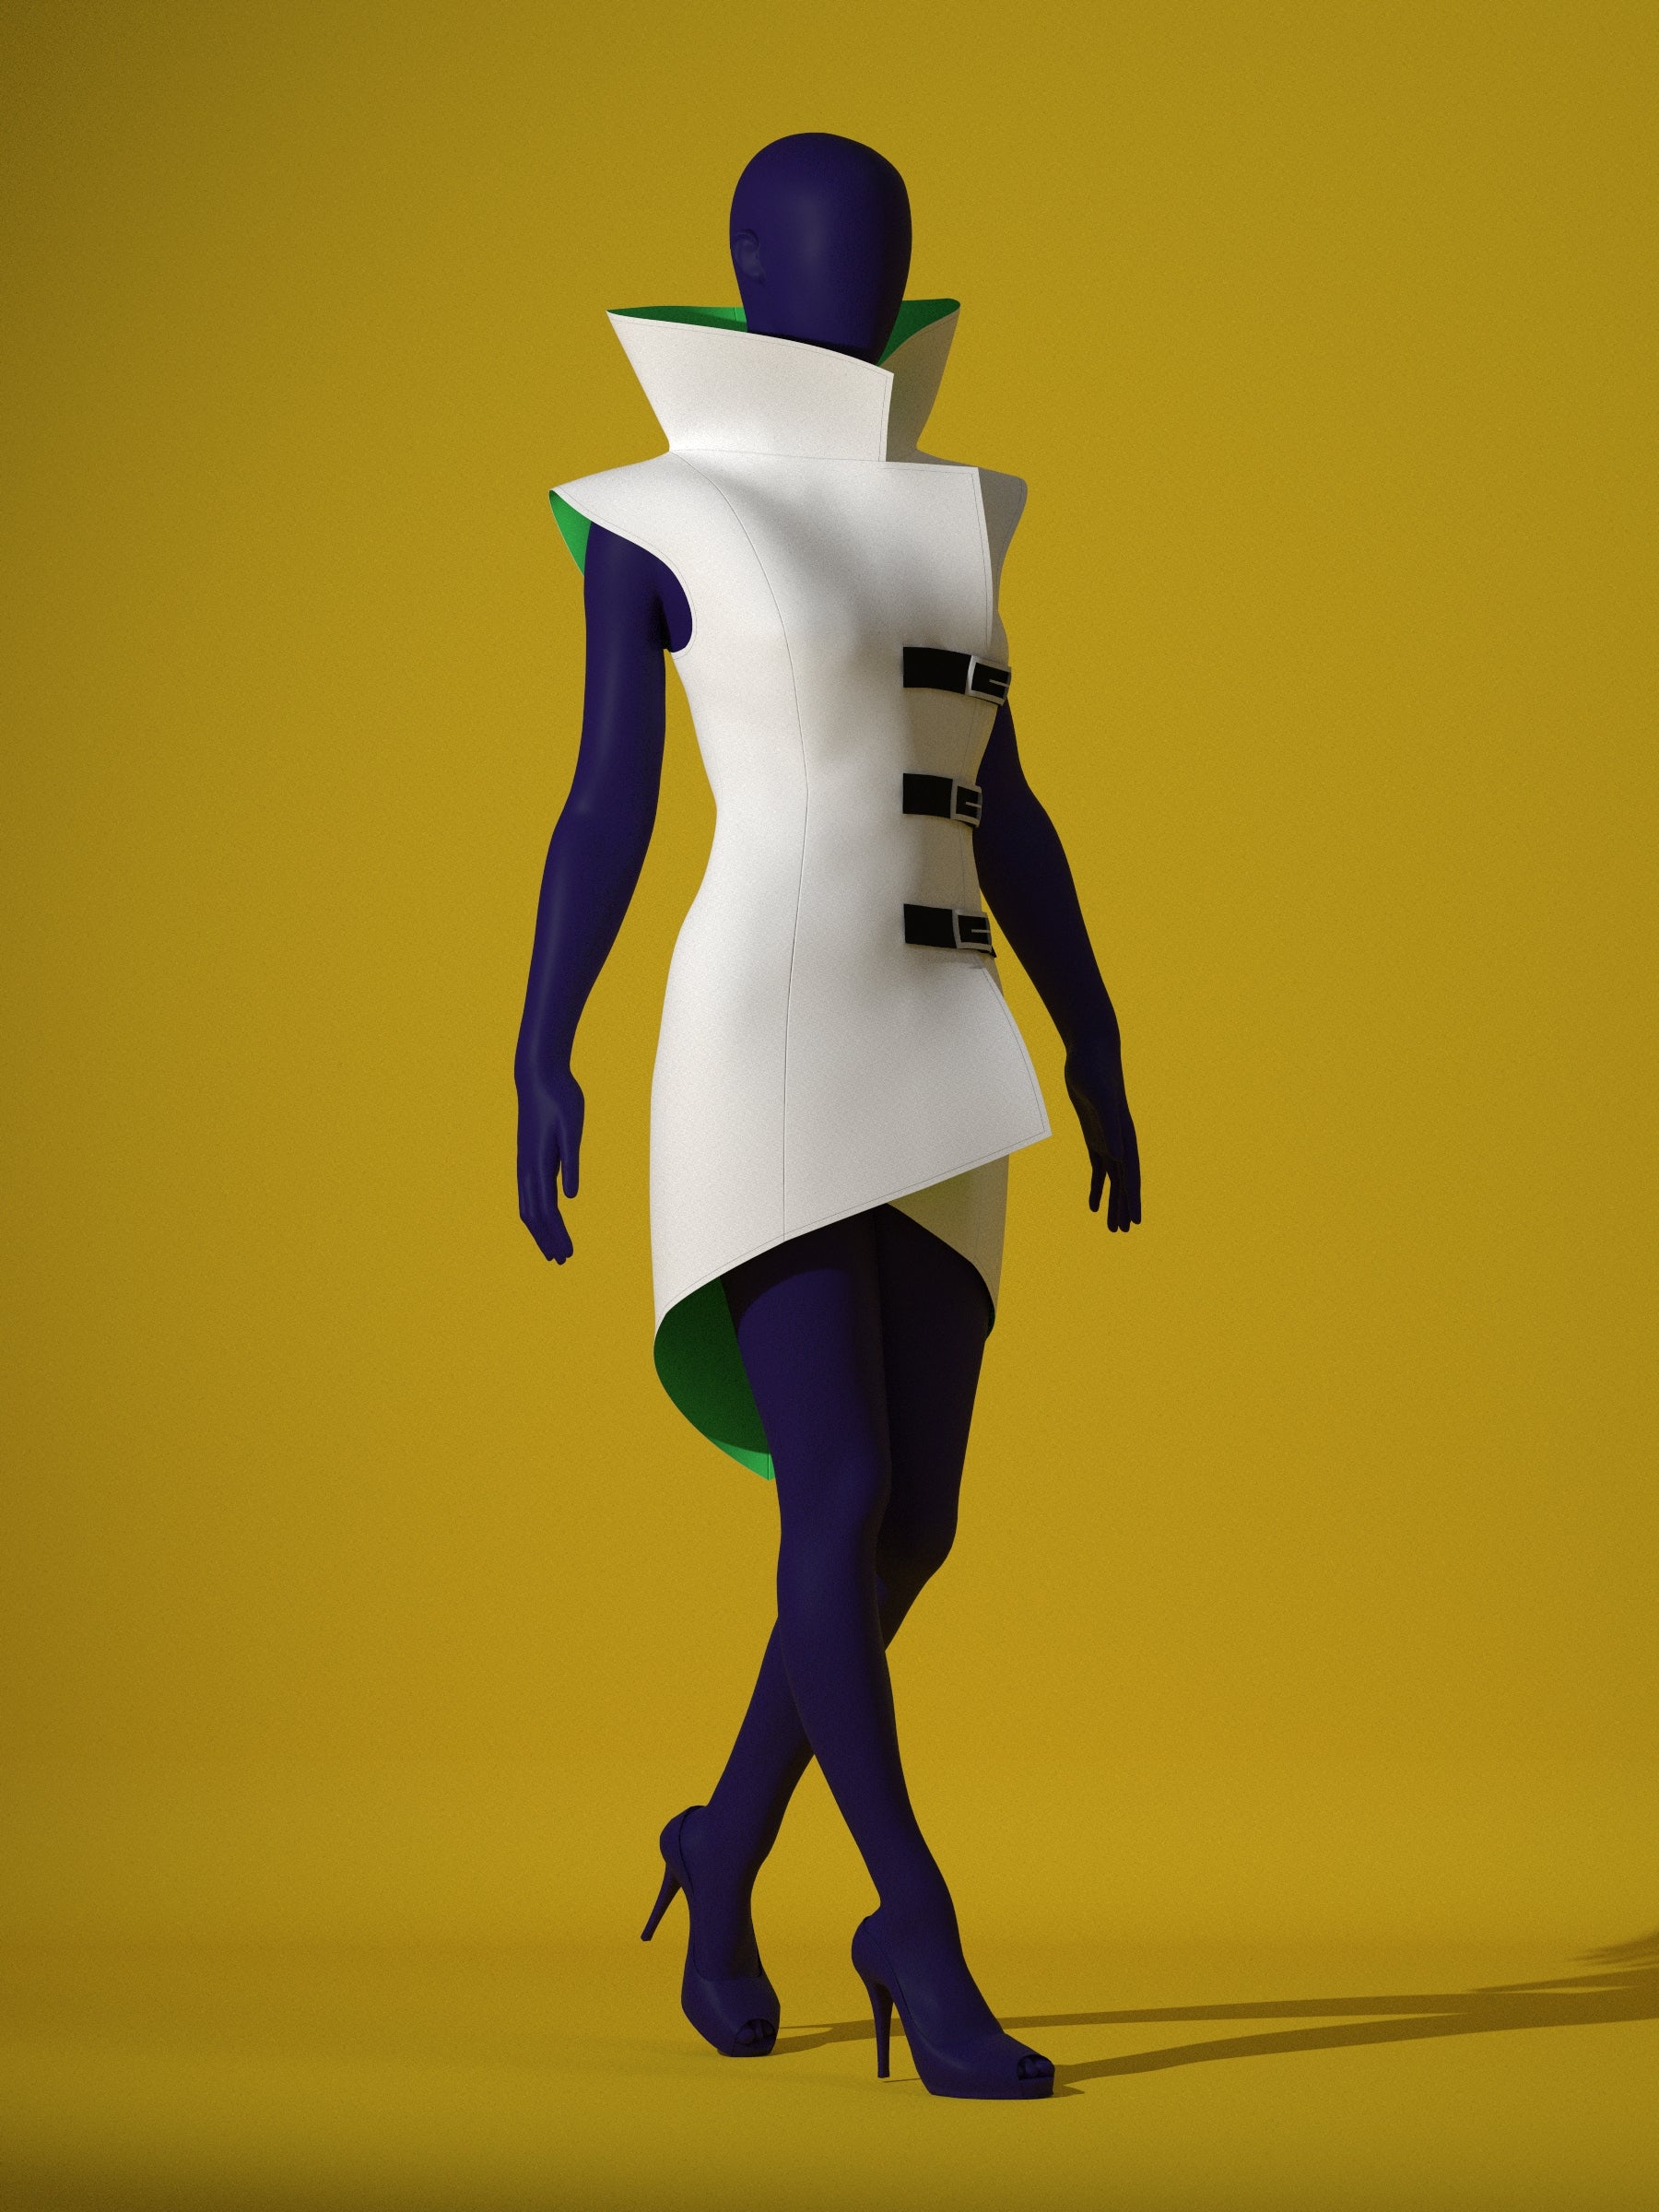
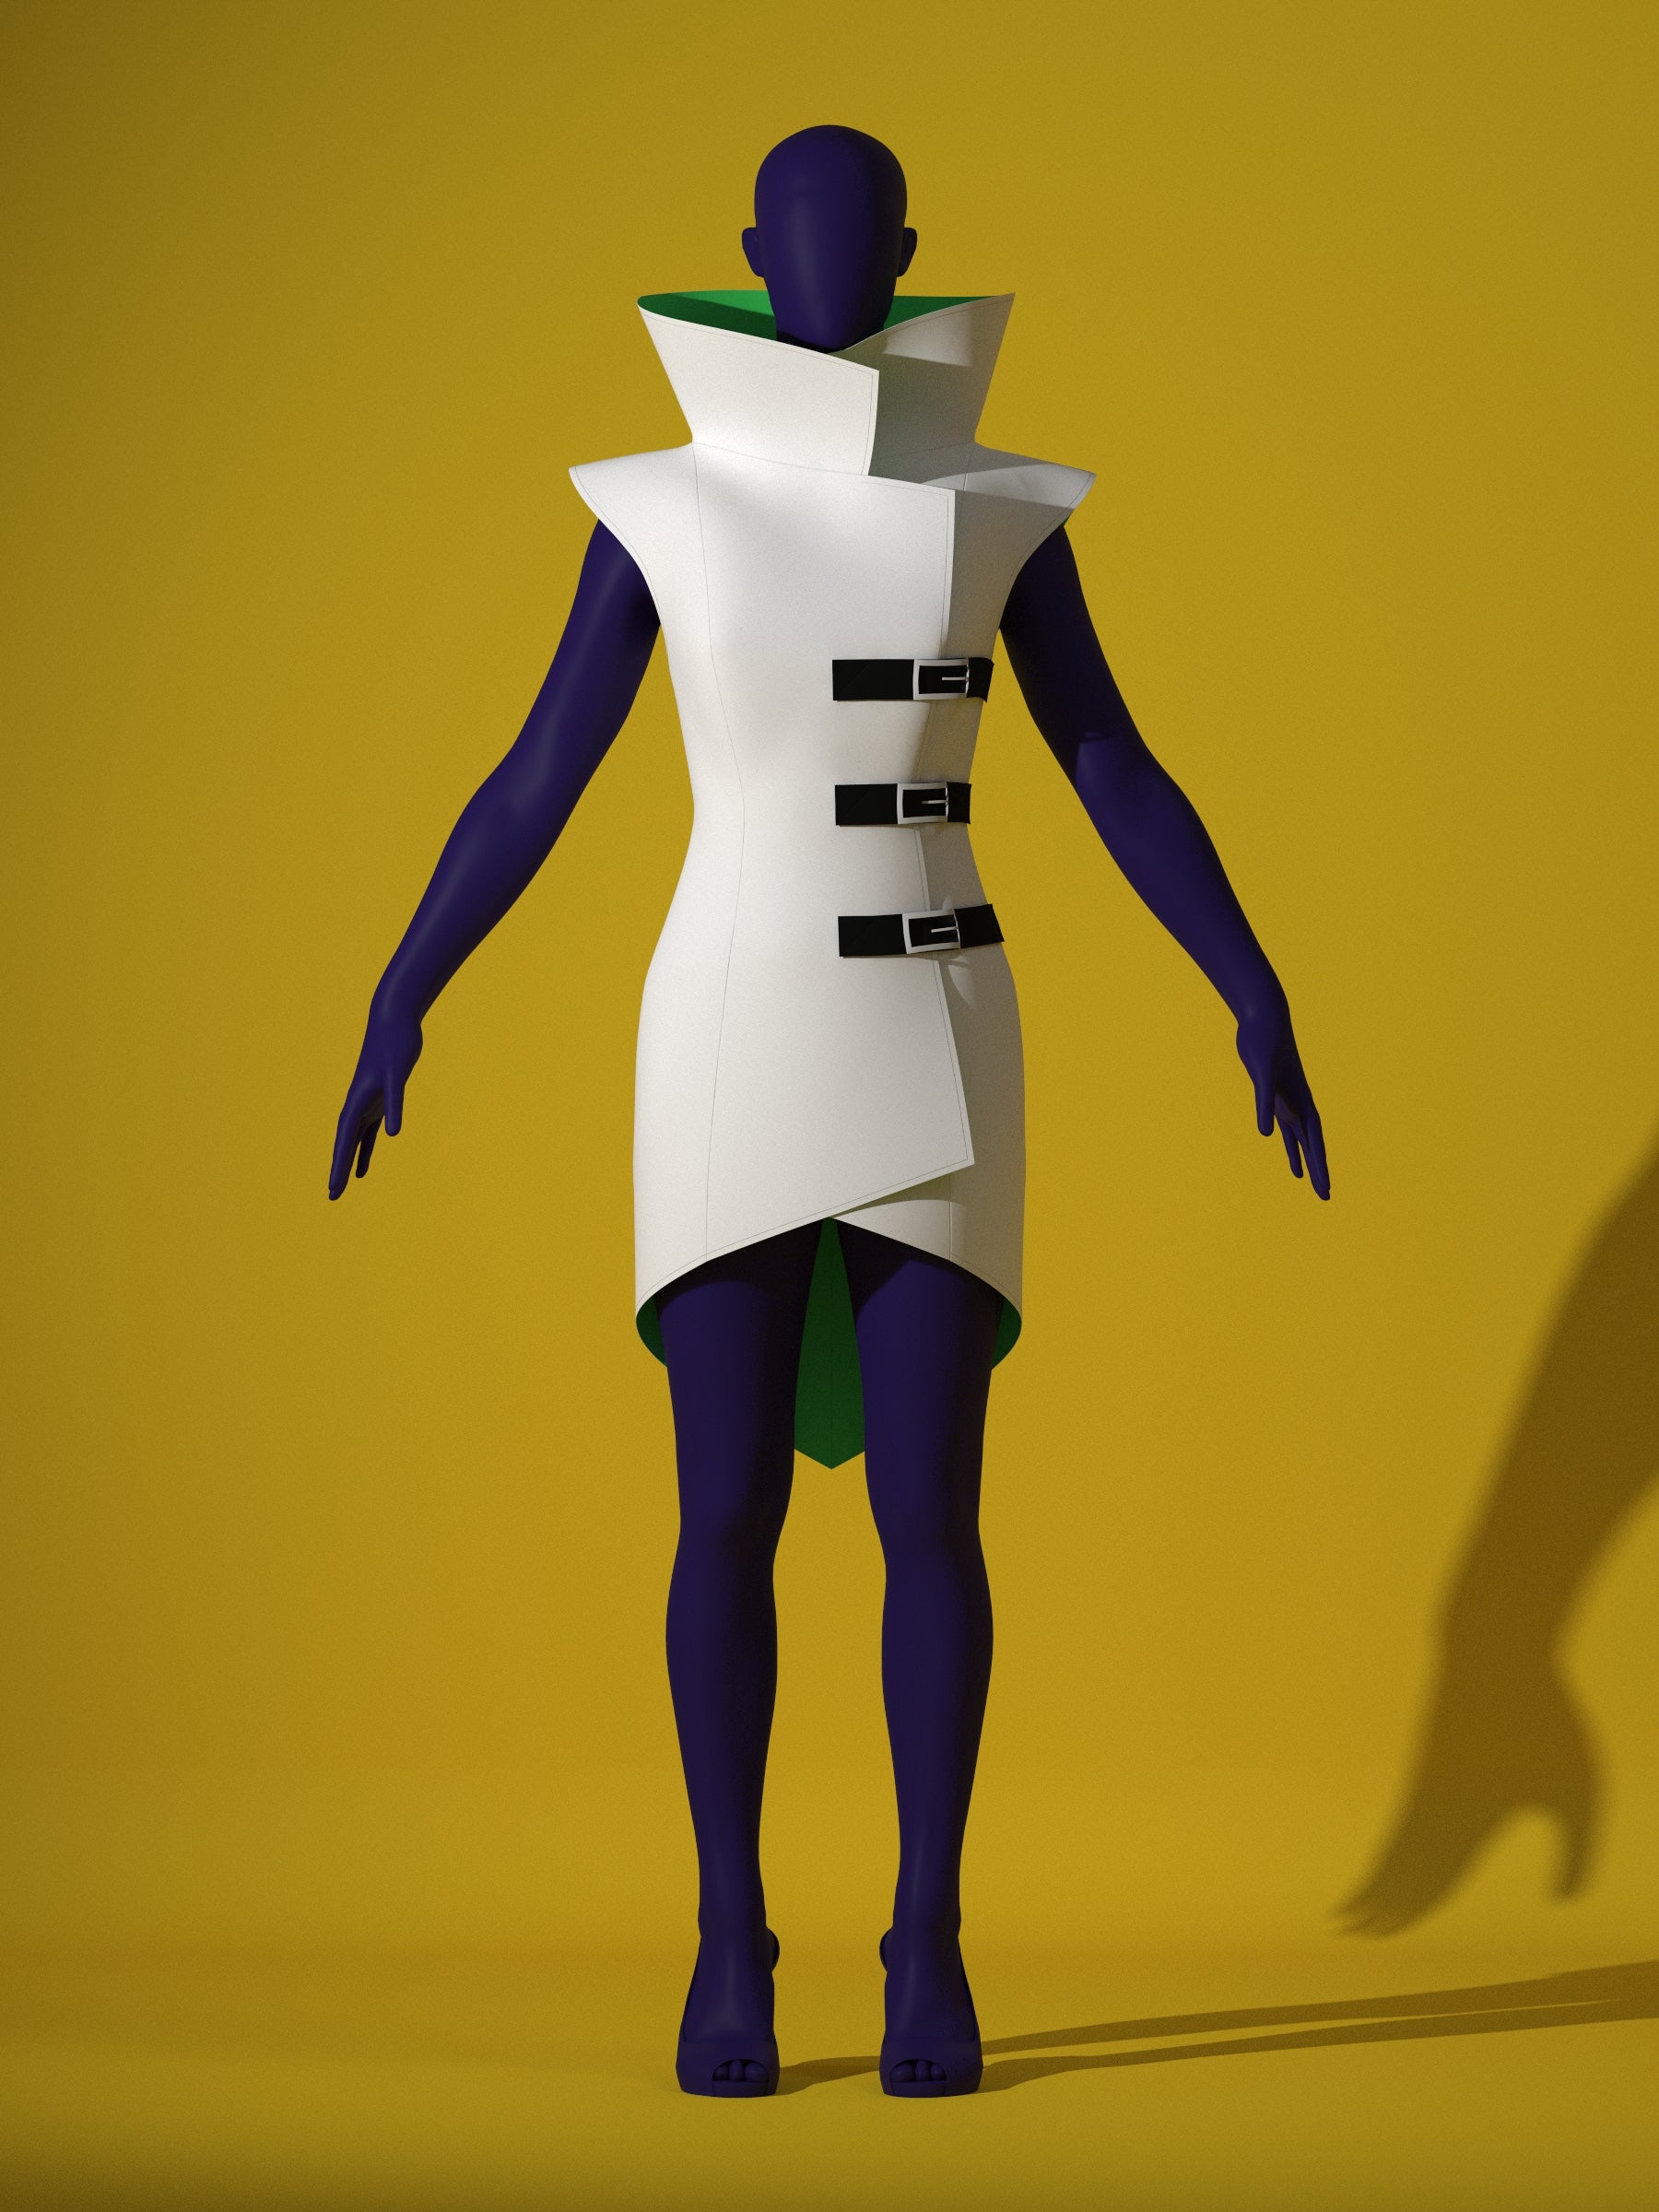
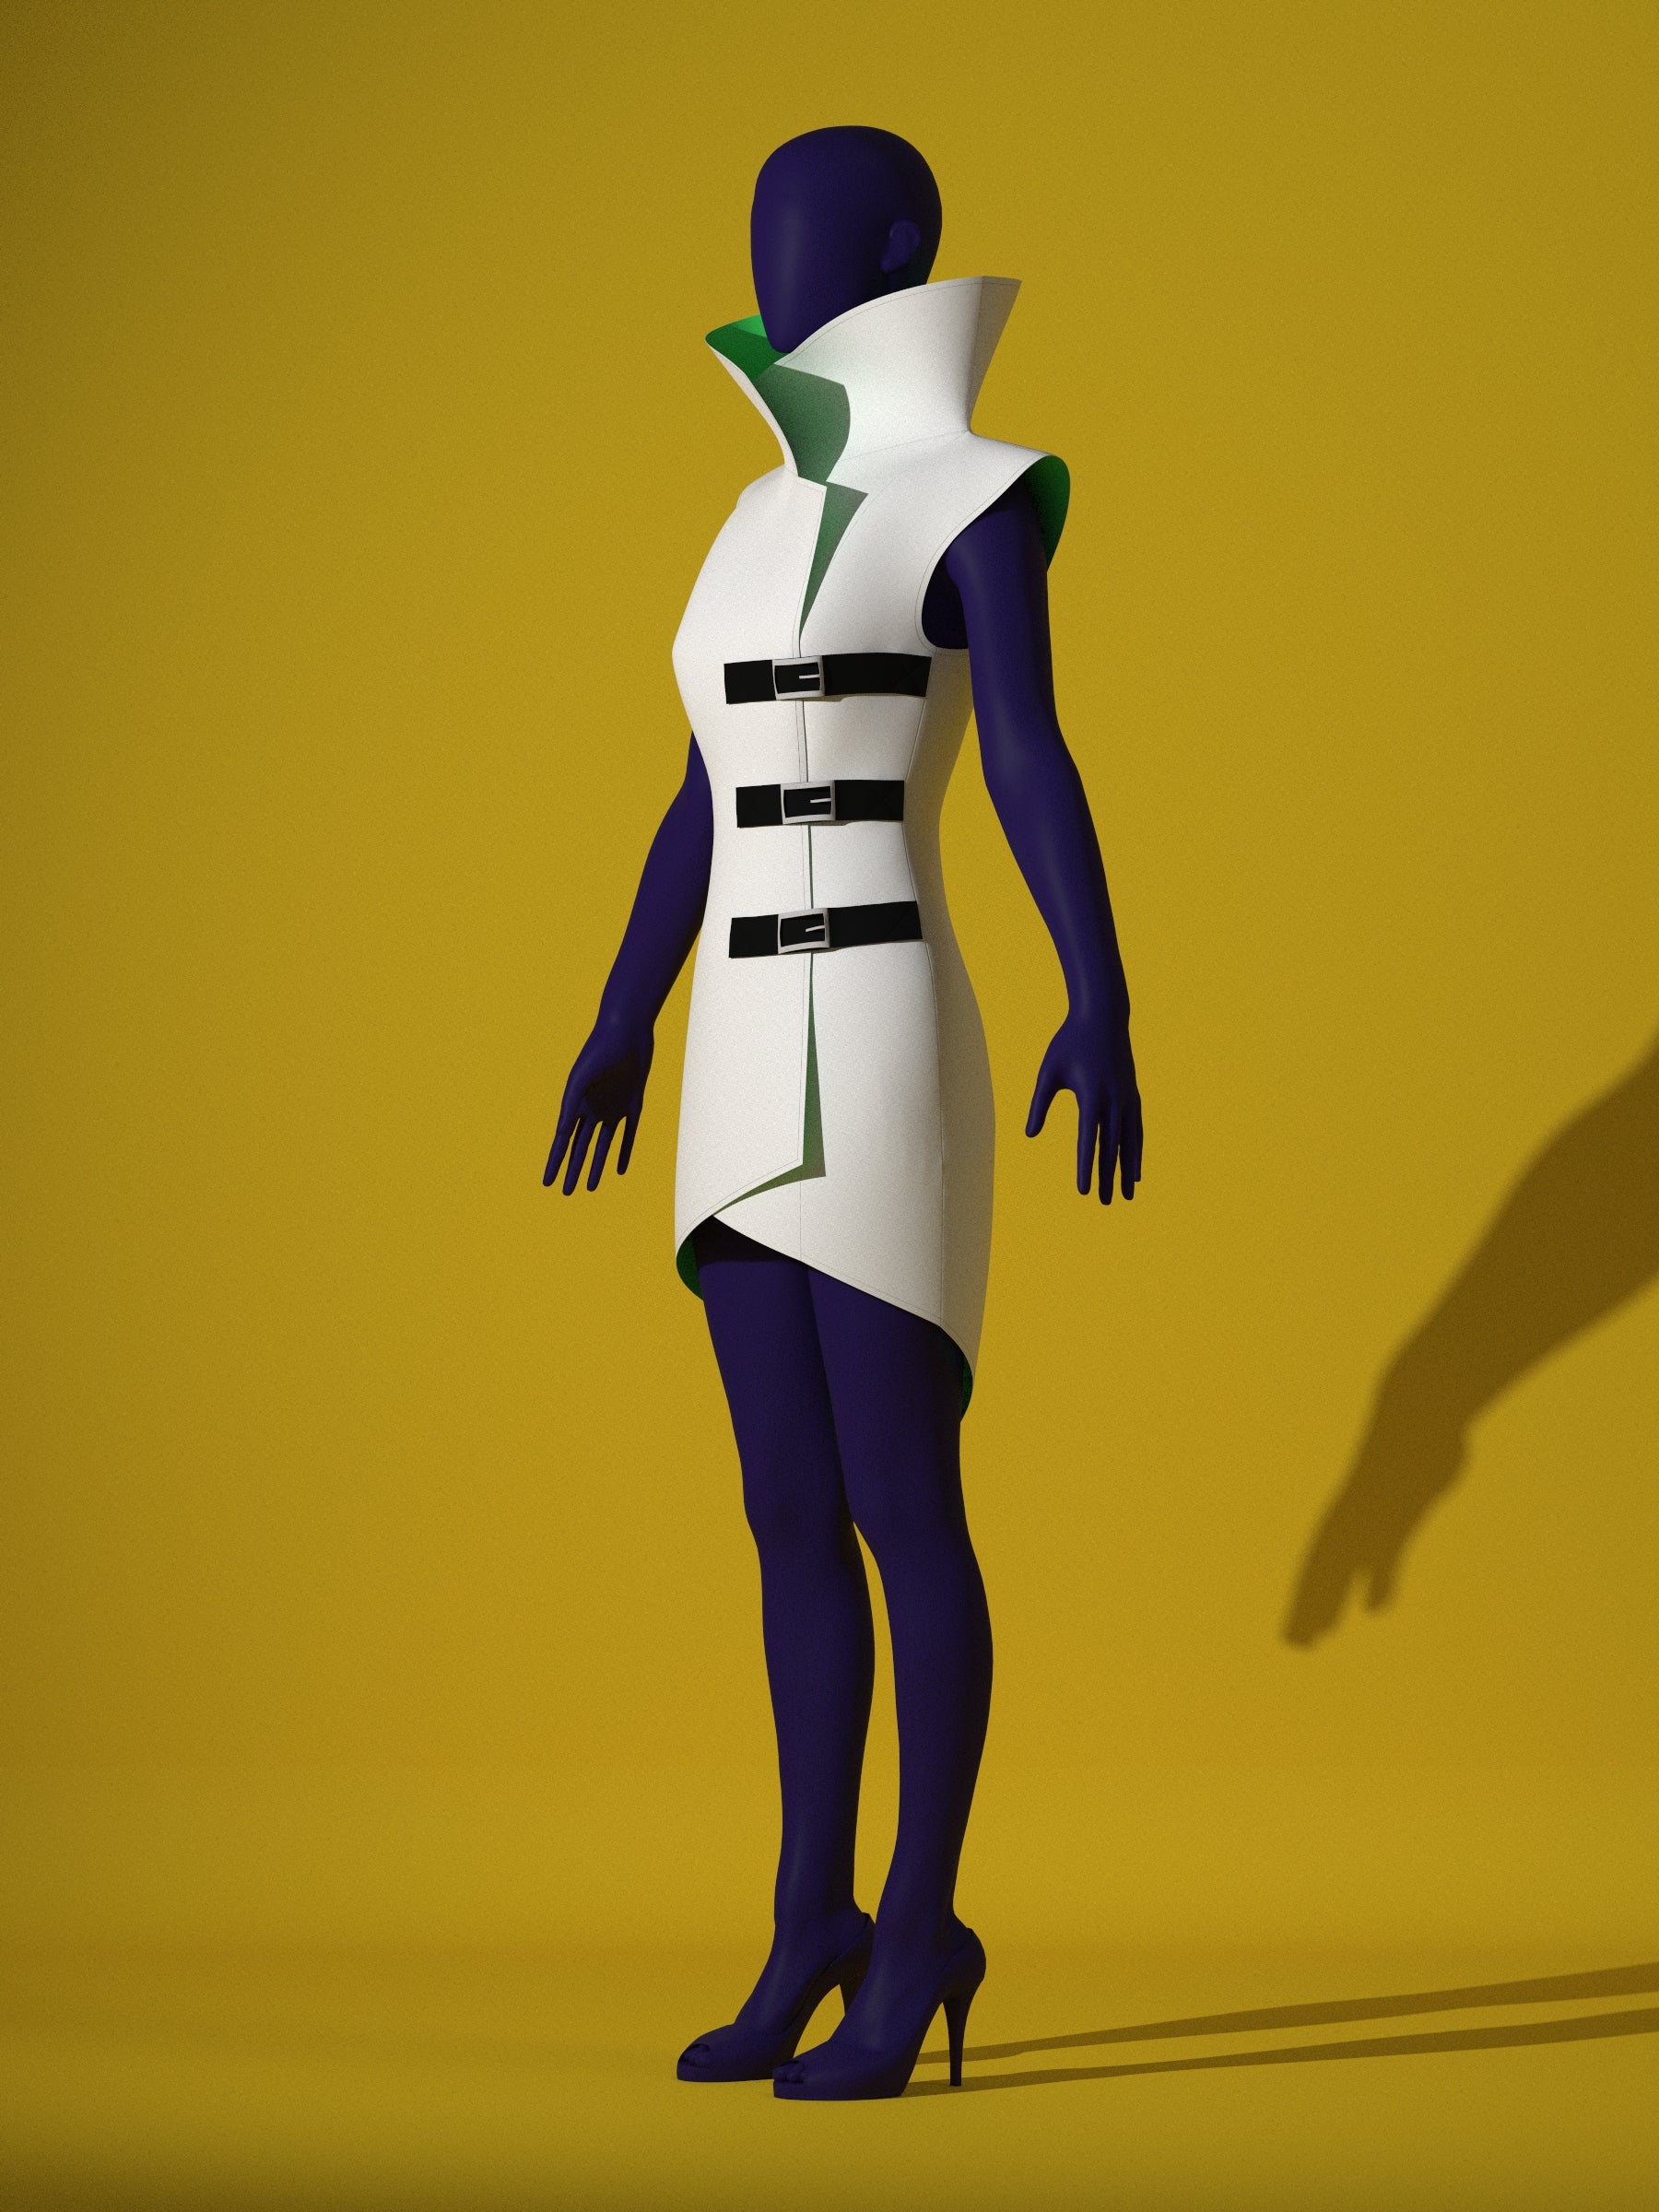
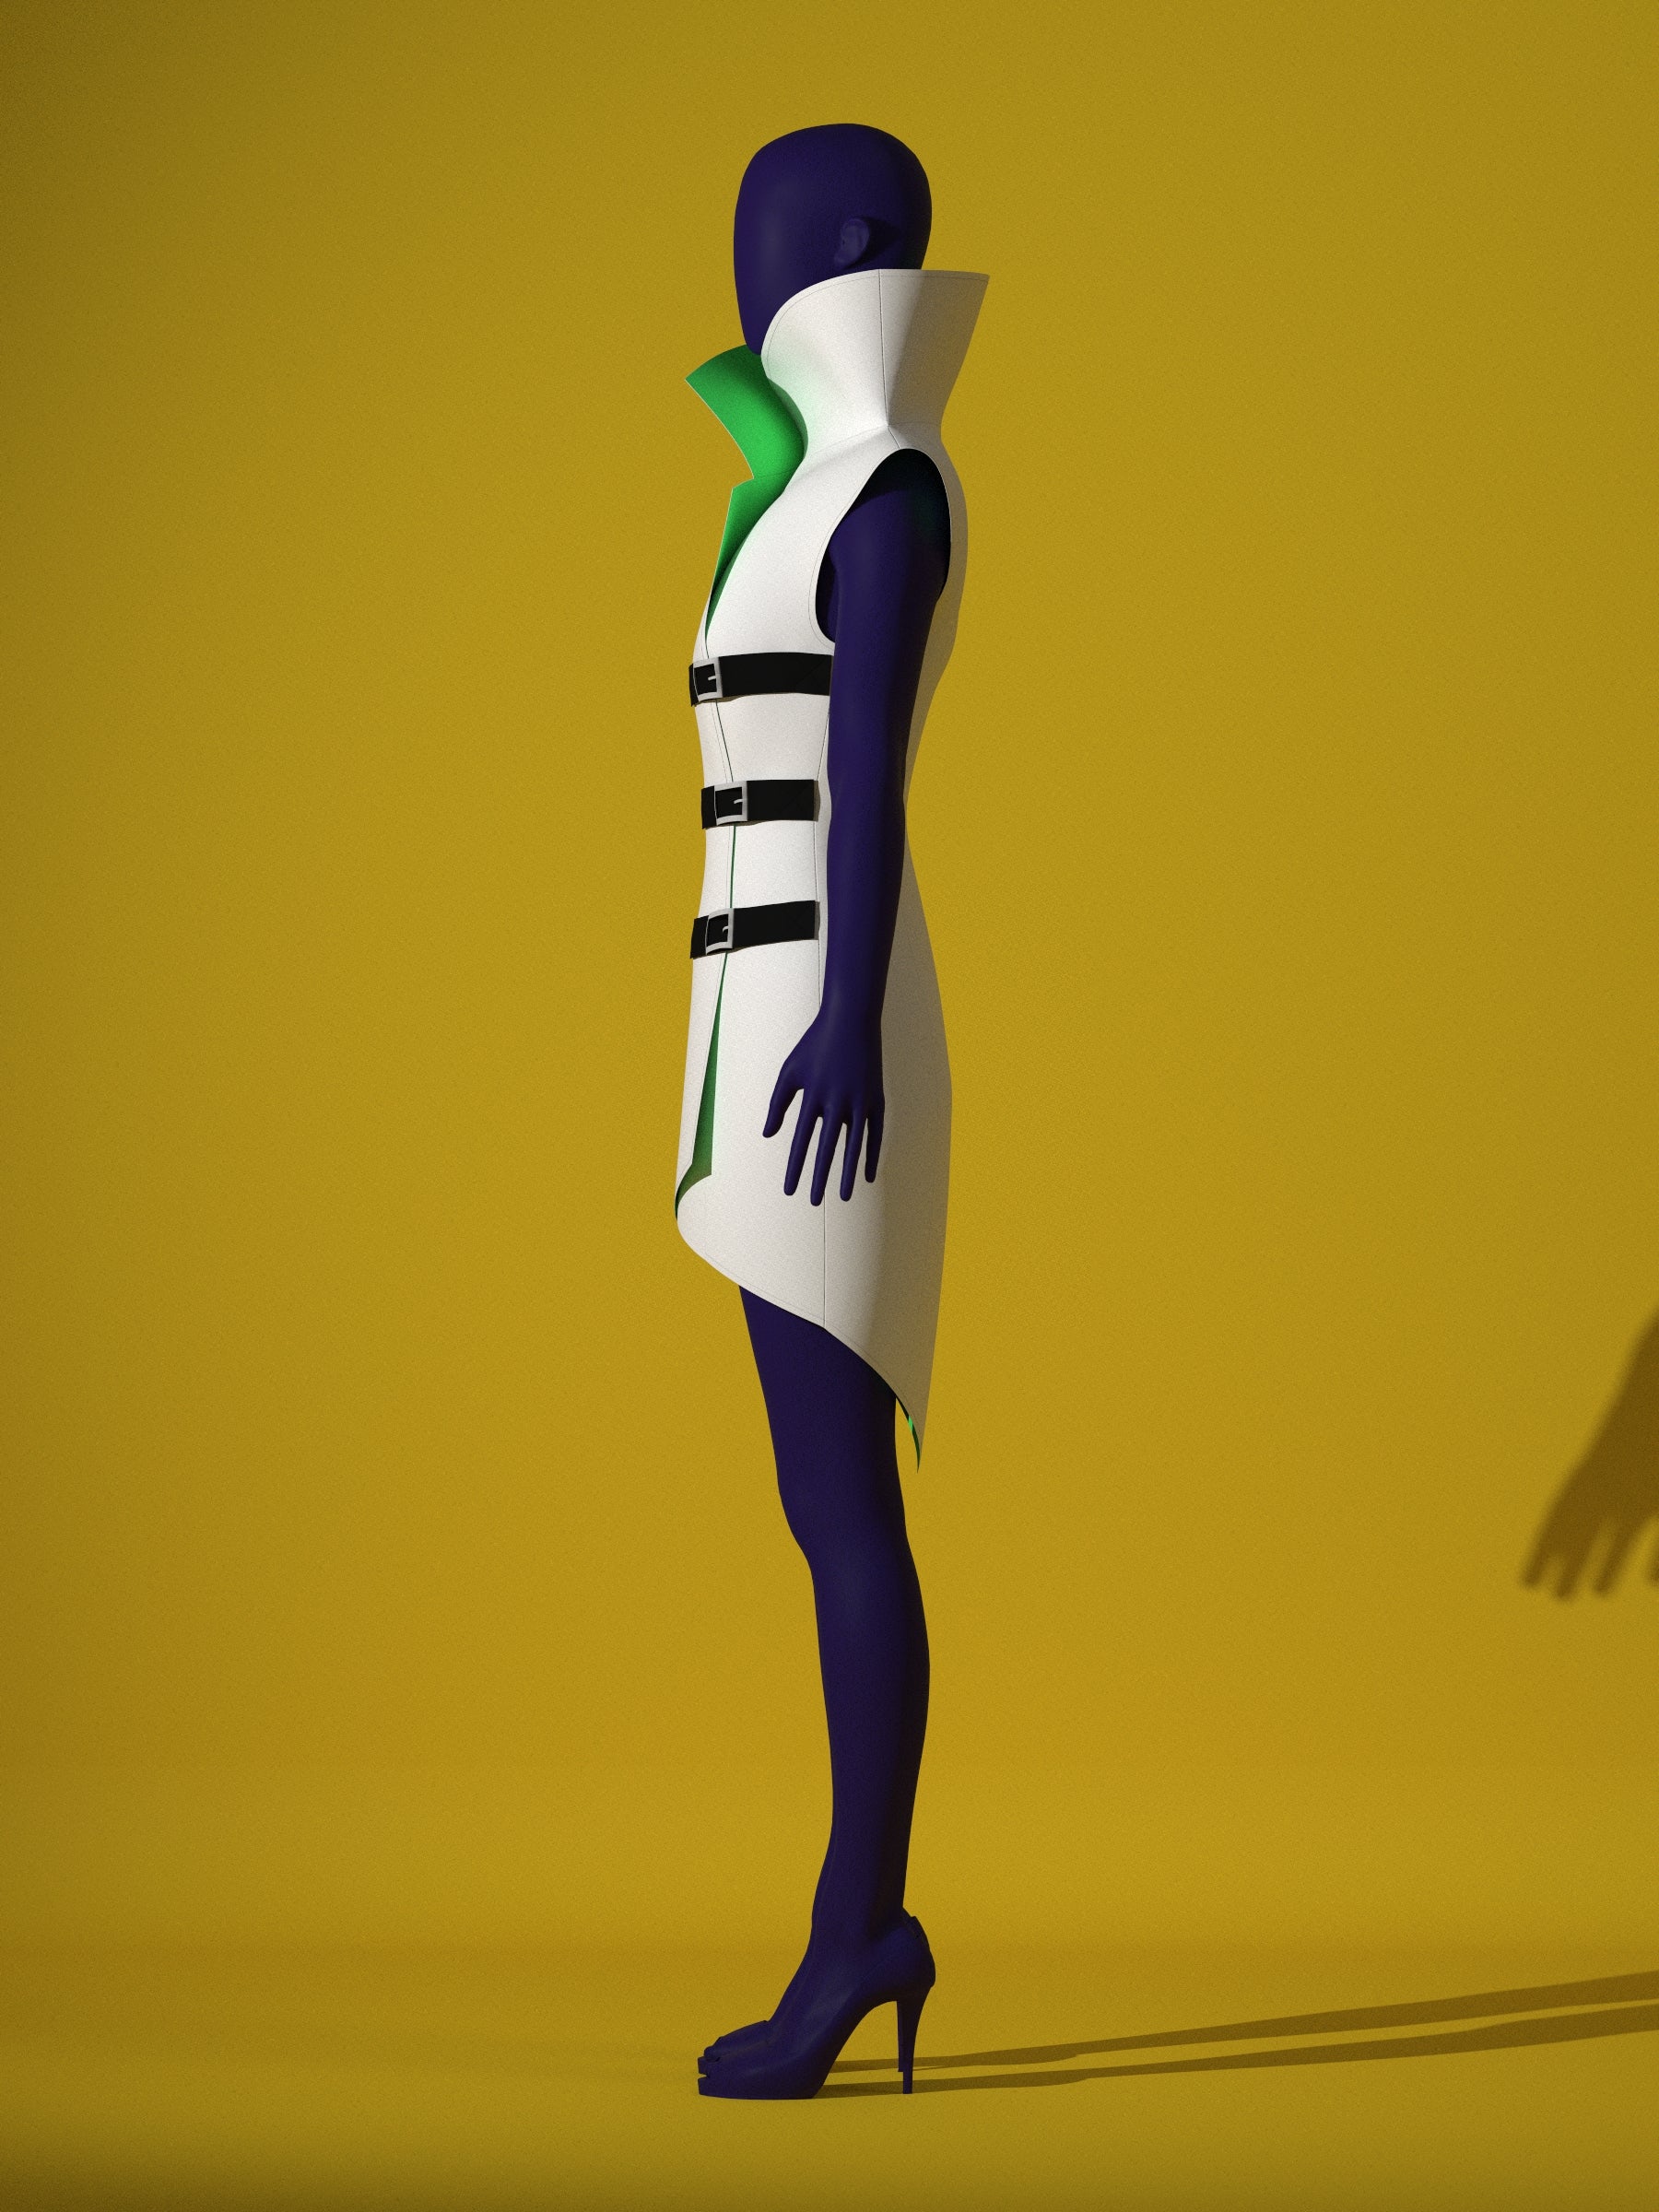
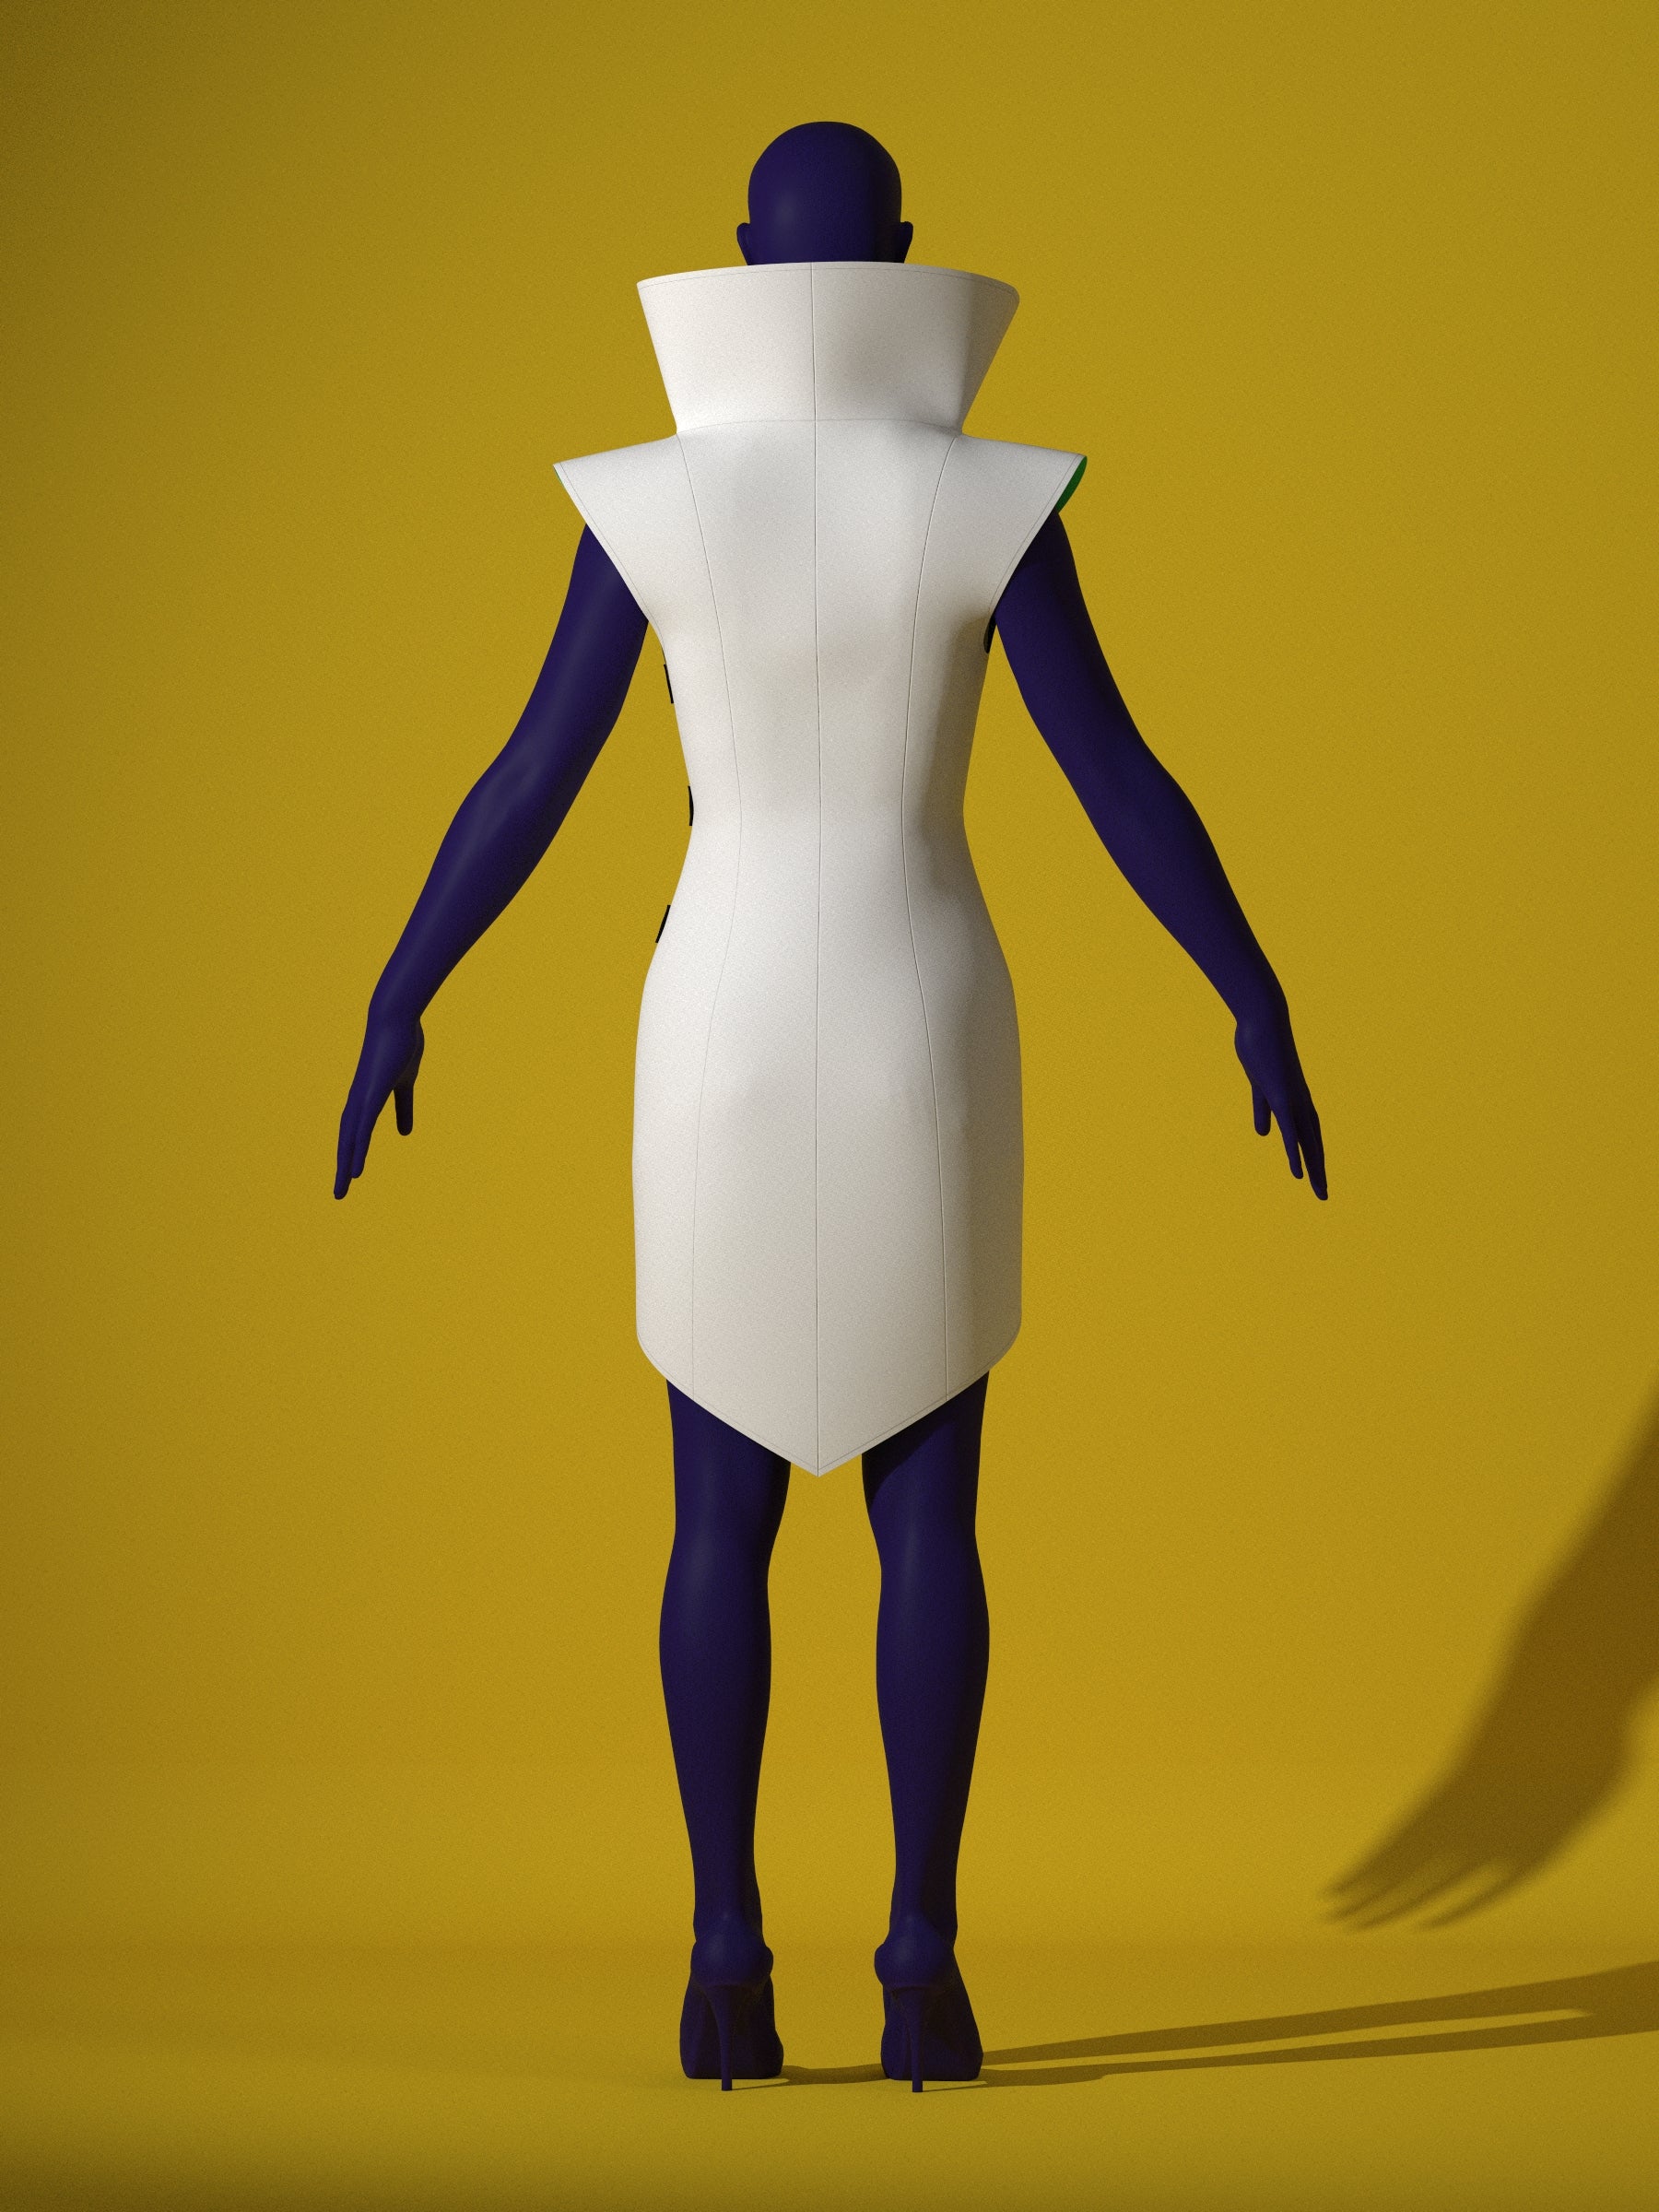
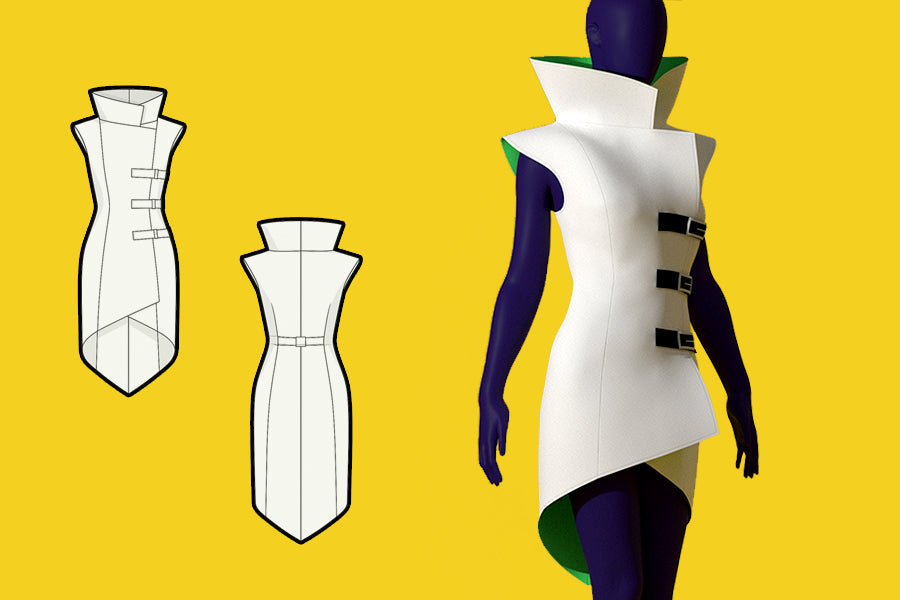
Learn how to sew our Mad Scientist Lab Coat Halloween Costume Sewing Pattern, a fierce and fabulous sewing pattern made for drag queens. This lab wrap coat-inspired garment is tailored to turn heads, with three bold front belt buckles and a dramatic rear buckle that cinches the waist and sculpts your silhouette. Whether you're pulling off a high-octane reveal, gag-worthy runway moment, or slaying the Halloween scene, this coat brings mad science realness with structured flair. Perfect for spooky season, cosplay conventions, or anytime you need to cook up a costume that’s dangerously stylish.
Fabric Yardage
The fabric yardage below is for fabric bolt widths of 54" or more.
| Size | Shell | Lining | Belts | Interfacing |
|---|---|---|---|---|
| XS | 2y | 2y | 0.25y | 1y |
| S | 2y | 2y | 0.25y | 1y |
| M | 2.25y | 2.25y | 0.25y | 1y |
| L | 2.5y | 2.5y | 0.25y | 1.5y |
| XL | 2.5y | 2.5y | 0.25y | 1.5y |
Fabric & Notions
Recommended Fabrics: Non-stretch, medium-weight fabrics like cotton, polyester, faux leather, canvas, twill, or denim.
Notions: 4 x 2" metal buckles, fusible interfacing for collar, shoulders, and front facing.
Sizing Details
Designed for our drag queen sizing, however this pattern can be worn by any gender who fits the size measurements provided.
Drag Queen Sizes
| Sizes | XS | S | M | L | XL | 2X | 3X | 4X | |||
|---|---|---|---|---|---|---|---|---|---|---|---|
| Inches | |||||||||||
| Bust | 35”-37” | 38”-40” | 40”-42” | 44”-46” | 47”-49” | 50”-52” | 53”-55” | 56”-58” | |||
| Waist | 26”-28” | 29”-31” | 32”-34” | 35”-37” | 38”-40” | 41”-43” | 44”-46” | 47”-49” | |||
| Hips | 37”-39” | 40”-42” | 43”-45” | 46”-48” | 49”-51” | 52”-54” | 54”-56” | 58”-60” | |||
| Height | 70" | 70" | 70" | 70" | 70" | 70" | 70" | 70" | |||
| Centimeters | |||||||||||
| Bust | 89-94 | 96-102 | 102-107 | 112-117 | 119-124 | 127-132 | 135-140 | 142-147 | |||
| Waist | 66-71 | 74-79 | 81-86 | 89-94 | 96-102 | 104-109 | 112-117 | 119-124 | |||
| Hips | 94-99 | 102-107 | 109-114 | 117-122 | 124-130 | 132-137 | 137-142 | 147-152 | |||
| Height | 178 | 178 | 178 | 178 | 178 | 178 | 178 | 178 | |||
Our unique drag sizes are based on U.S. Standard Men’s and Women’s Plus sizes, designed to fit male bodies with padding with an average height of 70 inches. They feature longer torsos, wider shoulders, arms, and legs, and a shorter crotch inseam compared to standard women’s sizing, making them inclusive for anyone matching the provided measurements.
Sewing Instructions
Color Guide

Pattern Pieces
Once you have printed and assembled your paper pattern, you should have the following pieces: 1 front piece, 1 front side piece, 1 front collar piece, 1 back piece, 1 back side piece, 1 back collar piece, 1 right belt piece, and 1 left belt piece.
For interfacing, you will also have: 1 front collar interfacing, 1 back collar interfacing, 1 front interfacing, and 1 shoulder interfacing.
Cutting Your Fabric
Use the paper pattern pieces to cut the following from your fabric: 2 mirrored front pieces, 2 mirrored front side pieces, 2 mirrored back side pieces, 2 mirrored back pieces, 2 mirrored front collar pieces, and 2 mirrored back collar pieces.
Repeat this process for both the shell fabric and the lining fabric.
For the belts, cut 4 right belt pieces and 4 left belt pieces. This will give you four belts in total — three for the front and one for the back.
For the interfacing, cut 2 mirrored front interfacing pieces, 4 mirrored shoulder interfacing pieces, 2 mirrored front collar pieces, and 2 mirrored back collar pieces.

Step 1: Interfacing
Gather the lining fabric pieces and fuse the interfacing to their designated areas. Remember, the interfacing does not include seam allowance.
For example, attach the sticky side of the front collar interfacing to the wrong side of the front collar fabric, then press the layers together with an iron. Use a scrap piece of muslin to prevent glue from transferring to your iron. Repeat this process for the back collar interfacing.
The shoulder interfacing should only be applied to the shoulder cap area of the front and back side pieces.
The front interfacing should be placed along the ourt front edge where the belts will later be attached.

Step 2: Sewing Shell
Gather the two shell back pieces and stack them together with right sides facing each other.
Sew them together with a straight stitch along the center back edge.
Once sewn, either press the seams open and flat on the wrong side of the fabric, or use a serger to finish the raw edges.

Using the same method as before, attach the back side pieces to the center back assembly.

Next, sew the front pieces to the front side pieces with right sides facing each other. Keep the two front assemblies separate — you should have one left front assembly and one right front assembly. These will overlap each other later.

Once you have completed the back assembly and the two front assemblies for the shell, sew them together with right sides facing each other along the side seams and the shoulder seams.

Step 3: Collar
Gather the two back collar shell pieces, place them right sides facing each other, and sew them together along the center back edge. The center back edge will have one notch. Once sewn, spread the seams open and press them flat.

Next, gather the front collar pieces and sew them to the back collar pieces along the side seams with right sides facing each other. Repeat this for both front collar pieces.

Once the shell collar is assembled, attach it to the neckline of the shell coat, upside down with the right sides facing each other. Match the front notches and sew all the way around the neckline.

Step 4: Shell and Lining
Once the shell of your coat is complete with the collar, repeat the same steps to create the lining layer.

After both the shell and lining are assembled, stack them together with right sides facing each other. Sew along the collar edge, the front opening edges, and the bottom edge of the coat.
Leave an unsewn gap at the bottom edge so the garment can be turned right side out.

After sewing, trim any excess seam allowances to allow for sharp corners, then flip the garment right side out and press the edges flat.
Fold the seam allowance of the unsewn gap inward at the bottom hem and the armhole areas, and topstitch those gaps closed.
Once finished, edge stitch all around the coat — including the collar, the front opening, the bottom edge, and the armholes — so the edges lay neatly flat.

Step 5: Belt
Gather the right belt and left belt pieces. Each belt piece will be sewn in the same way. Take one piece and fold it horizontally in half with right sides facing each other, then sew the ends closed.
Once the ends are sewn, flip the belt right side out. Tuck in the seam allowance along the open edge, folding it inward. Use clips or pins to hold the folded layers in place, then topstitch all around the belt to secure the fold and seam allowance.
Repeat this process for all the left and right belt pieces.

Next, use your paper pattern guide to mark or puncture holes in the right belt pieces. For the left belt pieces, puncture 1 hole for attaching the buckle.
Assemble the belt loop piece by folding it inward, sewing it together, topstitching it, and then sewing the ends together to create a loop.

Sew the belt loop between the buckle fold to lock it in place and keep it from moving. Once the buckle and belt loop are attached, position the belts on the coat: across the front bust, waist, and high hip areas, adjusting as needed for your body. Add one more belt at the center back.
Your Mad Scientist Halloween Drag Lab Coat is now complete.

Get the Pattern